Quick Start
Check out these Quick Start guides to get started with QStash in your application.Next.js
Build a Next application that uses QStash to start a long-running job on your platform
Python
Build a Python application that uses QStash to schedule a daily job that clean up a database
Send your first message
PrerequisiteYou need an Upstash account before publishing messages, create one
here.
Public API
Make sure you have a publicly available HTTP API that you want to send your messages to. If you don’t, you can use something like requestcatcher.com, webhook.site or webhook-test.com to try it out. For example, you can use this URL to test your messages: https://firstqstashmessage.requestcatcher.comGet your token
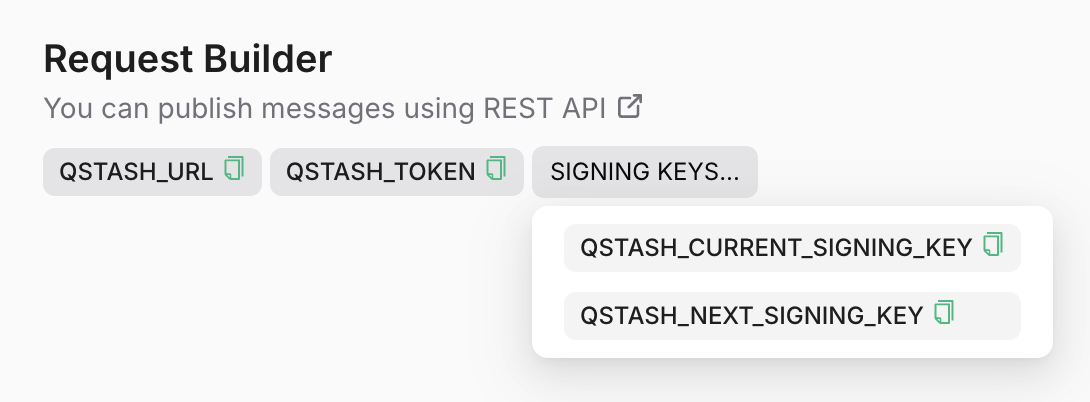
Go to the Upstash Console and copy theQSTASH_TOKEN.
Publish a message
A message can be any shape or form: json, xml, binary, anything, that can be transmitted in the http request body. We do not impose any restrictions other than a size limit of 1 MB (which can be customized at your request). In addition to the request body itself, you can also send HTTP headers. Learn more about this in the message publishing section.Check Response
You should receive a response with a unique message ID.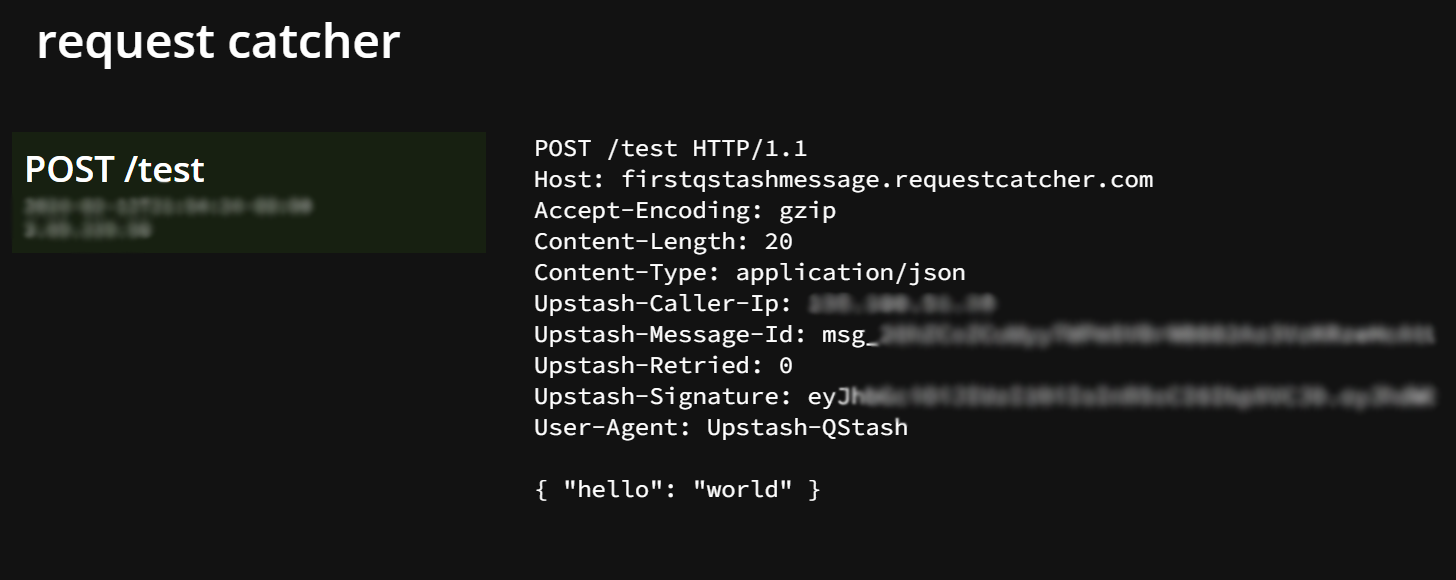
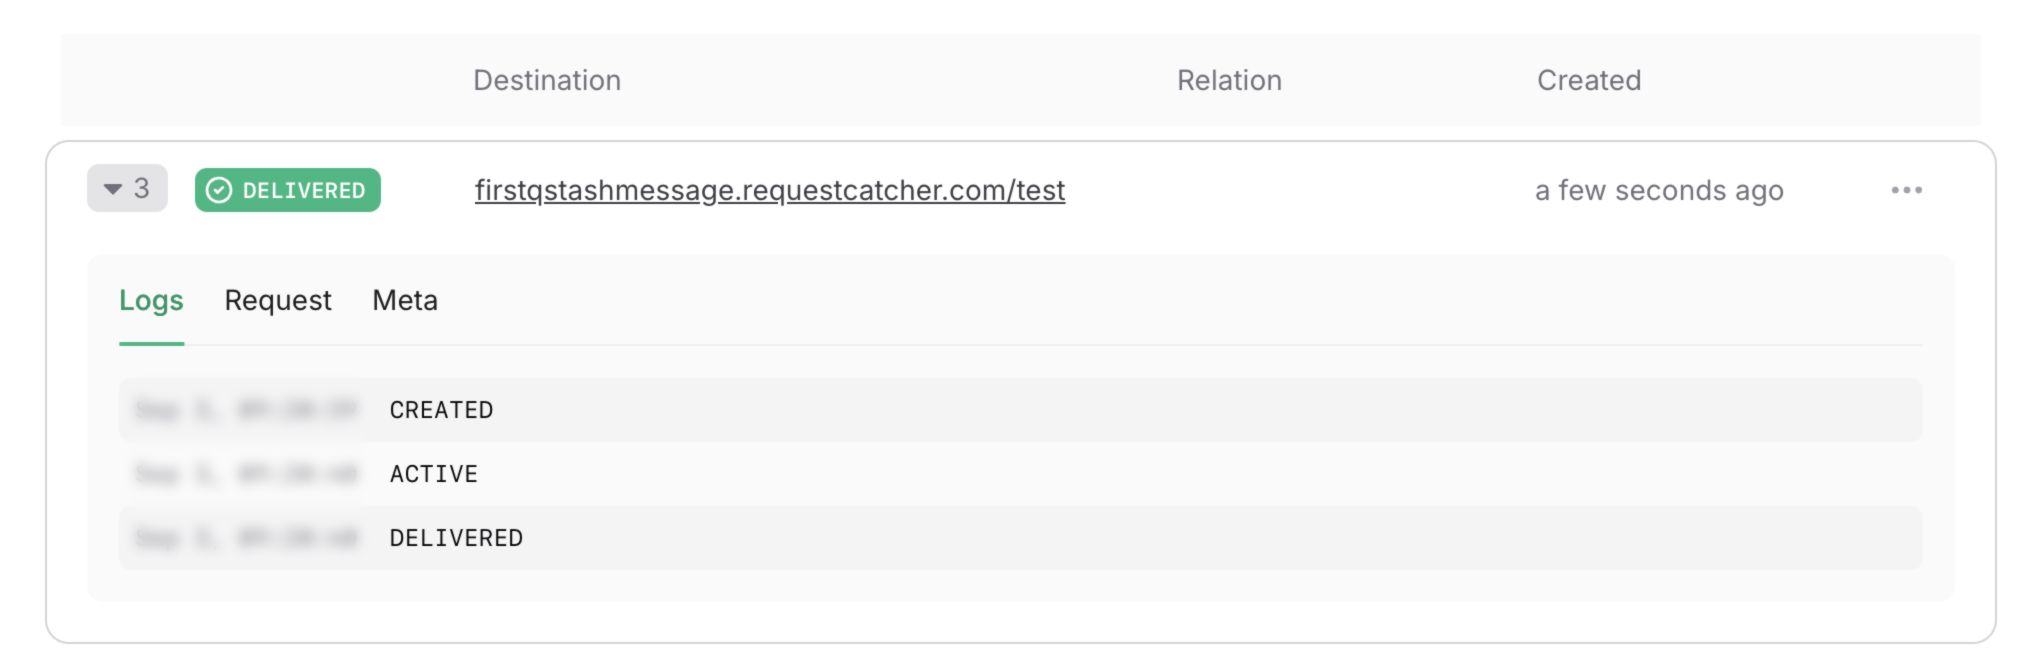
Check Message Status
Head over to Upstash Console and go to theLogs tab where you can see your message activities.
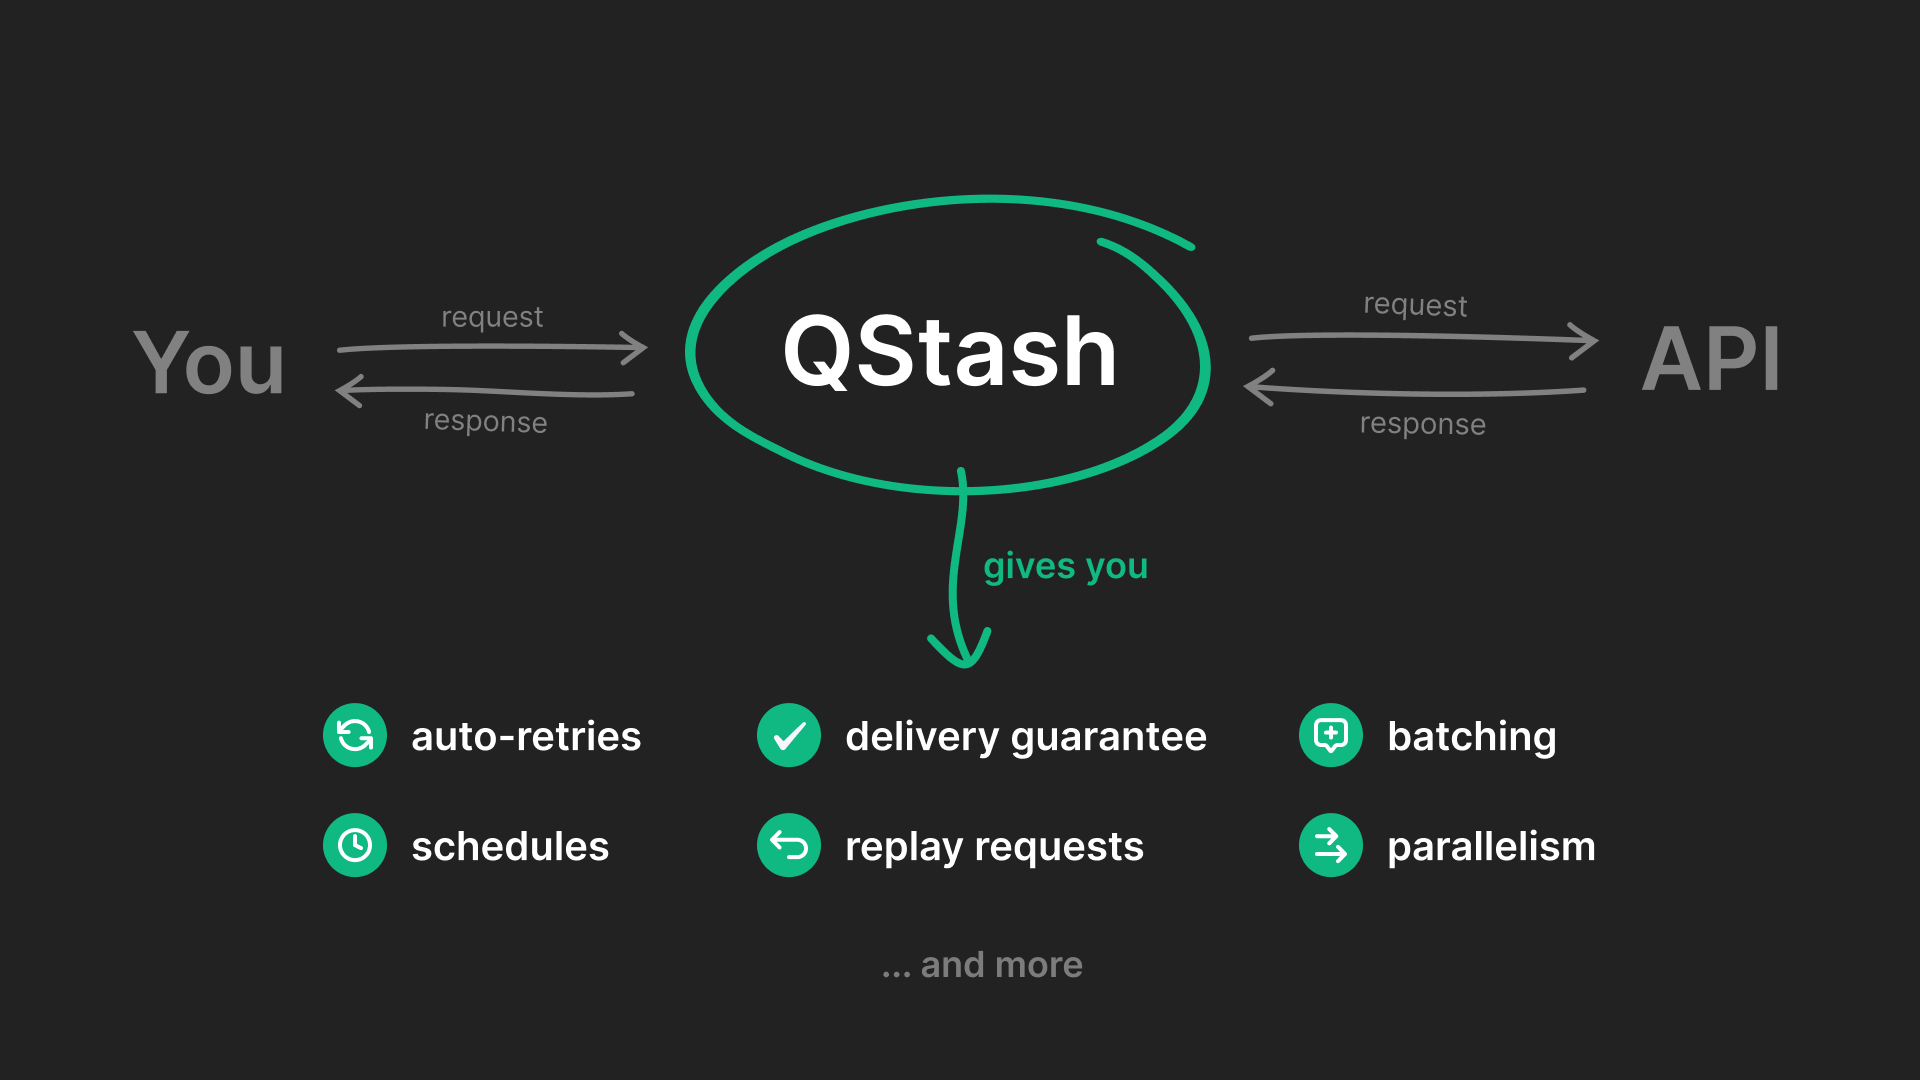
Features and Use Cases
Background Jobs
Run long-running tasks in the background, without blocking your application
Schedules
Schedule messages to be delivered at a time in the future
Fan out
Publish messages to multiple endpoints, in parallel, using URL Groups
FIFO
Enqueue messages to be delivered one by one in the order they have enqueued.
Flow Control
Custom rate per second and parallelism limits to avoid overflowing your endpoint.
Callbacks
Get a response delivered to your API when a message is delivered
Retry Failed Jobs
Use a Dead Letter Queue to have full control over failed messages
Deduplication
Prevent duplicate messages from being delivered
LLM Integrations
Publish, enqueue, or batch chat completion requests using large language models with QStash
features.