

A branch is a copy of a database’s data that you can change freely. It gets its own endpoint and password, so you can point a staging app, a test suite or an experiment at it without touching the data your production clients use. Later changes on either side stay separate: a branch is a copy, not a replica, so nothing is synced back.
Branching is available for global databases on the Pay as You Go, Fixed and Enterprise plans, in the Upstash console and also from an agent or the CLI. Free databases, regional databases, databases on the legacy Pro plan, databases with an IP allowlist, suspended databases and HIPAA-enabled databases can’t be branched. Branching also needs an account with a payment method, and isn’t available to accounts created through Vercel, Heroku, DigitalOcean, Laravel, Fly.io or AWS Marketplace.
Creating a Branch#
Open your database and use the branch switcher in the header, or Create branch in the database’s
actions menu. You can create a branch from the main database or from one of its existing branches.
Choose a name and the data source, then wait for the branch to be created.
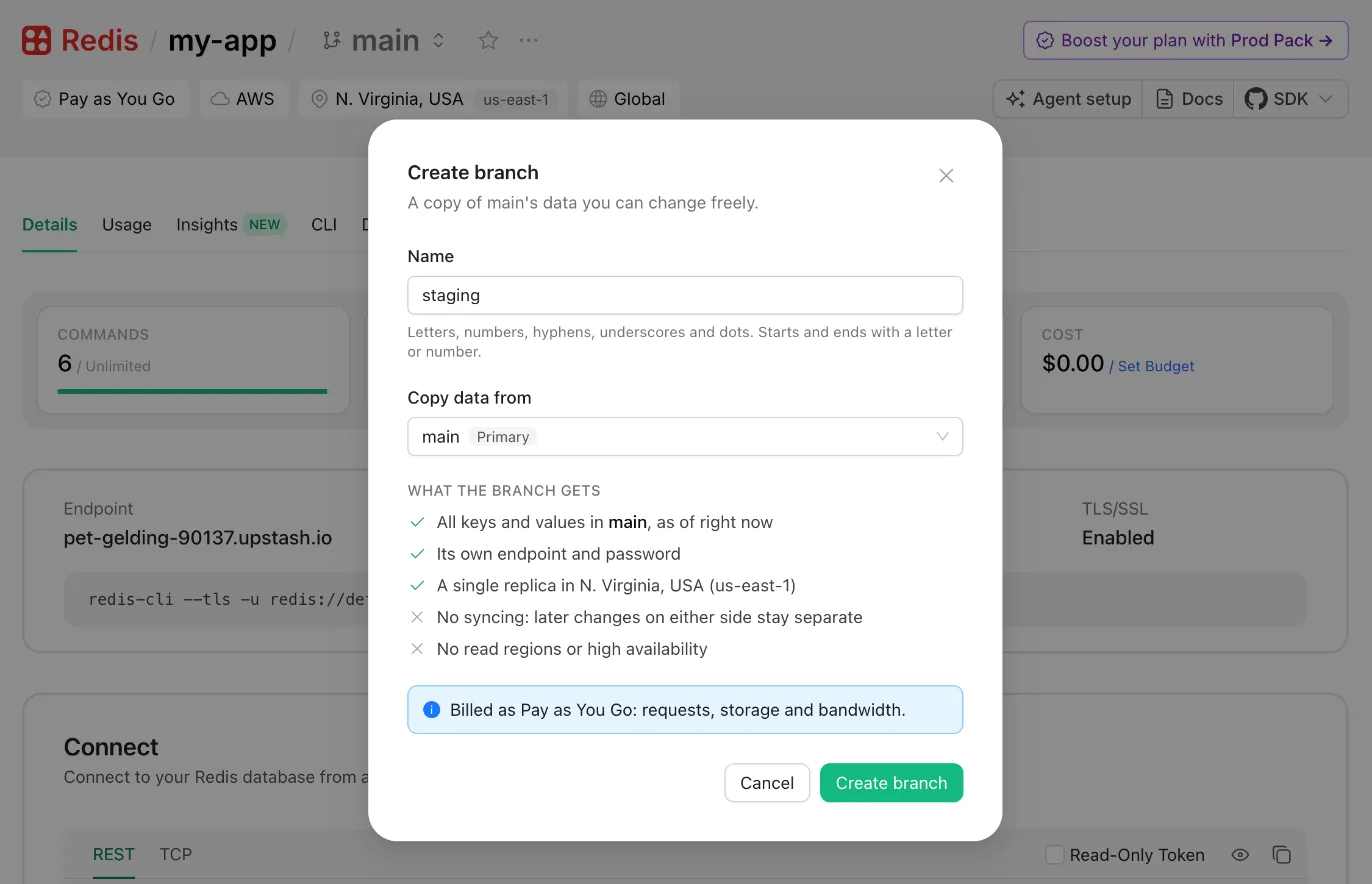
Branch names can contain letters, numbers, hyphens, underscores and dots, must start and end with a letter or number, and can be up to 100 characters long. Names must be unique within the database.
While a branch is being created, its page shows a Creating branch bar and its tabs stay
unavailable. Creating a branch usually takes a few seconds. When the branch is ready, the console
shows a notification. If it can’t be created, a message tells you it failed and the branch is
removed.
What a Branch Gets#
- All keys and values in the source database, as of the moment you create the branch.
- Its own endpoint and password.
- A single replica in the main database’s region.
A branch does not get read regions or high availability, and it is always on the Pay as You Go plan: its requests, storage and bandwidth are billed as Pay as You Go, whatever plan the main database is on.
Working with Branches#
Use the branch switcher in the header to move between the main database and its branches. The
switcher lists main first, then each branch, and you can search by name.
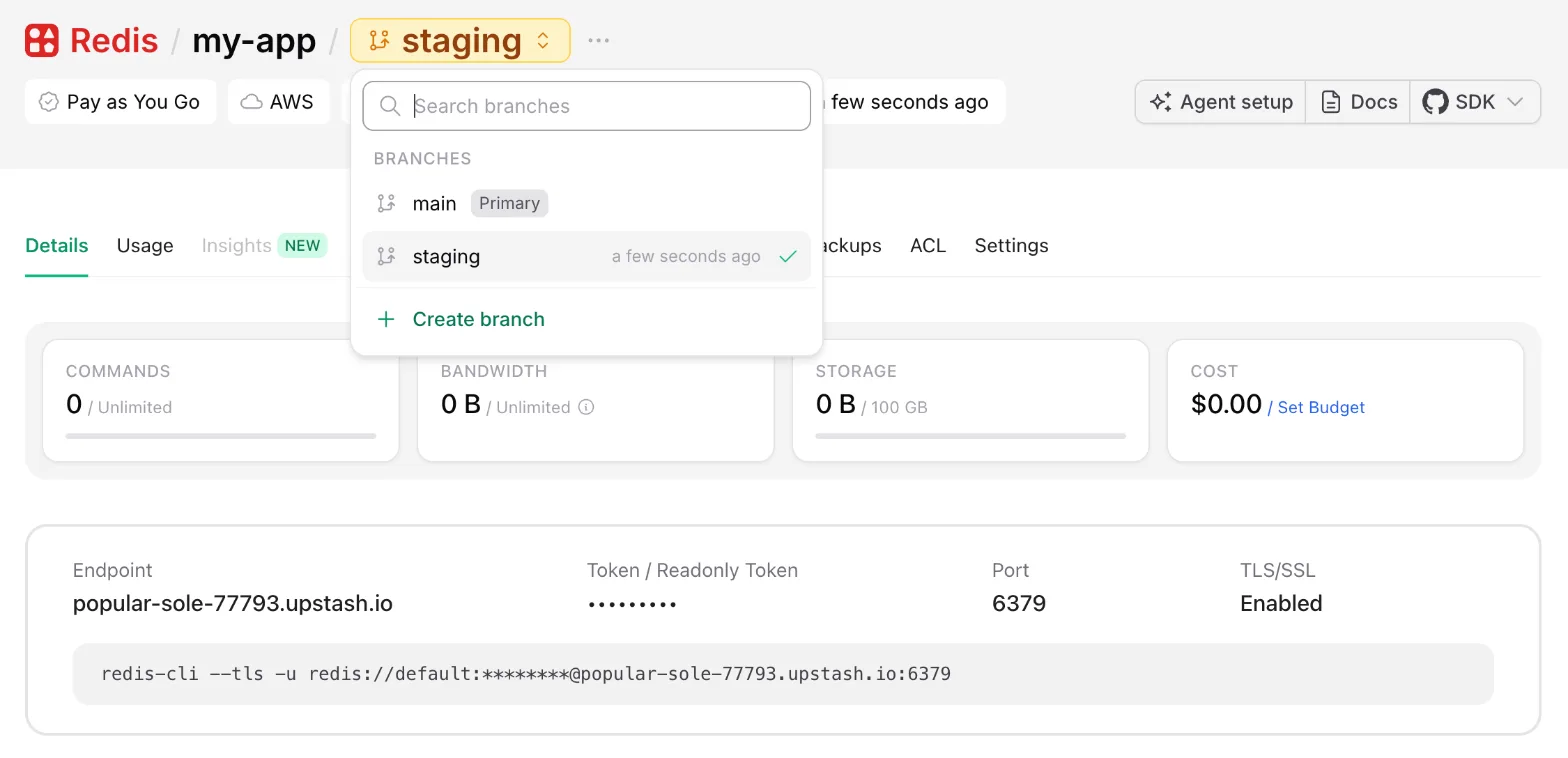
A branch is hidden on the main databases list. You reach it from the switcher on its database’s
page, and it appears as database / branch in places where databases are picked by name, such as
the Cost Explorer.
On a branch you can:
- Browse its data, run commands in the CLI and monitor it, using its own credentials.
- Rename it or delete it, from the branch’s actions menu or from
Settings→Delete Branch. - Create another branch from it.
A branch can’t be promoted to the main database.
The following are not available on a branch, since they depend on the main database’s plan or on more than one replica:
- Production Pack, and the features it unlocks: Protect Credentials, Prometheus, Datadog, Insights, the past-month usage range and 3-day backups.
- Changing the plan, adding read regions, and Enterprise add-ons such as HIPAA and VPC peering.
- Pinning the database, and the security checklist in
Settings.
From an Agent or the CLI#
With the Upstash MCP server, ask your agent something like “create a branch
of my-app called staging”. It uses redis_create_branch, and the branch then shows up in
redis_list_databases and can be renamed or deleted with the usual database tools.
With the Upstash CLI:
A new branch starts in the creating state and becomes active within seconds, which you can check
with upstash redis get --db-id $BRANCH_ID. Rename or delete it with upstash redis rename and
upstash redis delete, like any other database.
Deleting a Database with Branches#
A database that has branches can’t be deleted or transferred, because its branches depend on it. Delete its branches first, then delete or transfer the main database.