Render Key Value vs Upstash Redis: Which Redis for Your Render App? (2026)
 Cahid Arda Oz
If you need to connect to Redis from an app running on Render, the common approach is to use a Render Key Value instance in the same region, and put its internal URL into REDIS_URL. That’s what Render’s docs suggest.
Upstash is no different here; any regular Redis client will connect to Upstash over TCP, with TLS, so to use Upstash, you just need to put a different REDIS_URL into your app, whether it’s a Web Service, Background Worker, or Cron Job. No code changes needed.
So the choice between the two is really down to cost, free tier, whether you need persistence, and what other regions and services you need to access the database from.
Render Key Value vs Upstash at a glance
Here is how the two compare for an app running on Render:
| Render Key Value | Upstash Redis | |
|---|---|---|
| Engine | Valkey 8 (Redis 6 on older instances) | Upstash Redis |
| Client code | Any Redis client | Any Redis client over TCP, plus an HTTP client |
| Free plan | 25 MB, in memory only | 250 MB, 500K commands a month, persistent |
| Persistence | Paid plans only, on by default | All plans |
| Network | Private network in one region, external URL needs an IP allow list | One TLS endpoint you can reach from anywhere |
| Regions | One region per instance, fixed at creation | One primary region, optional read regions, one URL |
| HTTP or REST access | No | Yes |
| Pricing | Fixed per instance, from $10 a month | Per command, or fixed from $10 a month |
Can I use Upstash with an app on Render?
Yes, Upstash supports the standard Redis protocol over TCP. Render Web Services, Background Workers, and Cron Jobs can connect to Upstash using standard Redis clients, so you can set your REDIS_URL to the Upstash rediss:// URL and your code doesn’t have to change.
On Render Key Value, REDIS_URL is the internal URL, like redis://red-abc123:6379. On Upstash, it is the TCP URL from the Upstash console, with the database token as the password:
rediss://default:YOUR_TOKEN@YOUR_ENDPOINT.upstash.io:6379The client reads that URL the same way for both:
import Redis from "ioredis";

const redis = new Redis(process.env.REDIS_URL);

await redis.set("greeting", "hello from Render", "EX", 60);
console.log(await redis.get("greeting"));
await redis.quit();
Check out the Express quickstart to see what a full app might look like. To minimize each round trip, use the Upstash region closest to your Render region.
Set up Upstash for a Render service
The only Upstash step is to copy a single URL.
- Sign up for Upstash and create a free Redis database, select the region closest to your Render services, then copy the TCP URL for the new database.
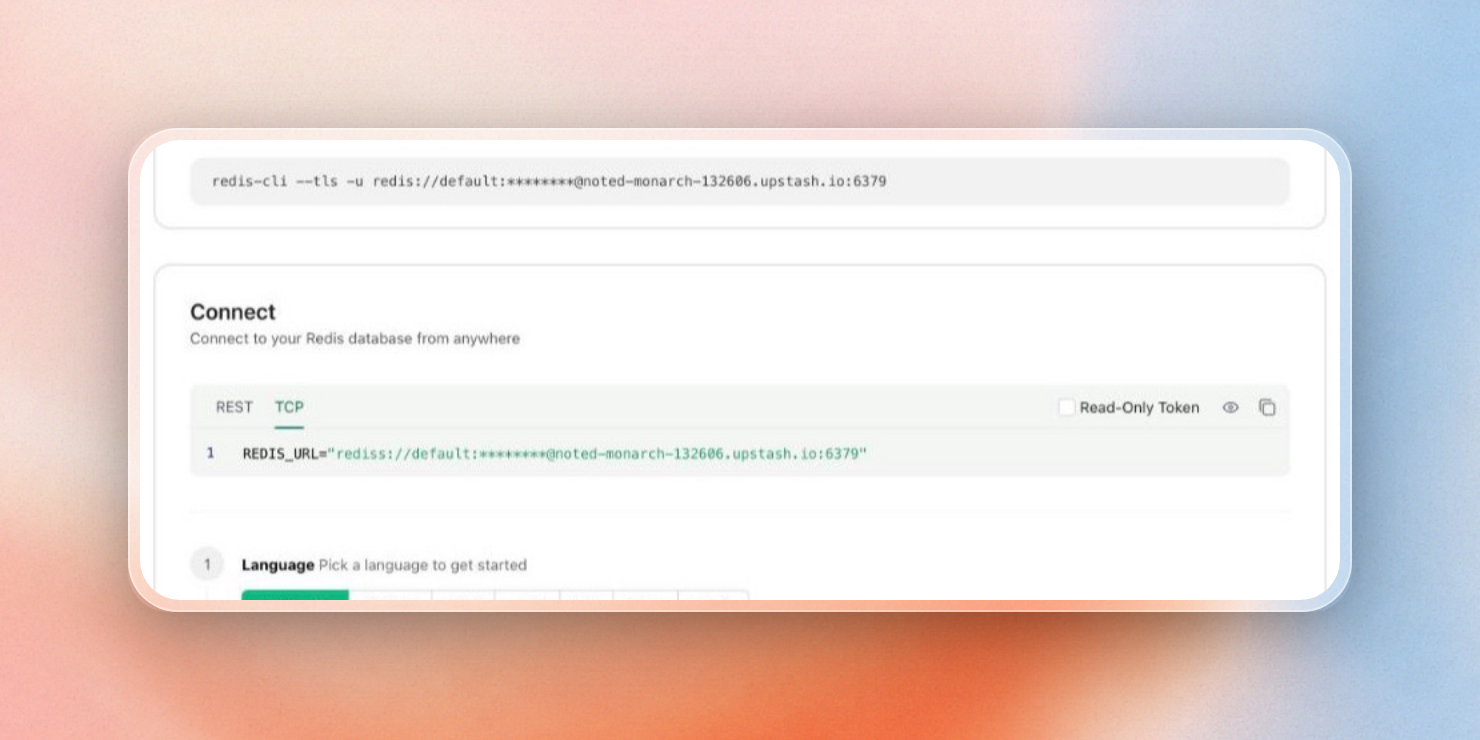
The TCP tab of the Connect panel in the Upstash console shows the REDIS_URL to copy
- Create a new service from your Git repo in Render, or open an existing one.
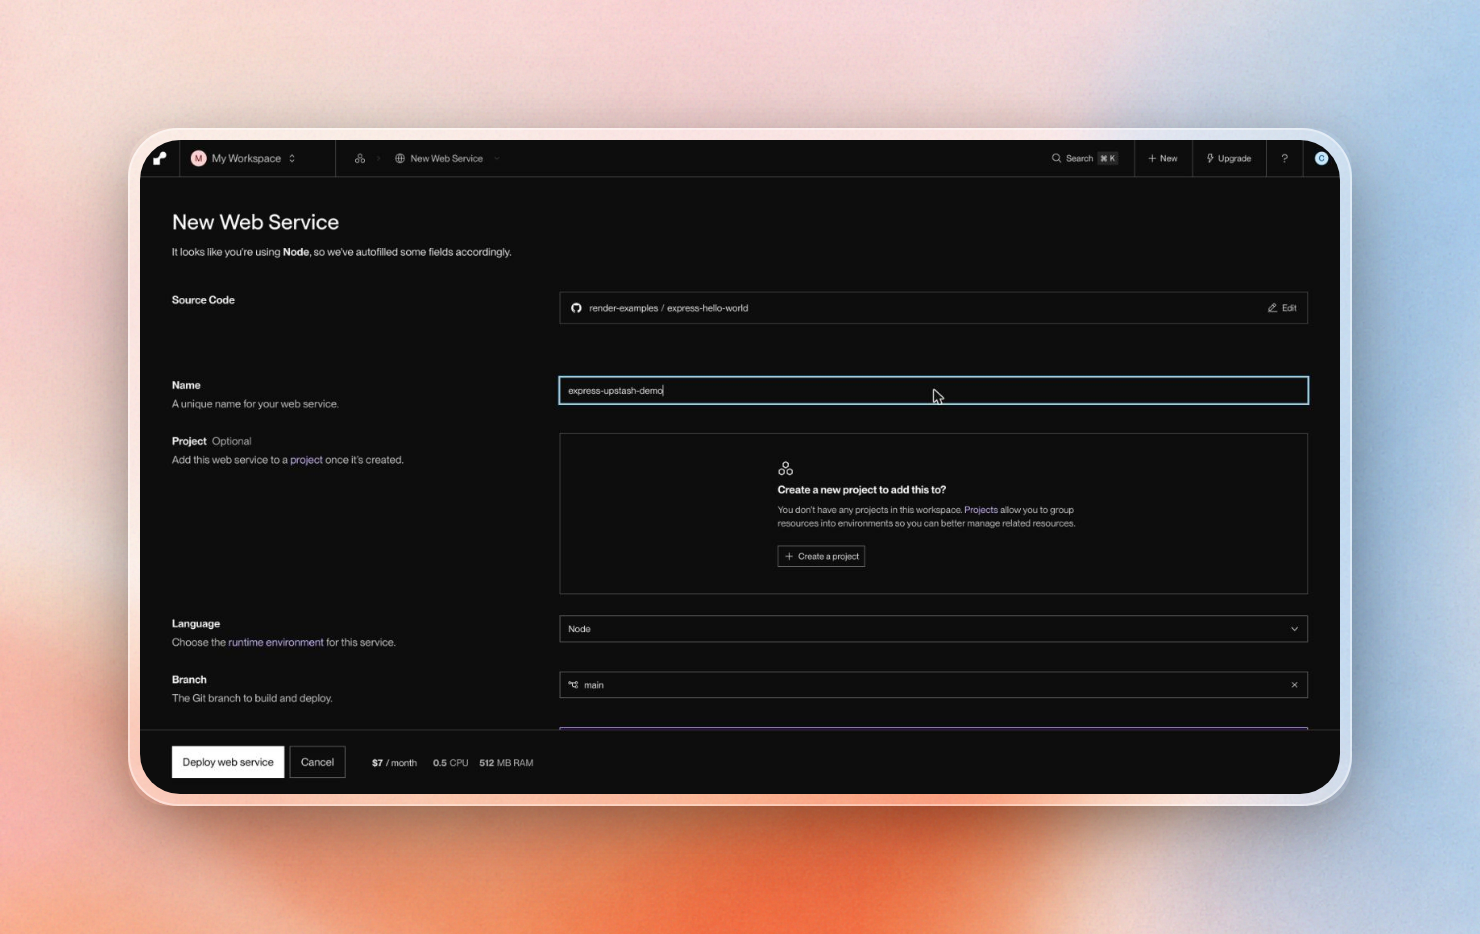
Creating a web service on Render from a GitHub repo
- In the environment settings for the new service, add a new variable named
REDIS_URLand paste the URL you copied from Upstash.
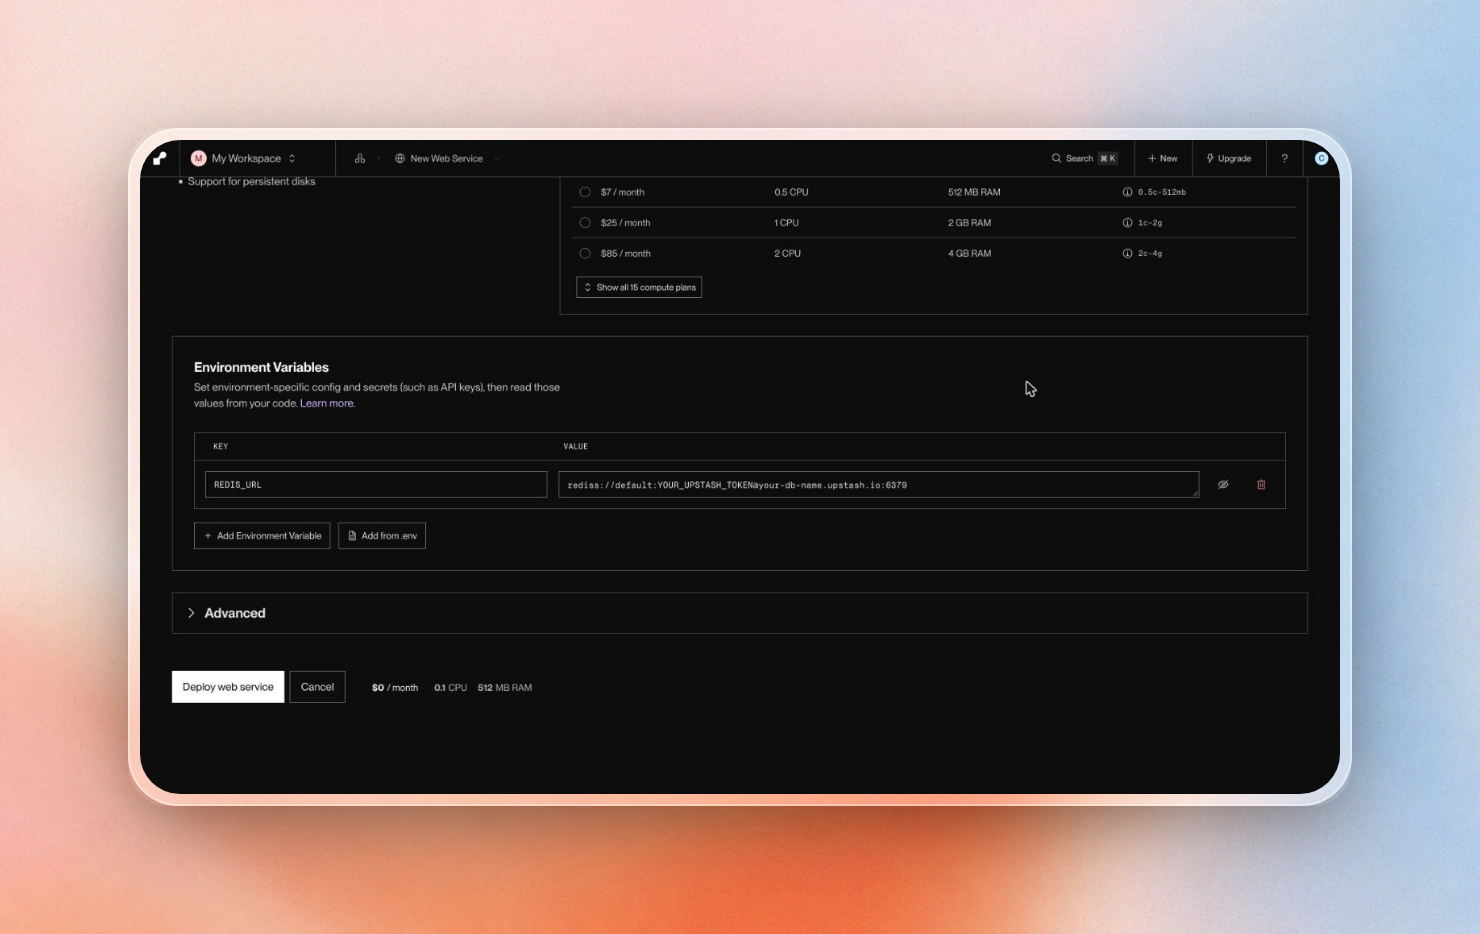
REDIS_URL set to the Upstash rediss:// URL in Render's environment variables
- Deploy. The service connects to Upstash with that URL when it starts.
And if a coding agent is building the app for you, it can also start a scratch database with a single POST to start-redis, which can be claimed in your account to keep (unclaimed ones are deleted after 3 days).
How each one connects to your web service
When you create a Render Key Value instance, Render provides two URLs to access the database. The internal URL is only accessible to Render services in the same workspace and the same region as the database. It is accessible over Render’s private network and by default doesn’t require a password. The external URL is used to connect from anywhere else, like your laptop or a service hosted elsewhere. It’s off by default until you add IP ranges to an allow list. All traffic over the external URL is encrypted with TLS and requires a password.
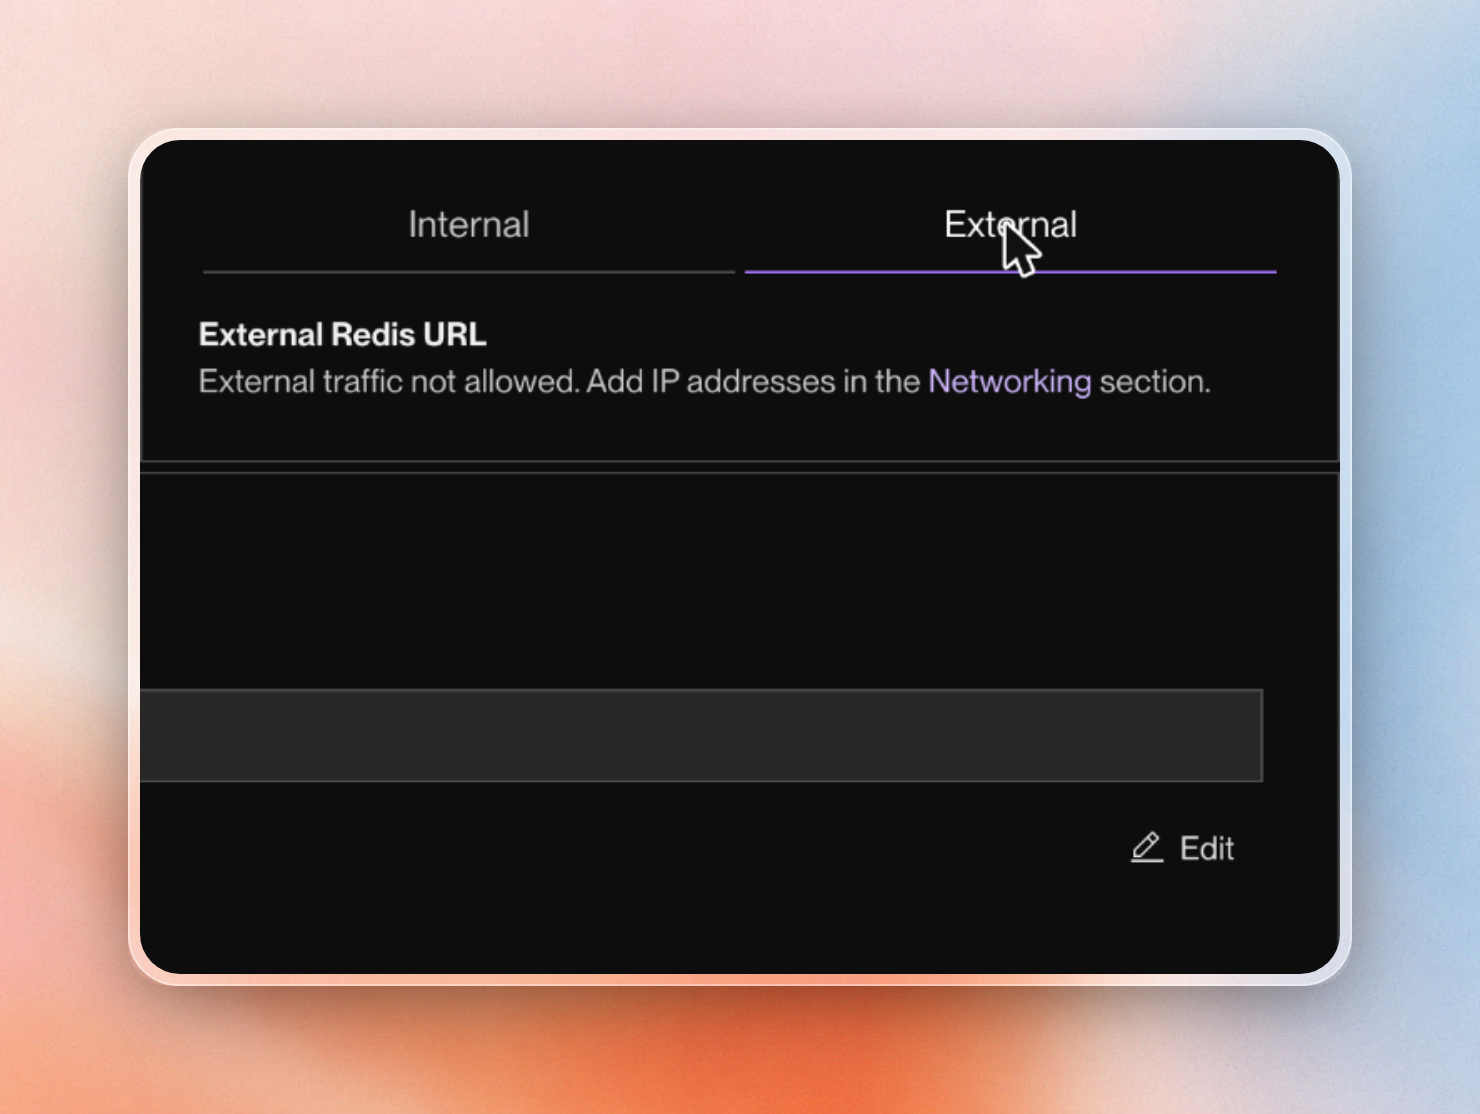
A new Key Value instance blocks external traffic until you allow list IPs
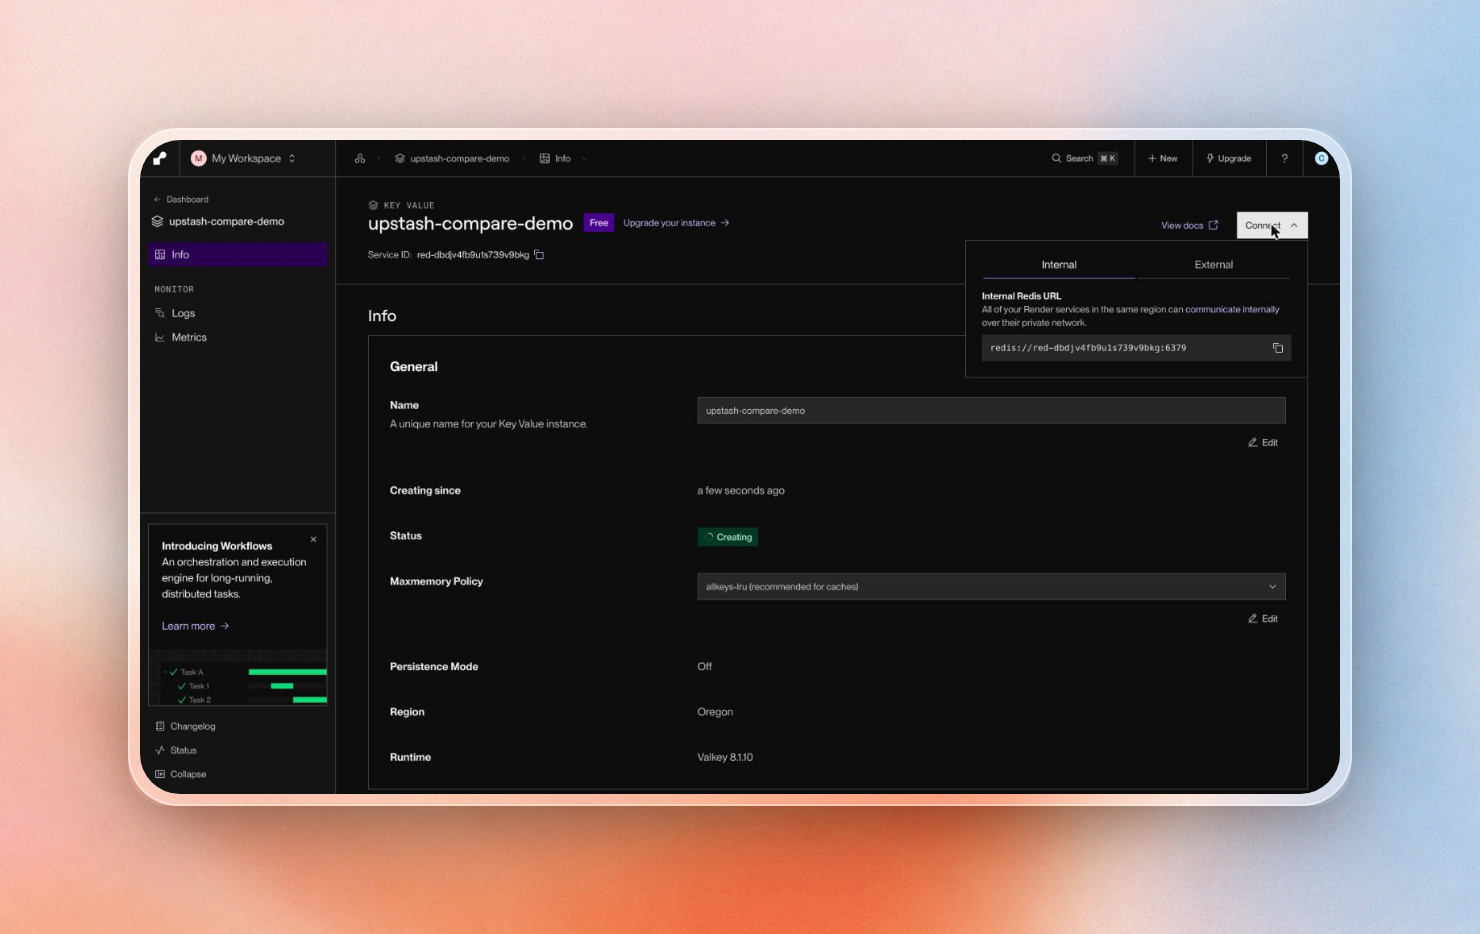
A Render Key Value instance's internal URL in the Connect panel
The Upstash service has a single endpoint exposed to the internet over TLS. The Redis password is the authentication token. Your Render service, your laptop and your CI jobs all use the same Redis URL, and you don't need to add IPs to an allow list (though you can restrict access by IP if you want to). Runtimes that do not support opening TCP connections can reach the same Redis database over HTTP. This is especially useful for local development, as with Render Key Value, you have to run a Redis database locally or allow list your IP. With Upstash, you just set REDIS_URL to a development database URL and run the same code.
Running on Render in more than one region
Each service on Render runs in one region that you choose when you create it. You can’t change it later. Render runs in Oregon, Ohio, Virginia, Frankfurt, and Singapore, and each of these regions has its own private network. A service running in Frankfurt cannot access a Key Value instance in Virginia over the private network.
If your application is running in Virginia and Frankfurt, then you have two choices if you’re using Render Key Value:
- You can spin up a Render Key Value instance in each region. The Key Value instances will have separate data, so a key added to Key Value in Virginia will not be available in Frankfurt.
- You can use one Key Value instance and access it over the public internet from the other region. To do this, you’ll need to use the external URL for the instance. However, you can’t use the external URL until you’ve added IP addresses to its allow list.
An Upstash Global database has a primary region, and you can add read regions in other locations (one on the free plan). Upstash has regions available in the same cities as Render: Oregon, Ohio, Virginia, Frankfurt, and Singapore. Writes to the database go to the primary region, and are copied to all read regions. Reads from the database are made to the closest region. This means both Render services can use the same REDIS_URL, and share the same dataset. Adding a read region is a setting in the Upstash console, so your app and its REDIS_URL stay the same.
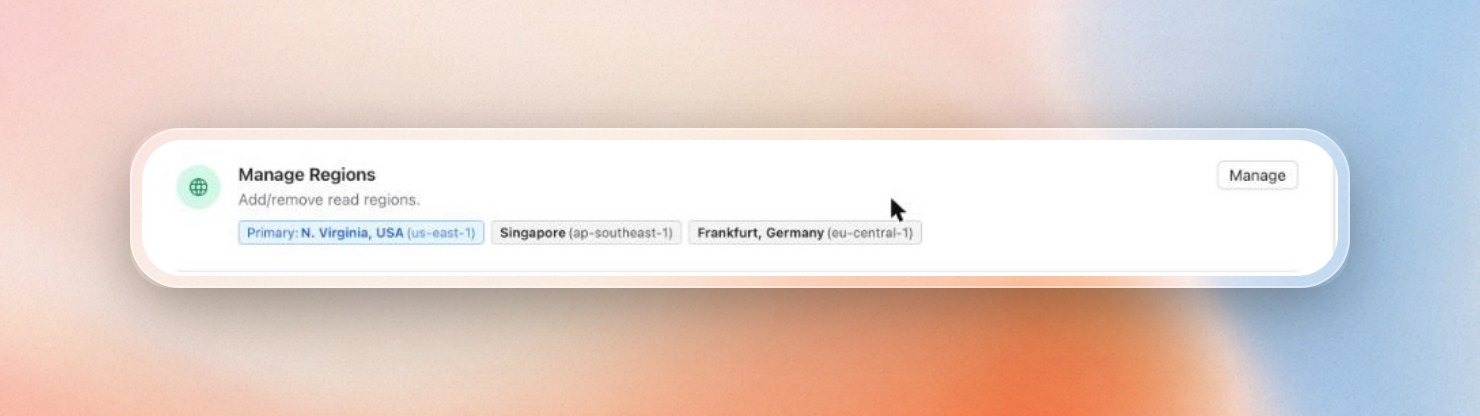
A Virginia primary with read regions in Frankfurt and Singapore, set in the Upstash console
This works best for apps that are read-heavy, as all writes to the database will go to the primary region.
Free tier: what you get on each
Both Render and Upstash have free tiers. However, they are drastically different in size.
Render’s free Key Value instance has 25 MB of RAM and a limit of 50 connections. You get one free instance per workspace, and it only stores data in memory. Render can restart it at any time, and the data stored in the instance is wiped with each restart. Upgrading a free instance to a paid plan will also wipe its data.
Upstash’s free plan includes 250 MB of data, 500K commands per month and 10 GB of bandwidth. It stores data in memory and also writes it to block storage, so data is persisted across restarts on the free tier. When you add a card to your account, Upstash will upgrade your existing database to the pay-as-you-go tier.
| Free plan | Render Key Value | Upstash Redis |
|---|---|---|
| Memory or data size | 25 MB | 250 MB |
| Monthly commands | No command limit | 500K |
| Persistence | None, data is lost on restart | Yes |
| Free instances | 1 per workspace | 1 database |
For a project you'd like to keep running, 25 MB with no persistence is pushing it; Upstash's free tier offers ten times the space.
How pricing works on Render Key Value and Upstash
Render bills Key Value by instance size. The smallest paid plan is $10 a month for 256 MB of RAM. The next one is $20 a month for 1 GB. You pay the same whether your cache receives ten requests or ten million. Render also can't downgrade a Key Value instance after you create it, so pick the size with care.
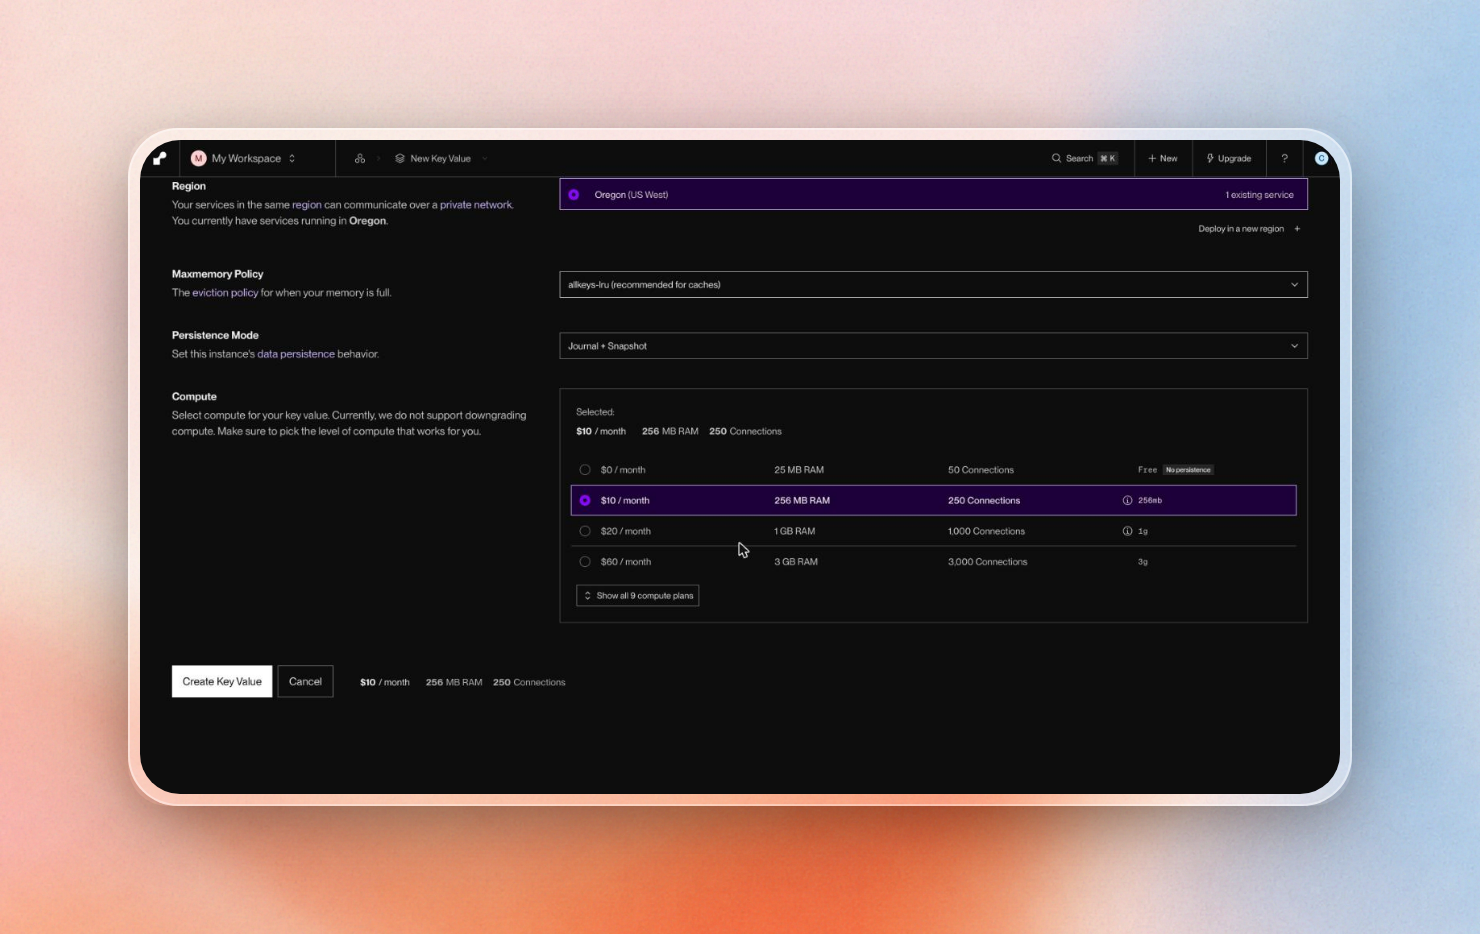
Render Key Value compute plans in the dashboard
Upstash has two ways to pay. Pay-as-you-go costs $0.2 per 100K commands with the first 1 GB of storage per database free. Or there’s the Fixed 250MB plan, which costs $10 a month with no per-command billing and 50 GB bandwidth. The free plan includes one database. On pay-as-you-go, the first 10 databases have no per-database fee, and each one after that costs $0.50 a month, up to 100.
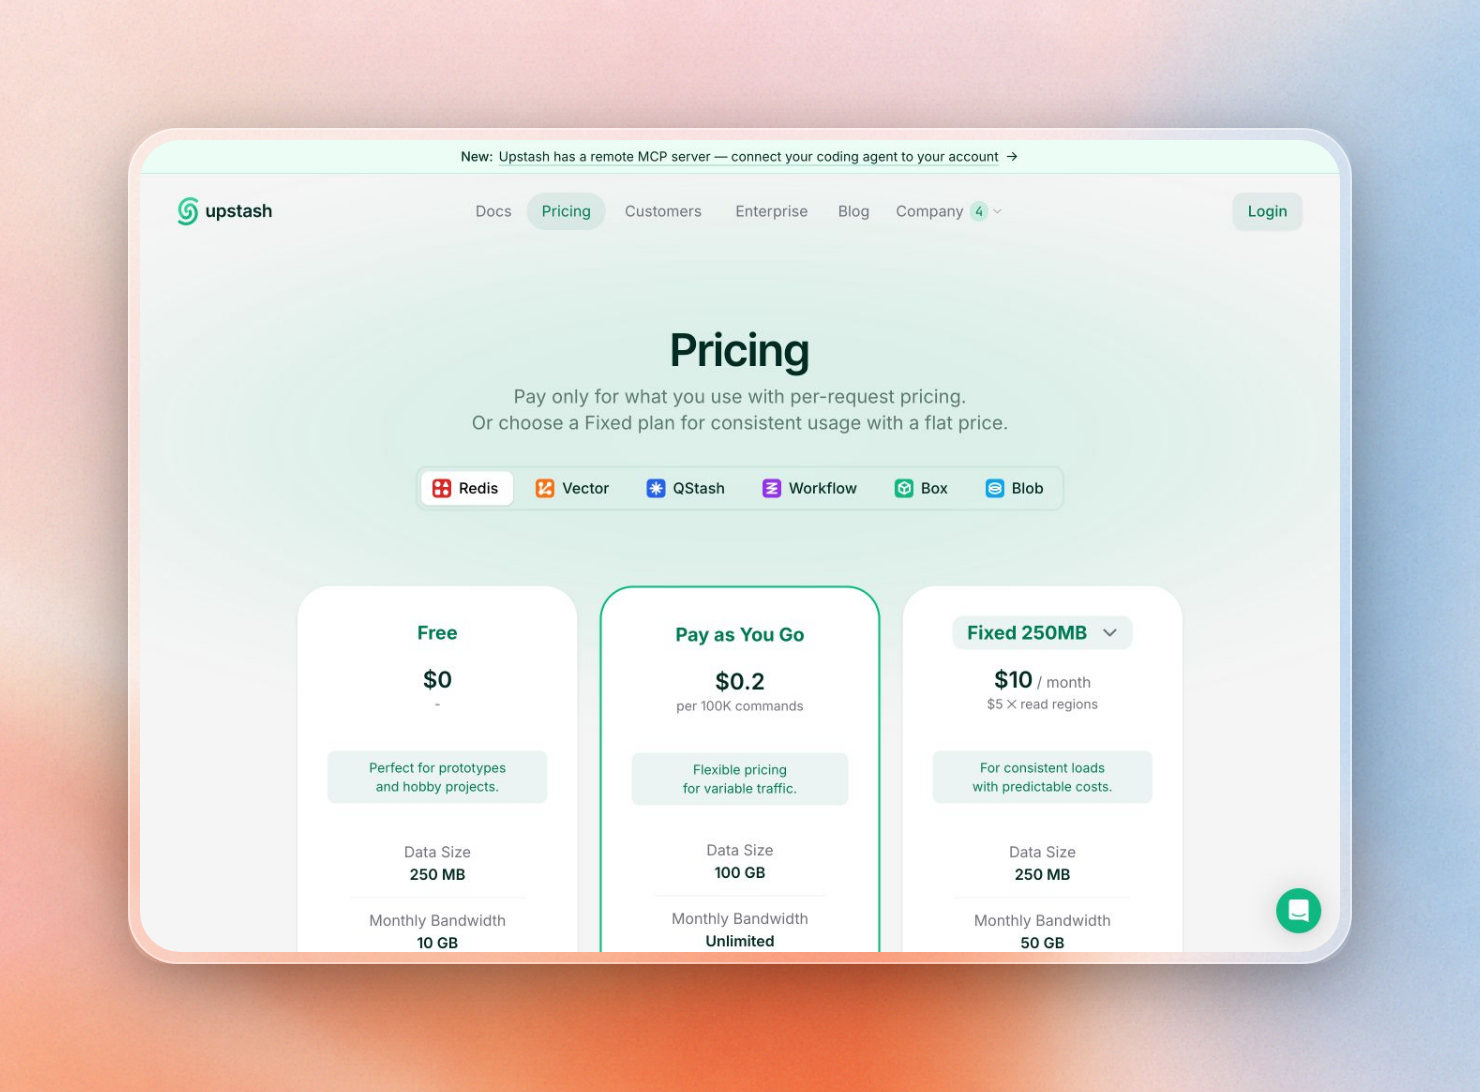
Upstash Redis plans
On pay-as-you-go, a cache doing 2M commands a month costs 2M ÷ 100K × $0.20 = $4, and the first 1 GB of storage is free. If your traffic is steady and high, the Fixed 250MB plan caps the bill at $10 a month with no per-command charges.
To measure how well the cache is performing in production, we can use the Usage tab in the Upstash console. This tab shows the number of hits and misses per second for each database.
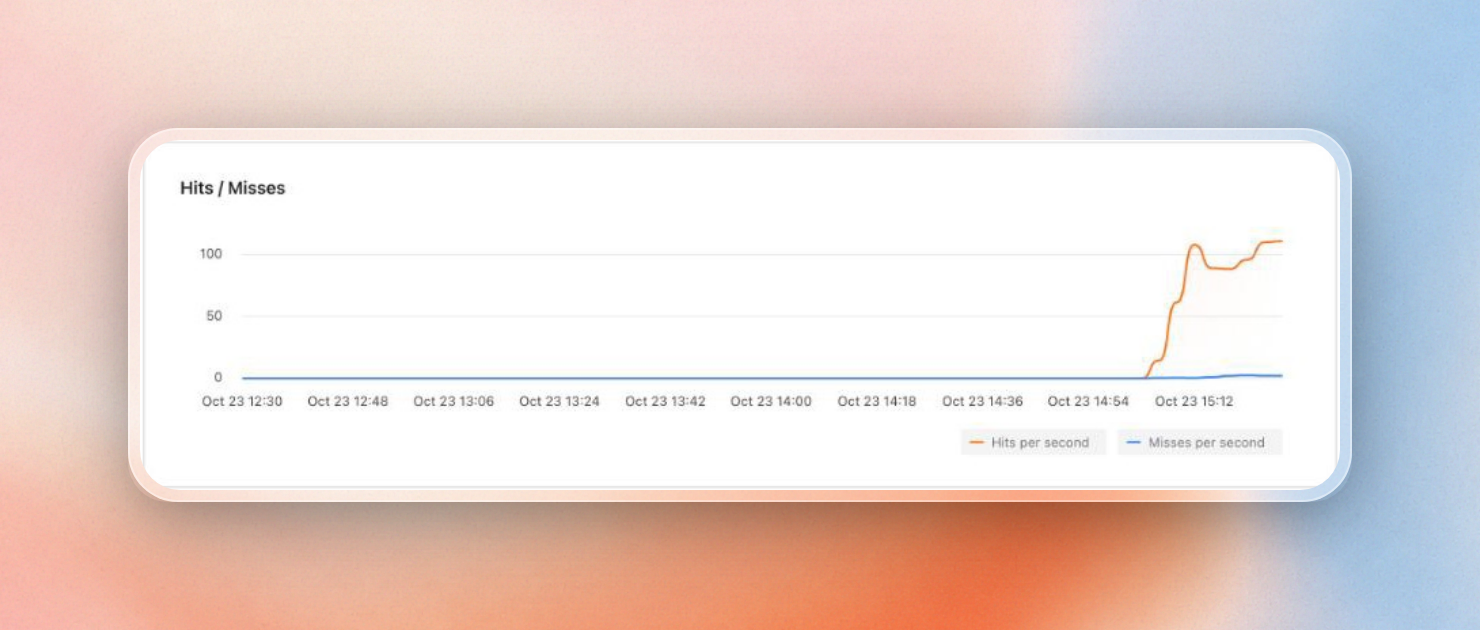
Hits and misses per second in the Usage tab of the Upstash console
For prices on other providers, please see our Redis pricing comparison.
Summary
Both services take a standard REDIS_URL, so you can switch without changing code. Render Key Value keeps traffic on Render's private network inside one region. Upstash gives you a persistent free plan with 250 MB, per-command or fixed pricing, one TLS URL that works from Render, your laptop, CI or an edge function (over HTTP too), and optional read regions near your users in other regions. If a coding agent is setting things up, it can create a scratch database with start-redis that you claim later, or manage databases in your account through the Upstash MCP server.
Either way, your app's code stays the same. Check out our managed Redis comparison for more comparisons with other providers.
