Trigger a Pipedream workflow from a QStash topic message
This is a step by step guide on how to trigger a Pipedream workflow from a QStash topic message. Alternatively click here to create a new workflow with this QStash topic trigger added.1. Create a Topic in QStash
If you haven’t yet already, create a Topic in the QStash dashboard.2. Create a new Pipedream workflow
Sign into Pipedream and create a new workflow.3. Add QStash Topic Message as a trigger
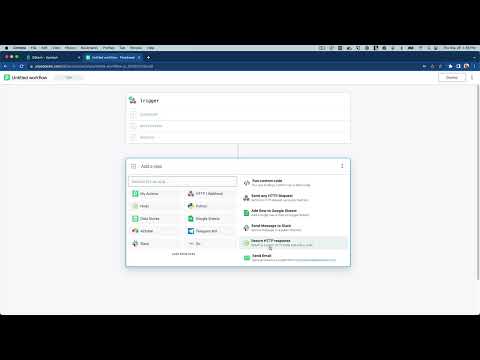
In the workflow Trigger search for QStash and select the Create Topic Endpoint trigger. Then, connect your QStash account by clicking the QStash prop and retrieving
your token from the
QStash dashboard.
After connecting your QStash account, click the Topic prop, a dropdown will
appear containing the QStash topics on your account.
Then click on a specific topic to listen for new messages on.
Then, connect your QStash account by clicking the QStash prop and retrieving
your token from the
QStash dashboard.
After connecting your QStash account, click the Topic prop, a dropdown will
appear containing the QStash topics on your account.
Then click on a specific topic to listen for new messages on.
 Finally, click Continue. Pipedream will create a unique HTTP endpoint and
add it to your QStash topic.
Finally, click Continue. Pipedream will create a unique HTTP endpoint and
add it to your QStash topic.
4. Test with a sample message
Use the Request Builder in the QStash dashboard to publish a test message to your topic. Alternatively, you can use the Create topic message action in a Pipedream workflow to send a message to your topic. Don’t forget to use this action in a separate workflow, otherwise you might cause an infinite loop of messages between QStash and Pipedream.5. Add additional steps
Add additional steps to the workflow by clicking the plus icon beneath the Trigger step. Build a workflow with the 1,000+ pre-built components available in Pipedream, including Airtable, Google Sheets, Slack and many more. Alternatively, use Node.js or Python code steps to retrieve, transform, or send data to other services.6. Deploy your Pipedream workflow
After you’re satisfied with your changes, click the Deploy button in the top right of your Pipedream workflow. Your deployed workflow will not automatically process new messages to your QStash topic. Collapse quickstart-trigger-pipedream-workflow-from-topic.md 3 KBVideo tutorial
If you prefer video, you can check out this tutorial by pipedream.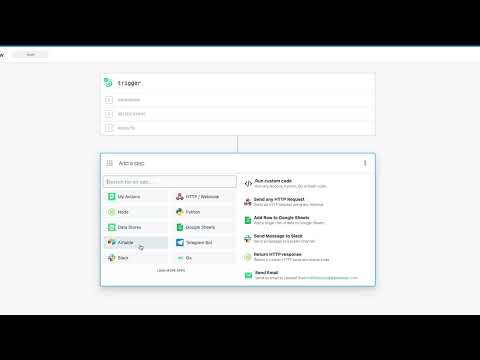
Trigger a Pipedream workflow from a QStash topic message
This is a step by step guide on how to trigger a Pipedream workflow from a QStash endpoint message. Alternatively click here to create a pre-configured workflow with the HTTP trigger and QStash webhook verification step already added.1. Create a new Pipedream workflow
Sign into Pipedream and create a new workflow.2. Configure the workflow with an HTTP trigger
In the workflow Trigger select the New HTTP / Webhook Requests option. Pipedream will create a unique HTTP endpoint for your workflow.
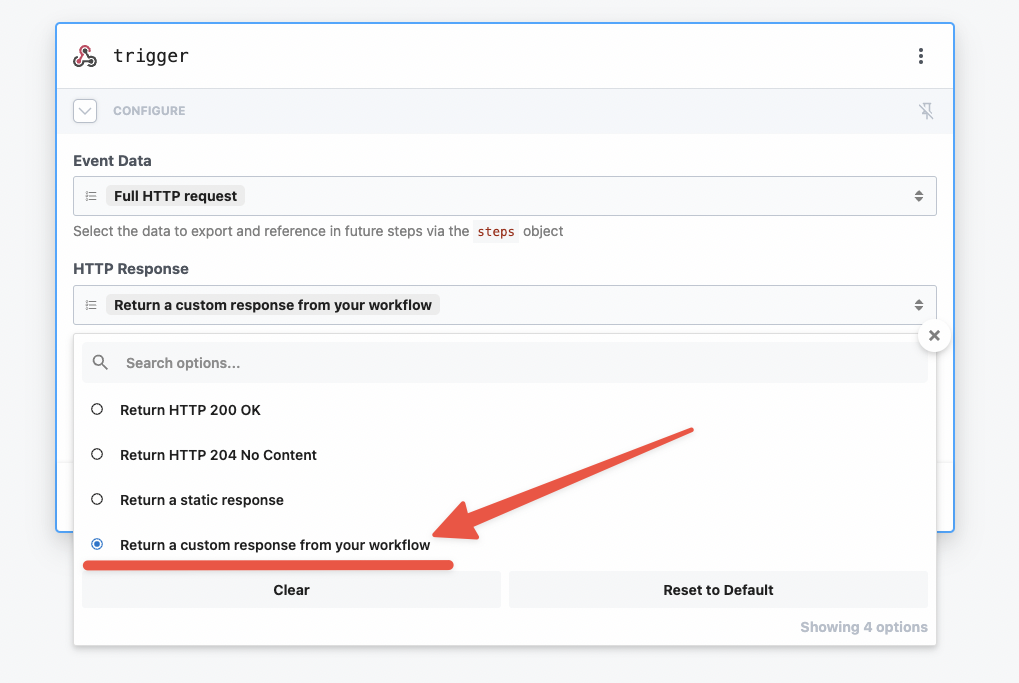
Then configure the HTTP trigger to return a custom response. By default
Pipedream will always return a 200 response, which allows us to return a non-200
response to QStash to retry the workflow again if there’s an error during the
execution of the QStash message.
Pipedream will create a unique HTTP endpoint for your workflow.
Then configure the HTTP trigger to return a custom response. By default
Pipedream will always return a 200 response, which allows us to return a non-200
response to QStash to retry the workflow again if there’s an error during the
execution of the QStash message.
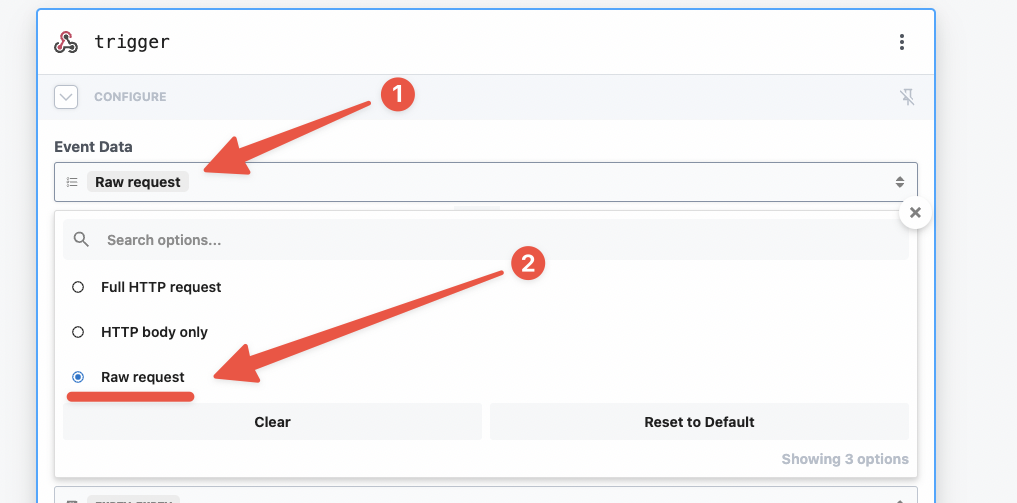
 Lastly, set the Event Body to be a Raw request. This will make sure the
QStash verify webhook action receives the data in the correct format.
Lastly, set the Event Body to be a Raw request. This will make sure the
QStash verify webhook action receives the data in the correct format.
3. Test with a sample message
Use the Request Builder in the QStash dashboard to publish a test message to your topic. Alternatively, you can use the Create topic message action in a Pipedream workflow to send a message to your topic. Don’t forget to use this action in a separate workflow, otherwise you might cause an infinite loop of messages between QStash and Pipedream.4. Verify the QStash webhook
Pipedream has a pre-built QStash action that will verify the content of incoming webhooks from QStash. First, search for QStash in the step search bar, then select the QStash app. Of the available actions, select the Verify Webhook action. Then connect your QStash account and select the HTTP request prop. In the dropdown, click Enter custom expression and then paste in{{ steps.trigger.event }}.
This step will automatically verify the incoming HTTP requests and exit the
workflow early if requests are not from QStash.
5. Add additional steps
Add additional steps to the workflow by clicking the plus icon beneath the Trigger step. Build a workflow with the 1,000+ pre-built components available in Pipedream, including Airtable, Google Sheets, Slack and many more. Alternatively, use Node.js or Python code steps to retrieve, transform, or send data to other services.6. Return a 200 response
In the final step of your workflow, return a 200 response by adding a new step and selecting Return an HTTP Response.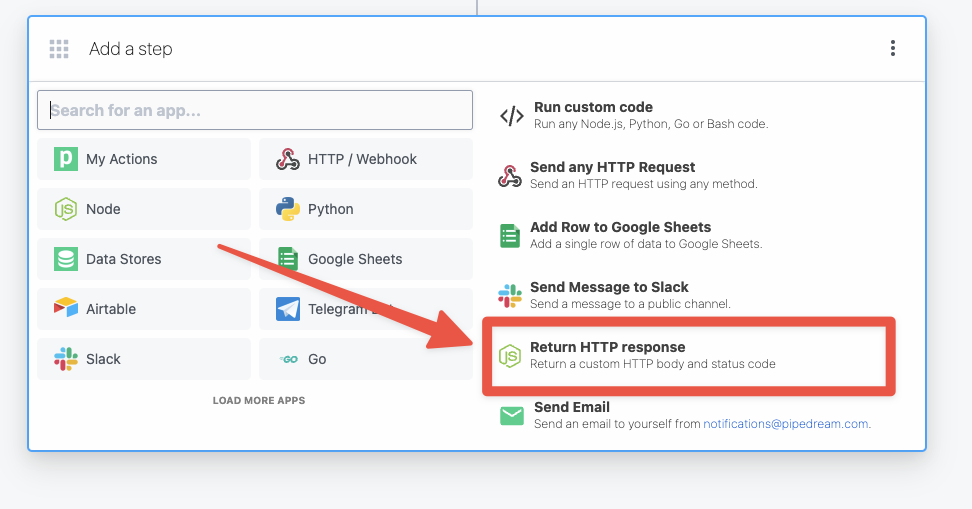 This will generate Node.js code to return an HTTP response to QStash using the
$.respond helper in Pipedream.
7. Deploy your Pipedream workflow
After you’re satisfied with your changes, click the Deploy button in the top right of your Pipedream workflow. Your deployed workflow will not automatically process new messages to your QStash topic.Video tutorial
If you prefer video, you can check out this tutorial by pipedream.