Next.js Authentication with NextAuth and Serverless Redis

Next.js is one of the most popular frontend frameworks with React at its core. It can generate static HTML or render dynamically on the client and server. This makes it a versatile tool for applications and websites of every type, and the best thing is, it’s open-source, and you can use it free of charge!
NextAuth is a third-party library for Next.js that helps you integrate different identity providers and databases. You can save your users time at sign-up and still have all their essential account information in your chosen database. NextAuth comes with support for over 50 authentication providers, including GitHub, Google, Facebook, Coinbase, and many more.
NextAuth Upstash Redis® Adapter
As of today, Upstash Redis® is one of the databases supported by NextAuth!
The upstash-redis NextAuth adapter uses the Upstash HTTP client, which works on many hosting services. You can use one free tier Redis database for multiple NextAuth enabled applications with prefixes.
So, let’s dive into NextAuth with this freshly released adapter.
NextAuth Example with Upstash Redis
You should have at least version 16.13.2 of Node.js installed for this tutorial. You also need a GitHub and an Upstash account.
Setting up the Application
You need to create a basic Next.js app; the learn-starter template is suitable for this example.
You can use the following command:
    $ npx create-next-app nextauth-upstash-redis \
    --use-npm \
    --example "https://github.com/vercel/next-learn/tree/master/basics/learn-starter"
You will use the dotenv package to make the setup of the credentials a bit easier. To get dotenv, NextAuth, the Redis adapter, and the Upstash HTTP Redis client, use this command:
$ npm i dotenv next-auth @upstash/redis @next-auth/upstash-redis-adapter
Creating the Auth API Endpoint
The API endpoint for NextAuth is a simple JS file, create it at pages/api/auth/[...nextauth].js with the following content:
import { UpstashRedisAdapter } from "@next-auth/upstash-redis-adapter";
import { Redis } from "@upstash/redis";
import NextAuth from "next-auth";
import GithubProvider from "next-auth/providers/github";

import "dotenv/config";

export default NextAuth({
  adapter: UpstashRedisAdapter(
    new Redis({
      url: process.env.UPSTASH_REDIS_URL,
      token: process.env.UPSTASH_REDIS_TOKEN,
    }),
  ),
  providers: [
    GithubProvider({
      clientId: process.env.GITHUB_ID,
      clientSecret: process.env.GITHUB_SECRET,
    }),
  ],
});
The UpstashRedisAdapter wraps the upstashRedisClient, and you supply it with the Upstash credentials from the environment variables. In this example, they will be loaded via the dotenv package from a .env file in our application root directory. The same goes for the GitHub provider.
Setting up the Environment Variables
To set up the environment variables, you have to create a .env file with the following content:
    UPSTASH_REDIS_URL=
    UPSTASH_REDIS_TOKEN=
    GITHUB_ID=
    GITHUB_SECRET=
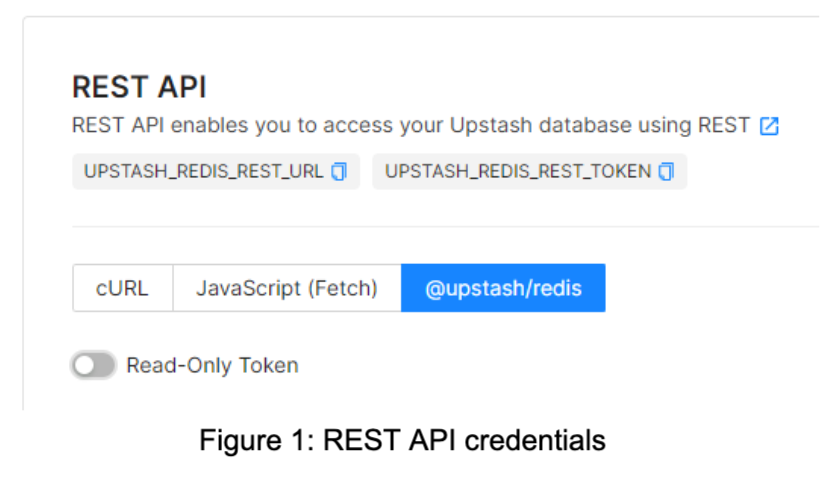
You get the Upstash credentials from the Upstash console. Log in to the console, create a database and click on it in the overview. Figure 1 shows the place in the console that contains the credentials you need.
You get the GitHub provider credentials when registering a new OAuth Application for your GitHub account. Figure 2 shows the registration form. To run the example on your local machine, you should use http://localhost:3000 as URLs.

After registering your app, you are presented with the Client ID and can generate the secret by clicking on the “generate new client secret” button.
After you set up the services, you also want to supply your app components with the session data NextAuth fetches.
For this, create a new file at pages/_app.js with the following content:
import { SessionProvider } from "next-auth/react";

export default function App({
  Component,
  pageProps: { session, ...pageProps },
}) {
  return (
    <SessionProvider session={session}>
      <Component {...pageProps} />
    </SessionProvider>
  );
}
This code will provide all components in your Next.js app with the session data so you can check if the current user is logged in.
To check if everything works, you also need to update the index page at page/index.js with this code:
import { signIn, signOut, useSession } from "next-auth/react";

export default function Home() {
  const { data: session } = useSession();
  if (session) {
    const { email, image, name } = session.user;
    return (
      <>
        <img src={image} width="150" /> <br />
        Signed in as {name} ({email}) <br />
        <button onClick={signOut}>Sign out</button>
      </>
    );
  }
  return <button onClick={signIn}>Sign in</button>;
}
If a session exists, it will display the current user’s profile image, name, and email address. If not, it only shows a sign-in button that will automatically redirect the user to a login page.
Testing the Application
To test the whole setup, you have to run the following command:
$ npm run dev
This command will start an HTTP server at port 3000 that you have to open in a browser. If everything goes well, you will be presented with a sign-in button. Click this button and allow the app to connect to your GitHub account.
If the signup succeeded, you would be redirected to the index page and see your GitHub account information.
Using Multiple Applications with one Redis Database
Upstash offers one free Redis database for every account. You can use this database for multiple disconnected applications, with a prefix that will be added to all the keys written into the storage.
To set this up, you have to change the code inside pages/api/auth/[...nextauth].js. The adapter factory function takes a second argument besides the Upstash Redis client.
UpstashRedisAdapter(
  new Redis({
    url: process.env.UPSTASH_REDIS_URL,
    token: process.env.UPSTASH_REDIS_TOKEN,
  }),
  { baseKeyPrefix: "app-specific-prefix-1:" },
);
This way, you can ensure that users of multiple apps don’t collide in your database.
Conclusion
NextAuth is a handy library for setting up authentication for your applications without hassle. The same ease of use is what you can expect from Upstash Redis, a simple Redis database hosting service. With the new NextAuth database adapter for Upstash Redis, these create a powerful synergy that lets you churn out new applications in no time!
Upstash Redis is a serverless database; you only pay for what you use, so you can test and iterate on multiple MVPs without worrying about an enormous bill for an app that doesn’t even have users.