Add Rate Limiting to Your n8n Workflow with Upstash Redis

n8n is a powerful workflow automation tool that lets you connect different services and automate complex processes.
But what happens when your workflows start receiving too many requests? Without proper rate limiting, you could overwhelm your APIs, hit external service limits, or even crash your workflows.
In this post, we'll show you how to add robust rate limiting to your n8n workflows using Upstash Redis.
Simple, effective, and extensible to meet your needs.
The Challenge: Protecting n8n Workflows
When building n8n workflows that handle external requests (like webhooks or API endpoints), you need to consider:
- API Abuse Prevention: Stop malicious users from overwhelming your workflow
- External Service Protection: Respect rate limits of third-party APIs
- Resource Management: Prevent your workflow from consuming too many resources
- Cost Control: Avoid unexpected charges from excessive API calls
Thanks to Upstash Redis and n8n, you can implement a rate‑limiting system with just a few nodes. You'll also benefit from all the advantages of Upstash Redis (see docs).
Getting Started with Upstash Redis in n8n
Before we dive into the implementation, connect your Upstash Redis account to the Redis node in n8n. We'll use this setup throughout this guide. (see n8n with Upstash Redis)
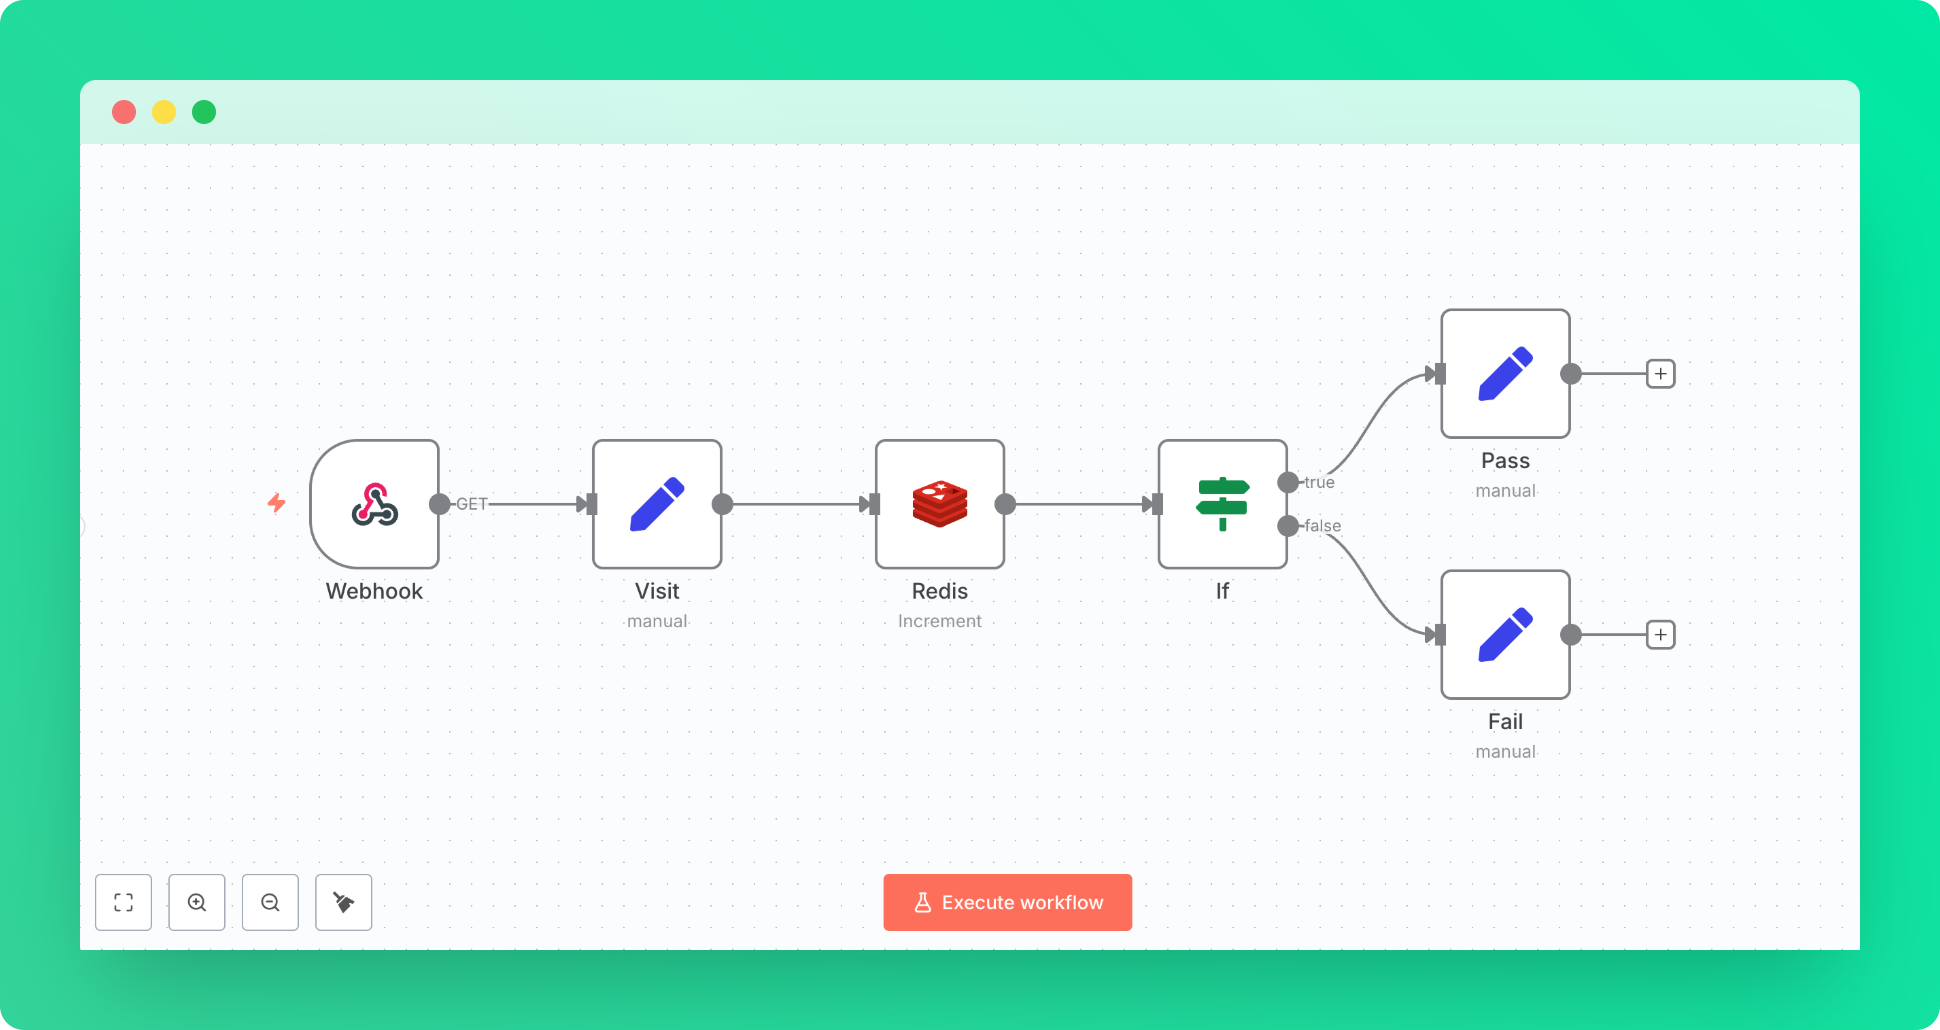
Building the Rate Limiting Workflow
Let's start with the implementation, going through the nodes one by one.
Yes, it's as simple as that:
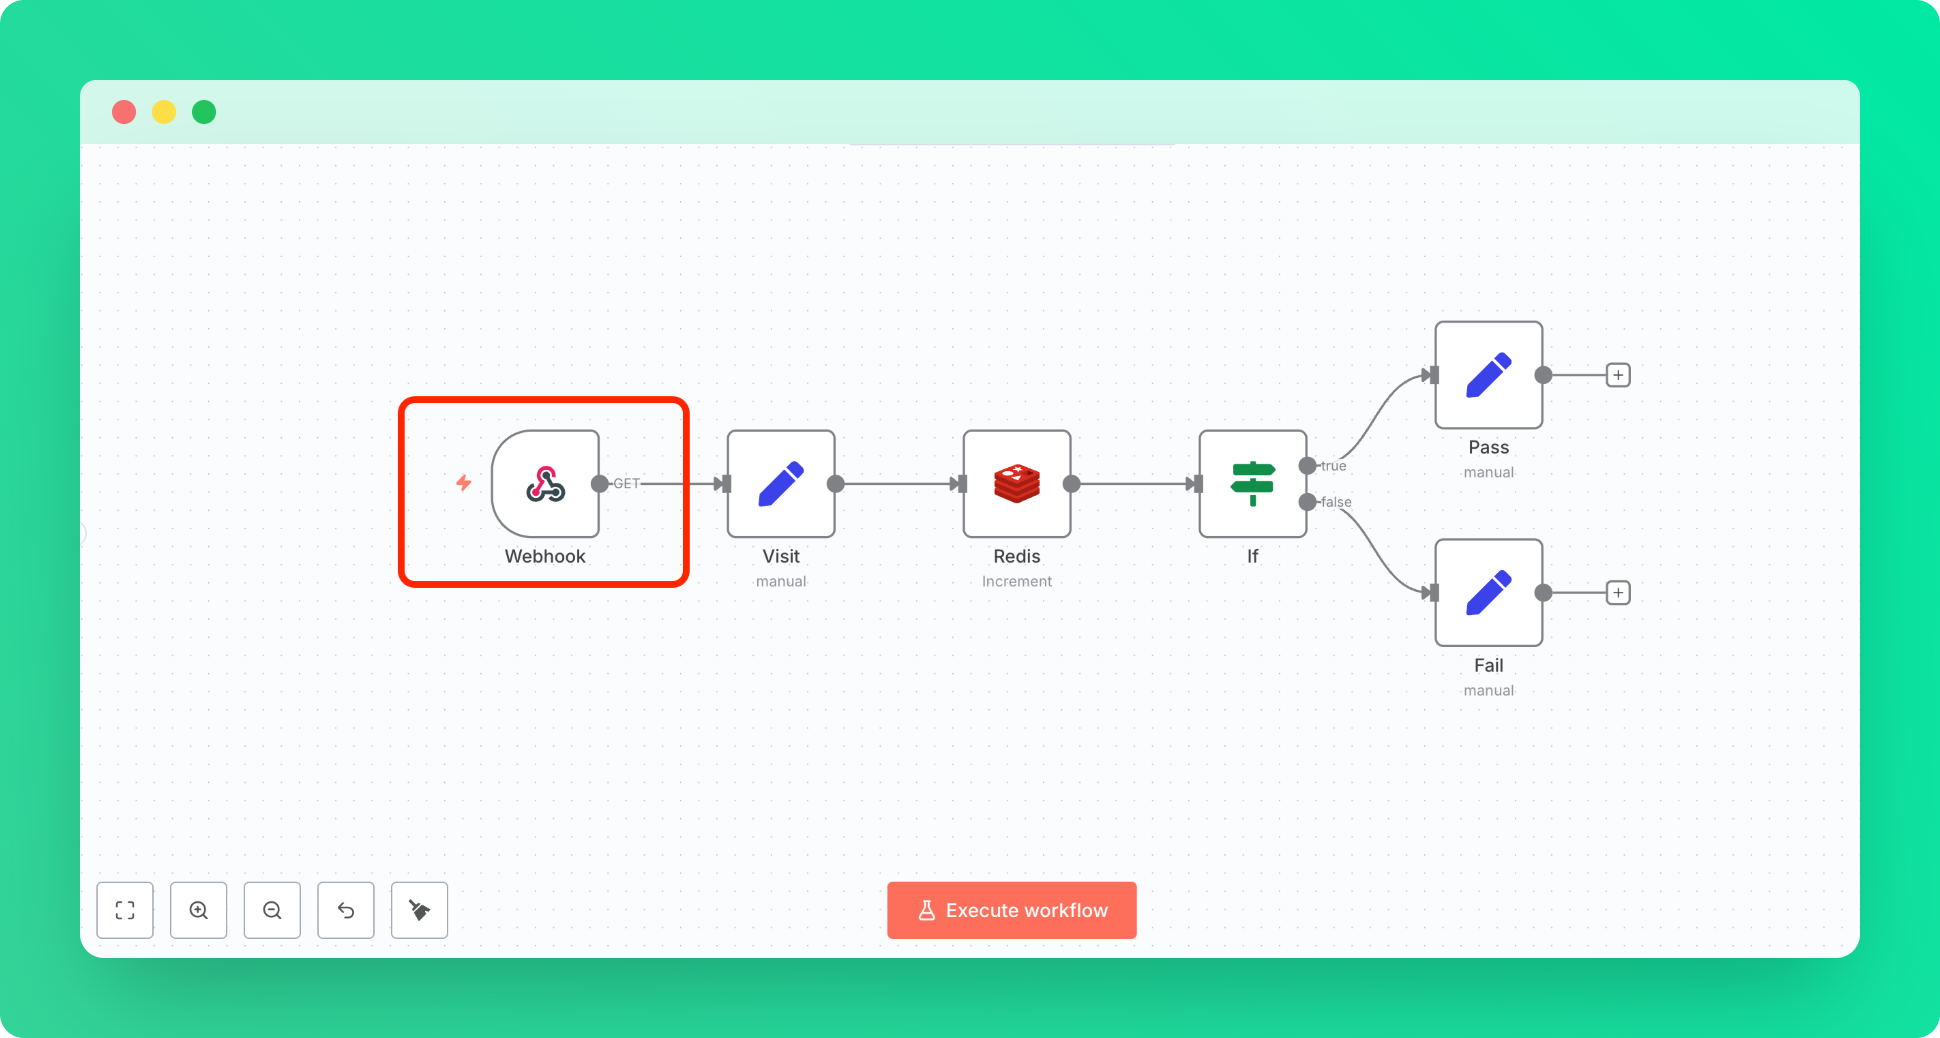
Step 1: Webhook Trigger
Start with a basic Webhook node. This will be our mock entry point for the incoming requests.
Set it up with the default settings; we'll use it for testing:
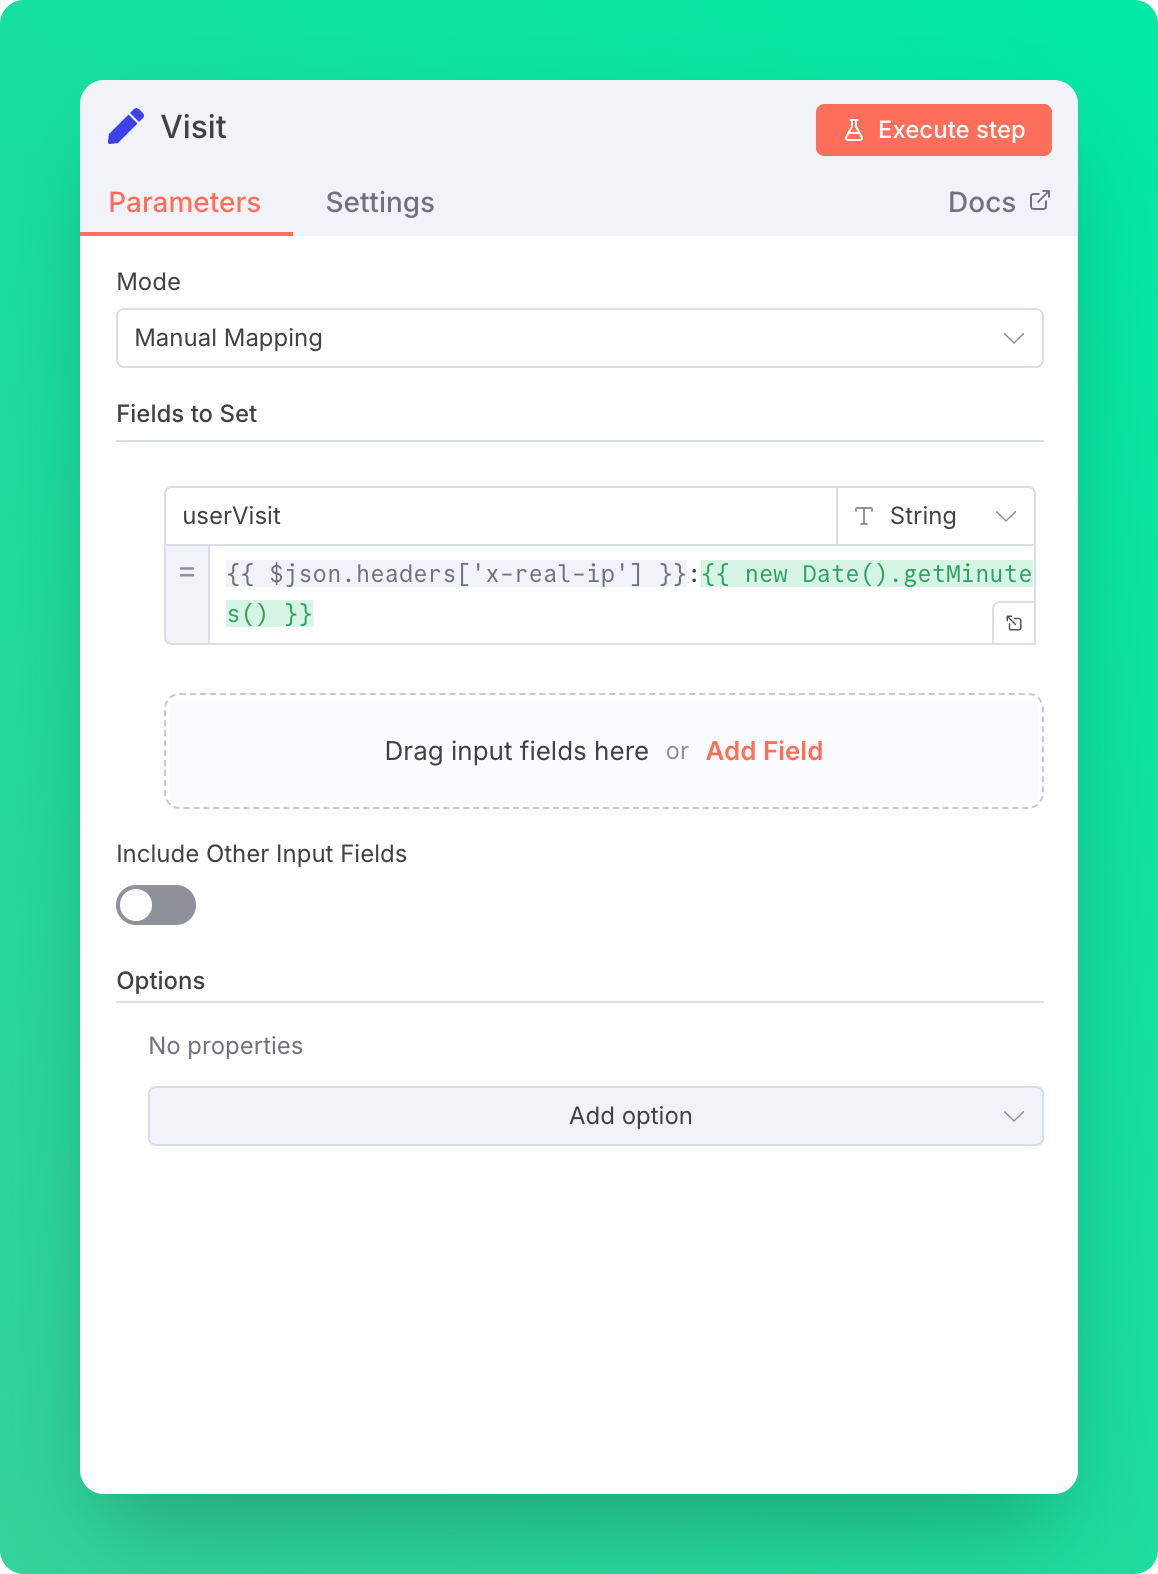
Step 2: Visit Node
Now, create an Edit Field node. This node stores the Redis key name in the format USER_IP:REQUEST_MINUTE. You can modify the format to meet your needs. In our example, we're using IP‑based rate limiting, and the rate limit applies per minute.
Step 3: Redis Node with Increment Action
Create a Redis node connected to Upstash Redis as mentioned above. Here we use the field we set in the previous step as the Redis key. With the Increment action, this key is created on the first request and incremented by one on subsequent requests.
Set TTL to 60 so the key disappears in one minute, freeing up space.

Step 4: If Node with Conditional Response
Add an IF node to handle allowed vs blocked requests. Again, use the field we set at Step 2 as a JSON parameter to fetch the result of Step 3. That result is the count of how many times a user has sent requests to our endpoint. In our example, we allow up to 4 requests and block afterwards till the next minute.

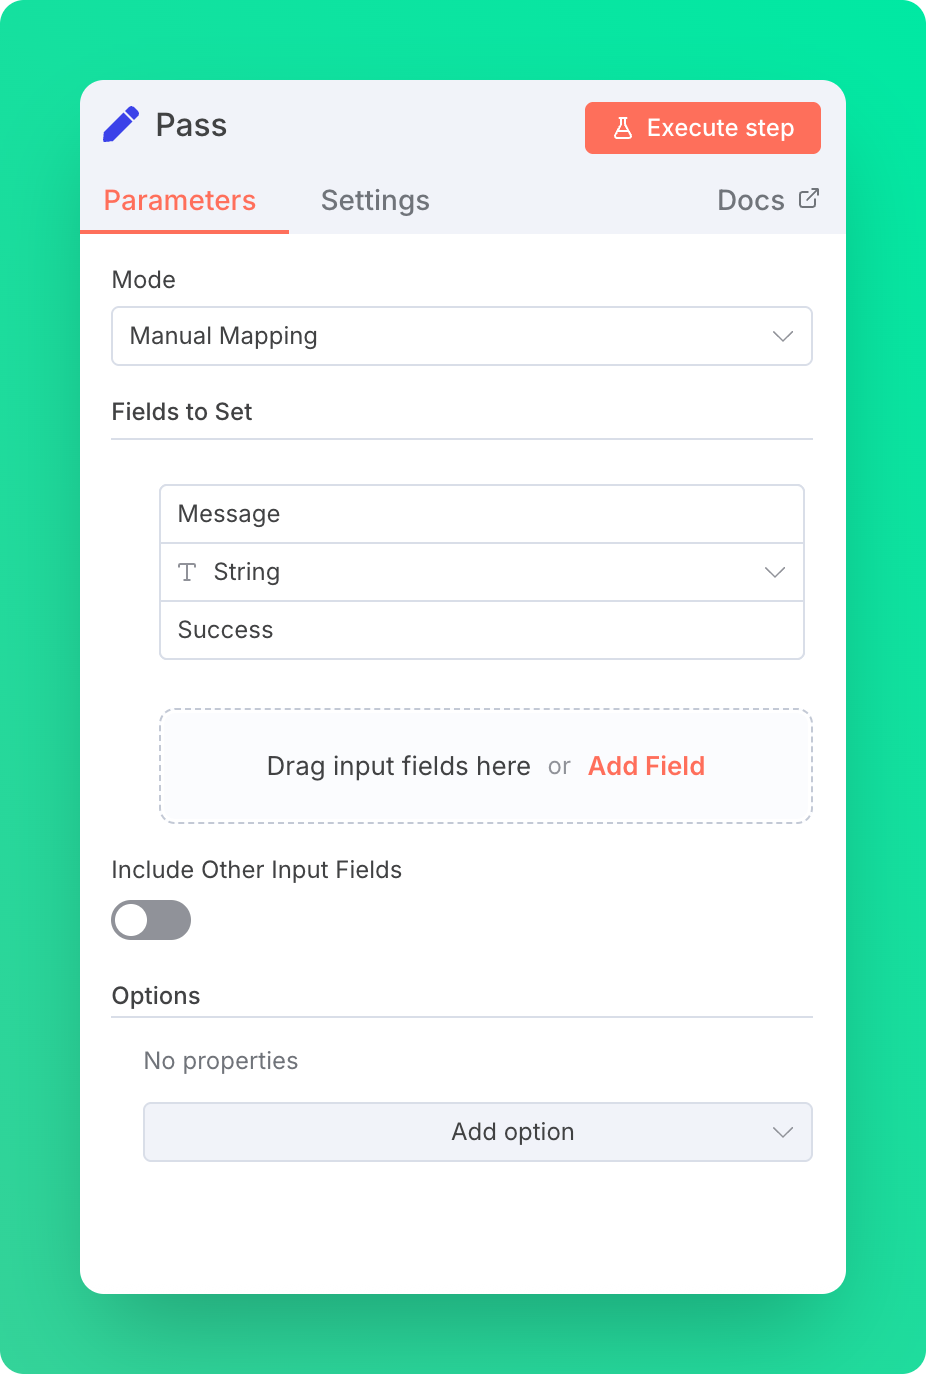
Step 5.1: Success Response
If the rate limit isn't exceeded, you can let the user call your endpoint. Put your actual logic behind this check so that it is neither overwhelmed nor abused.
For testing purposes, we return a simple success message.
Step 5.2: Fail Response
Once the limit is exceeded, requests are blocked.
For testing purposes, we return a simple failure message.

Test the Workflow
Send GET requests to the URL defined in the webhook.
Within a minute, the first 4 requests follow the pass path, while subsequent requests are blocked and follow the limit path.
That's it — you have successfully implemented rate limiting in n8n!
Customization and Improvements
This basic implementation gives you a solid foundation that can be easily customized and improved based on your specific needs:
Time Window Adjustments
- Hourly limits: Change TTL to 3600 seconds for hourly rate limiting
- Daily limits: Set TTL to 86400 seconds for daily request limits
- Custom windows: Adjust TTL to any duration that fits your use case
Different Limiting Strategies
- User-based limiting: Use user IDs from the
Authorizationheader instead of IP addresses for authenticated requests - API endpoint specific: Different limits for different endpoints based on resource requirements.
- Geographic limiting: Rate limit by country or region using
X-Forwarded-FororCF-IPCountryheaders
Error Handling
- Retry mechanisms: Upstash Redis provides this by default.
- Circuit breaker pattern: Temporarily disable rate limiting if Redis fails
Monitoring and Analytics
- Real-time dashboards: Monitor rate limit hits and violations in the Upstash Console
- Usage patterns: Analyze request patterns to optimize limits
- Alert systems: Set up notifications for unusual traffic spikes
- Performance metrics: Track response times and system health
Conclusion
The beauty of this algorithm is its simplicity and extensibility. You can start with basic IP-based limiting and gradually add sophisticated features like user authentication, tiered limits, and advanced monitoring as your needs evolve.
The n8n workflow automation platform combined with Upstash Redis's powerful capabilities gives you unlimited possibilities to create robust, scalable rate limiting solutions tailored to your specific requirements.
Further Reading
Want to dive deeper into rate limiting and n8n? Check out these resources: