Building Reliable & Type-Safe Webhooks

In this article, I wanna show you how easy it is to add a fully type-safe webhook system to your own app. We have
- automatic retries
- delivery guarantees
- delays
...and much more already built-in with Upstash QStash.
Background
We recently started our open-source program at Upstash.
Basically, we reach out to open-source project leaders and CEOs (or they reach out to us) and we cover all costs for powerful Redis or QStash instances to become core part of their infrastructure.
One of our open-source sponsorships is with Marble, an OSS content management system for technical people:
With QStash, we're now powering core part of their infrastructure: Their webhooks.
Webhooks allow Marble to notify user APIs whenever content changes. For example, when a post is published, updated, or deleted.
"As a startup founder, I need to move quick. Not having to build a custom solution to deliver webhooks, handle retries, etc., for our users saved us a ton of time. We were then able to dedicate that time to other, more important issues.
At my previous company, we had to implement our own messaging solution, which was incredibly high-maintenance. QStash saves us of all that hassle and allows us to develop a more robust messaging solution in less time."
— Dominik Koch, Co-Founder Marble
Building a type-safe webhook client
1. Defining possible webhook events
Webhook systems are always event-driven. One thing happens in your app, so you want to notify another app (the webhook subscriber) about it.
In Stripe for example, some events are:
customer.createdcustomer.updatedcustomer.deletedcharge.createdcharge.updatedcharge.deleted
And so on.
For Marble, we define all possible events in a zod schema:
import { z } from "zod";
const eventSchema = z.object({
// 👇 event name -> expected event data
"post.published": z.object({}),
"post.updated": z.object({}),
"post.deleted": z.object({}),
"category.created": z.object({}),
"category.updated": z.object({}),
"category.deleted": z.object({}),
"tag.created": z.object({}),
"tag.updated": z.object({}),
"tag.deleted": z.object({}),
"media.uploaded": z.object({}),
"media.deleted": z.object({}),
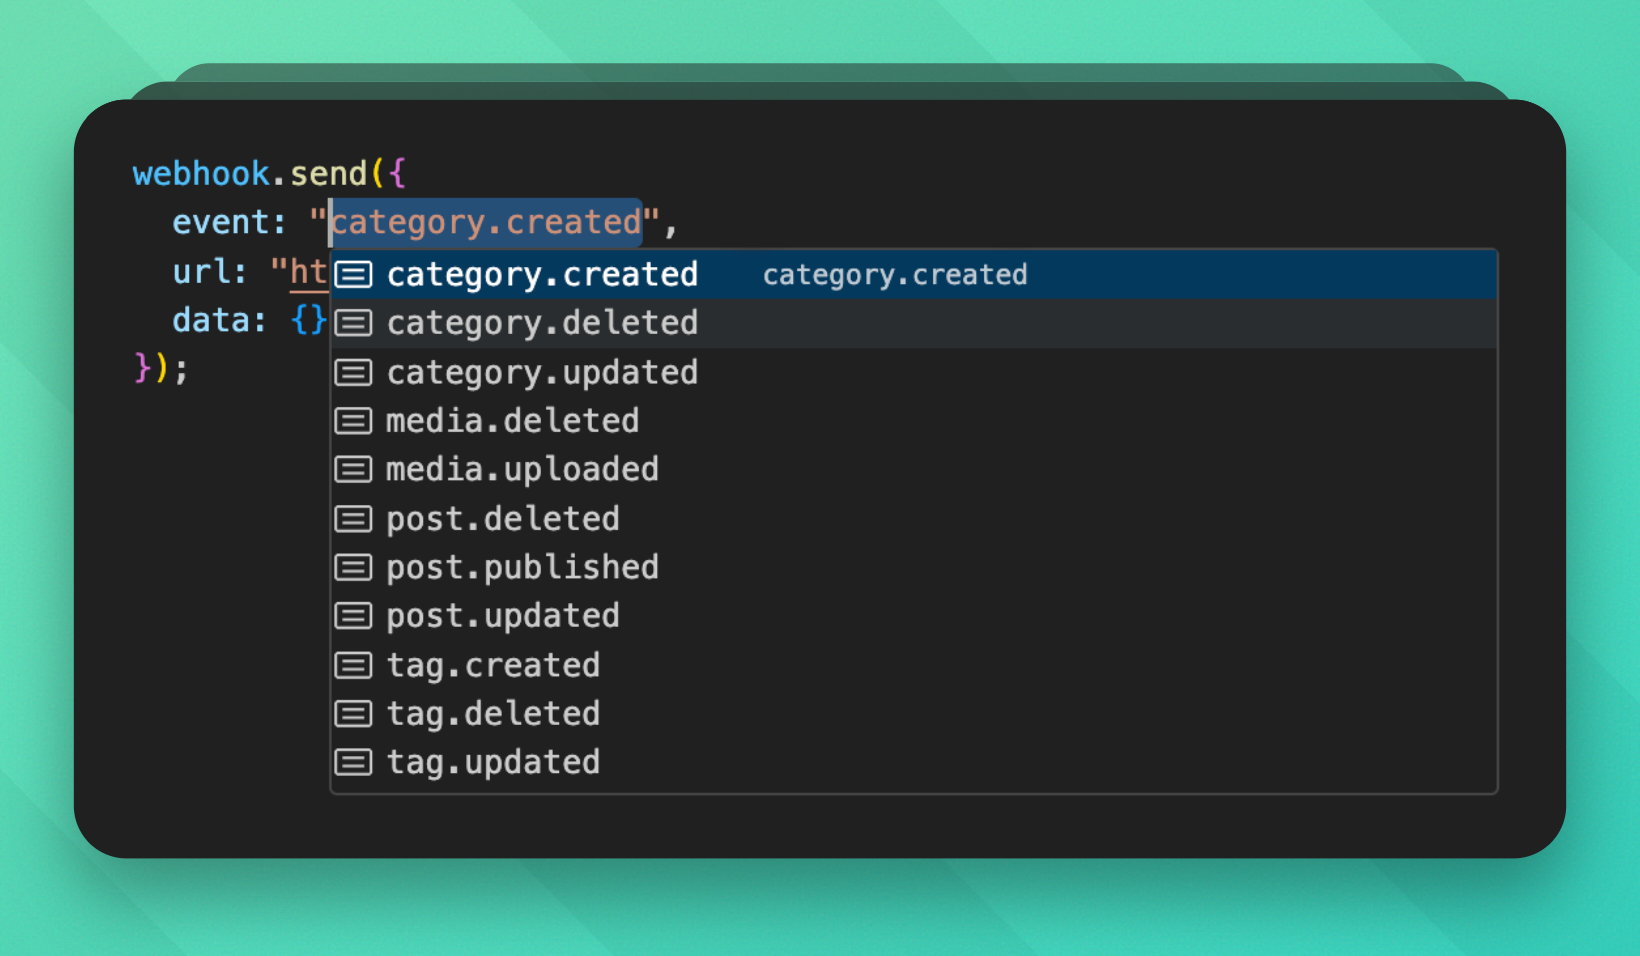
});Defining this as a schema allows us to get full type-safety and autocomplete whenever we trigger a webhook event. This way, we will never forget any data that needs to be sent to the webhook subscriber.
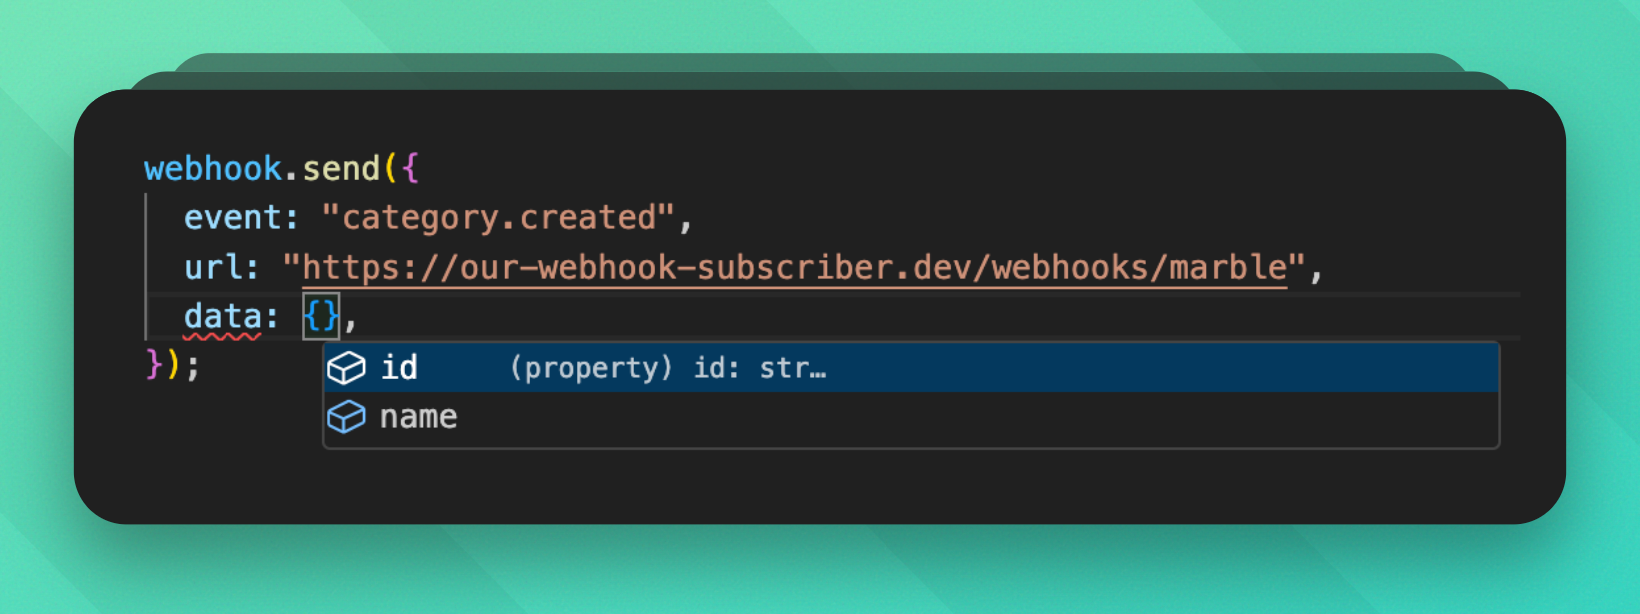
For example, if we always want to send id and name to our webhook subscribers in the category.created event:
import { z } from "zod";

const eventSchema = z.object({
  // ...
  "category.created": z.object({
    id: z.string(),
    name: z.string(),
  }),
  // ...
});
Later on, we'll be alerted if we forget to pass the right data:
2. Basic Webhook Client
Let's create a basic webhook client that can send webhook events to a webhook subscriber. We can already use the zod schema we defined earlier to strongly type the events:
import { z } from "zod";

const eventSchema = z.object({
  "post.published": z.object({
    // 👇 for example
    id: z.string(),
    title: z.string(),
    slug: z.string(),
    publishedAt: z.string(),
  }),
  "post.updated": z.object({}),
  "post.deleted": z.object({}),
  "category.created": z.object({}),
  "category.updated": z.object({}),
  "category.deleted": z.object({}),
  "tag.created": z.object({}),
  "tag.updated": z.object({}),
  "tag.deleted": z.object({}),
  "media.uploaded": z.object({}),
  "media.deleted": z.object({}),
});

type WebhookEvent = z.infer<typeof eventSchema>;

export class WebhookClient {
  private secret: string;

  constructor({ secret }: { secret: string }) {
    // 👇 we'll need this later to sign our webhooks
    this.secret = secret;
  }

  async send<K extends keyof WebhookEvent>(args: {
    url: string;
    event: K;
    data: WebhookEvent[K];
  }) {}
}
As you can see, we now get full type-safety when triggering a webhook event:
Of course, the sending doesn't actually work yet. We need to implement the send method.
3. Implementing the Webhook Client
Let's implement the send method. Now is the time we'll use QStash.
In a separate file, we'll create a QStash client:
import { QStash } from "@upstash/qstash";

export const qstash = new QStash({
  token: process.env.QSTASH_TOKEN,
});
We'll use the qstash.publish method to send the webhook event to the webhook subscriber. With QStash, we already have retries on failure, delivery guarantees, delays and much more built-in.
Our webhook client now looks like this:
import { createHmac } from "crypto";
import { qstash } from "@/lib/qstash";
import { z } from "zod";

const eventSchema = z.object({
  "post.published": z.object({}),
  "post.updated": z.object({}),
  "post.deleted": z.object({}),
  "category.created": z.object({}),
  "category.updated": z.object({}),
  "category.deleted": z.object({}),
  "tag.created": z.object({}),
  "tag.updated": z.object({}),
  "tag.deleted": z.object({}),
  "media.uploaded": z.object({}),
  "media.deleted": z.object({}),
});

type WebhookEvent = z.infer<typeof eventSchema>;

export class WebhookClient {
  private secret: string;

  constructor({ secret }: { secret: string }) {
    this.secret = secret;
  }

  private sign(payload: string): string {
    return createHmac("sha256", this.secret).update(payload).digest("hex");
  }

  async send<K extends keyof WebhookEvent>(args: {
    url: string;
    event: K;
    data: WebhookEvent[K];
  }) {
    const { url, event, data } = args;

    const body = { event, data };
    const payload = JSON.stringify(body);

    const signature = this.sign(payload);

    await qstash.publishJSON({
      url,
      body,
      headers: {
        "x-marble-signature": `sha256=${signature}`,
      },
    });
  }
}
As you can see, we're now making use of the secret we passed to the constructor. This secret is used to sign the payload and is given to the webhook subscriber (Marble users).
In their own webhook endpoint, they will be able to verify that this request actually came from Marble (and not from a potential attacker) by verifying the signature.
4. Verifying the signature
Your users (or in this case, Marble users) can verify that the webhook is actually coming from you:
import { createHmac, timingSafeEqual } from "node:crypto";

export const POST = async (req: Request) => {
  const raw = await req.text();
  const signature = req.headers.get("x-marble-signature");

  const expected = signature?.replace(/^sha256=/, "");

  const computed = createHmac(
    "sha256",
    process.env.MARBLE_WEBHOOK_SECRET as string,
  )
    .update(raw)
    .digest("hex");

  const isValid = verifySignature(expected, computed);

  if (!isValid) {
    // ...
  }
};

function verifySignature(expected?: string, computed?: string): boolean {
  if (!expected || !computed) return false;

  const expectedBuffer = Buffer.from(expected, "hex");
  const computedBuffer = Buffer.from(computed, "hex");

  if (expectedBuffer.length !== computedBuffer.length) {
    return false;
  }

  return timingSafeEqual(expectedBuffer, computedBuffer);
}
And that's it! 🎉
If both signatures match, users know the webhook is valid and can take action in their API route.
Final Words
This is a super solid foundation to build your own webhook system. Here's a quick summary:
Cryptography:
- We use HMAC-SHA256 for signatures (industry standard)
- We use timingSafeEqual() to prevent timing attacks
- We sign the entire payload
Type Safety:
- Zod schema validation for runtime type checking
- Strong TypeScript typing (because it makes for a great DX)
Infra Benefits:
- QStash provides built-in retry logic and delivery guarantees
- We offload the complexity of reliable message delivery
If we wanted to get more advanced, we could even add timestamp verification:
// in the signature generation
const timestamp = Math.floor(Date.now() / 1000);
const payload = `${timestamp}.${JSON.stringify(body)}`;

// in verification
const [timestamp, ...rest] = raw.split(".");
const age = Math.abs(Date.now() / 1000 - parseInt(timestamp));

if (age > 300) {
  // e.g. 5 minutes tolerance
  throw new Error("Webhook already expired");
}
Cheers for reading! If you have any feedback or would like to be a guest author on Upstash, let me know at josh@upstash.com 🙌