Model Context Protocol (MCP): Build Your Own in 5 Minutes

Model Context Protocol (MCP) Clearly Explained
The Model Context Protocol (MCP for short) is a standardized protocol to connect AI to external APIs, live data and more. It was introduced by Anthropic in late 2024.
Think of an MCP server as a tool (e.g., for retrieving weather data, translating text, interacting with APIs) that an AI agent can call autonomously when it finds the tool useful for its current task.
For example, our Upstash MCP allows Cursor to interact with your databases - something regular Claude would never be able to do on its own. Simple natural language commands like "put XYZ in my Redis database" become possible because the MCP translates these requests into actual database operations.
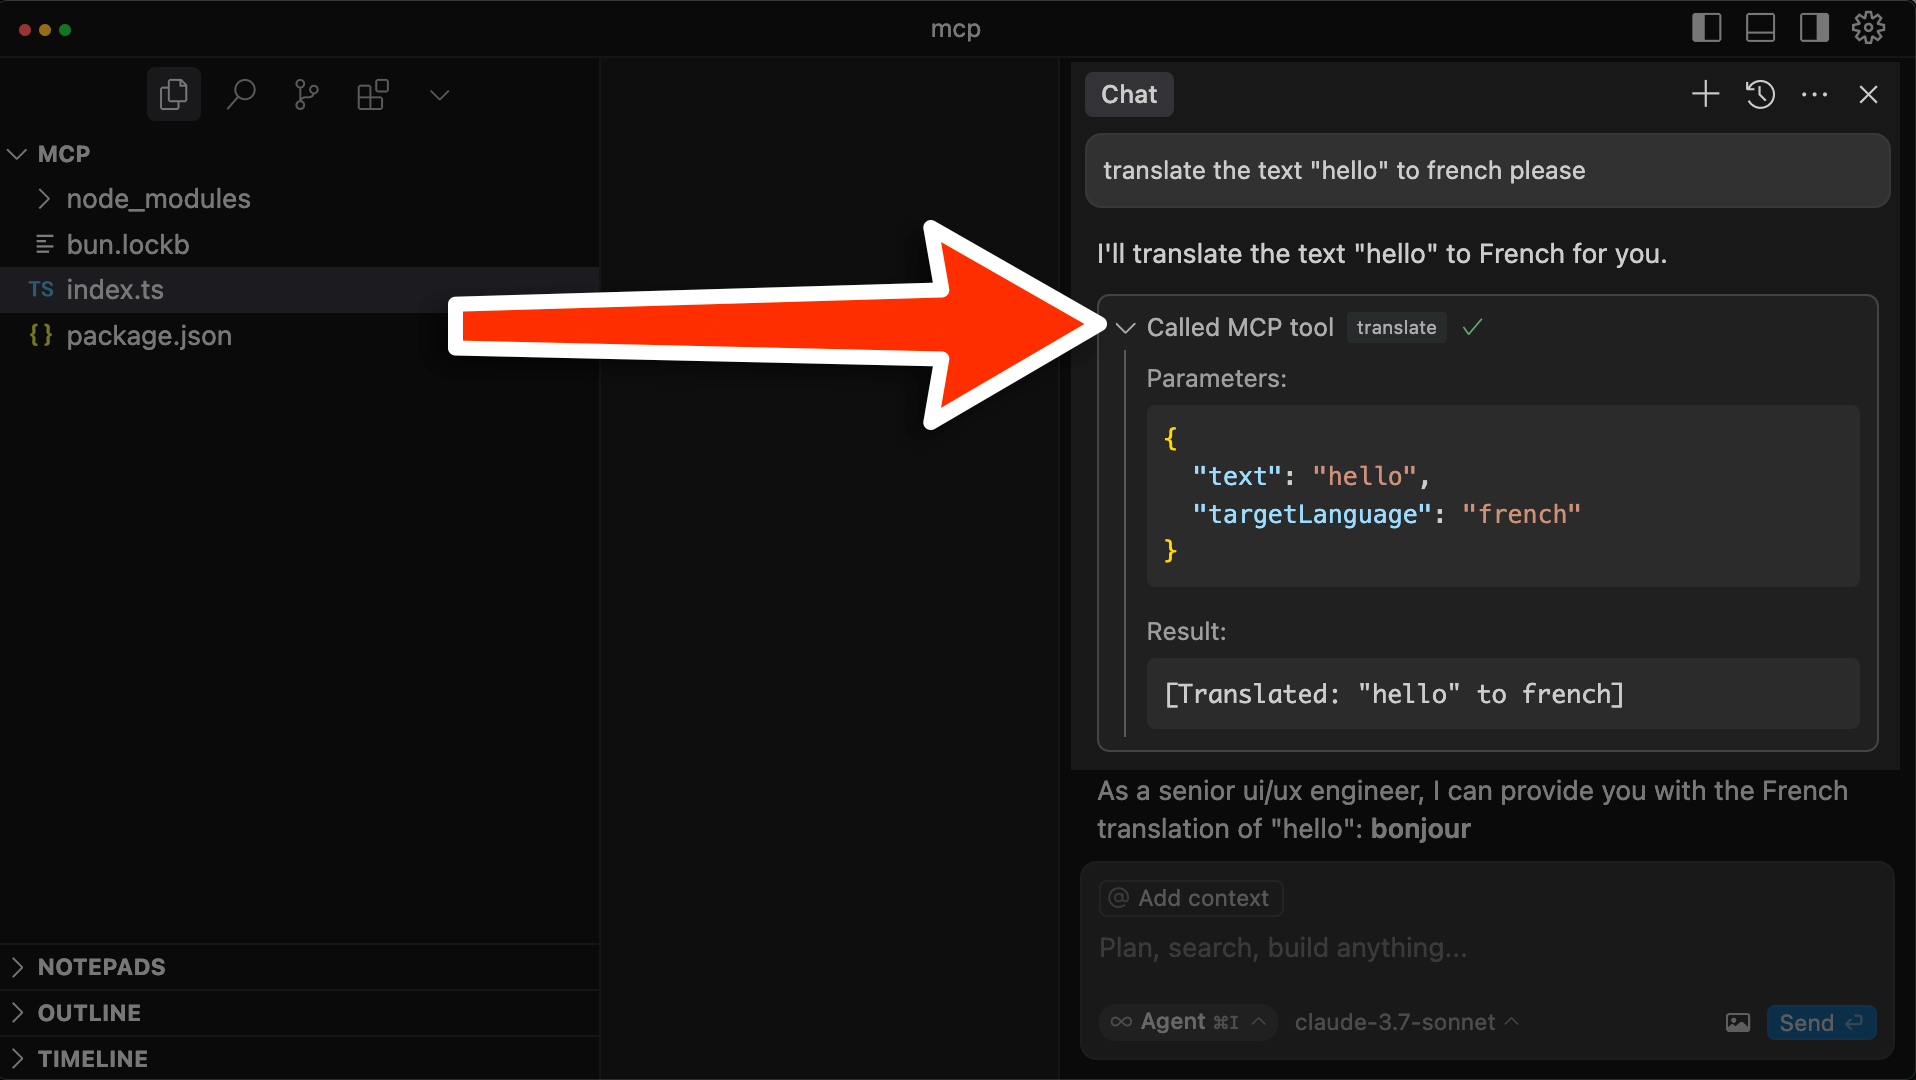
Model Context Protocol (MCP) Example
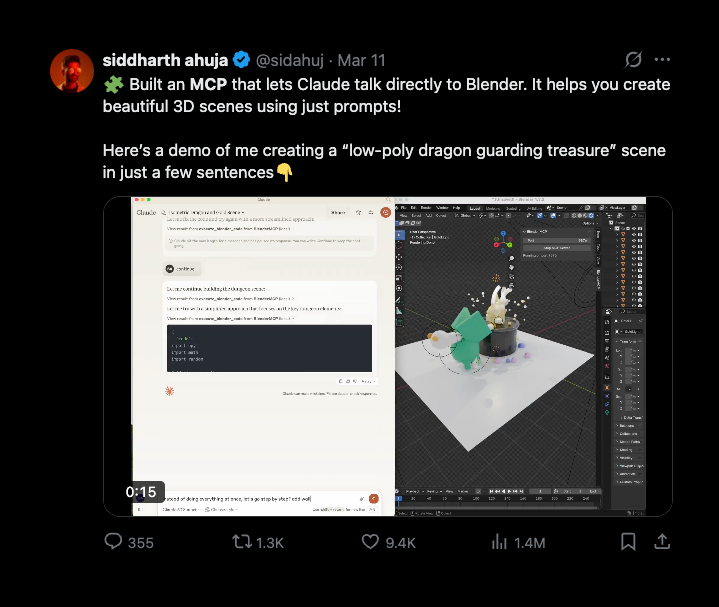
Since the release of MCP, people have been coming up with creative use cases left and right. These are by no means limited to Cursor and coding: Complex animation scenes in Blender that would take hours to create on your own? Just give Claude access to Blender via MCP:
To me, the Model Context Protocol feels like the next step after giving AI access to the Internet. In a metaphorical sense, if Internet access is analogous to giving an AI arms and hands (to make it actually do things), MCP is like giving it legs to walk.
By the way, building MCP servers is not limited to select companies or people. Anyone can create, host or even build a SaaS around their own MCP - let's see how.
How to Build a Basic MCP Server
Let's look at a very simple MCP example. Let's say you want to build a translation MCP to let Cursor translate text with our tool. All you need is a server to serve this MCP from and a tool to do what you want:
import { McpServer } from "@modelcontextprotocol/sdk/server/mcp.js";
import { z } from "zod";

const server = new McpServer({
  name: "Translation Service",
  version: "1.0.0",
});

server.tool(
  "translate",
  {
    text: z.string(),
    targetLanguage: z.enum(["spanish", "french", "german"]),
  },
  async ({ text, targetLanguage }) => {
    // 👉 Here, you'd make an API call to a translation service
    const translatedText = `[Translated: "${text}" to ${targetLanguage}]`;

    return {
      content: [{ type: "text", text: translatedText }],
    };
  },
);
The code above demonstrates the basic principles of the Model Context Protocol (MCP). We're creating a translation service that Claude can interact with programmatically.
We define a tool called translate with a Zod schema that specifies what parameters it accepts:
textas a stringtargetLanguageas a string (limited to Spanish, French, or German).
When an AI assistant calls this tool, it passes the required parameters enforced by Zod (an open-source schema validation library), and our function processes them. In a production environment, you'd replace the placeholder translation with an actual API call to a service like DeepL or Google Translate.
The response format of content: [{ type: "text", text: translatedText }], follows the MCP tool specification and returns a structure that Claude can use for its responses. This standardized approach allows any MCP-compliant AI use your tool without any custom integration work.
The same pattern works for any type of tool - from translation to data analysis, image generation, or even controlling smart home devices.
Running Our MCP Server and Testing with Cursor
Now, to start our MCP server, we are going to use a transport:
import { McpServer } from "@modelcontextprotocol/sdk/server/mcp.js";
import { StdioServerTransport } from "@modelcontextprotocol/sdk/server/stdio.js";
import { z } from "zod";

const server = new McpServer({
  name: "Translation Service",
  version: "1.0.0",
});

server.tool(/* ... */);

const transport = new StdioServerTransport();
server.connect(transport);
Just like that, we created our own MCP server! 🎉
We can test our new MCP locally by copying the path to the index.ts file and connecting it to Cursor. Cursor allows you to add MCP servers to improve its 'Agent' mode.
- In Cursor, right-click on
index.ts > Copy Path. We'll need this later. - To add an MCP server to Cursor, go to
Cursor Settings > Features > MCPand click+ Add New MCP Server.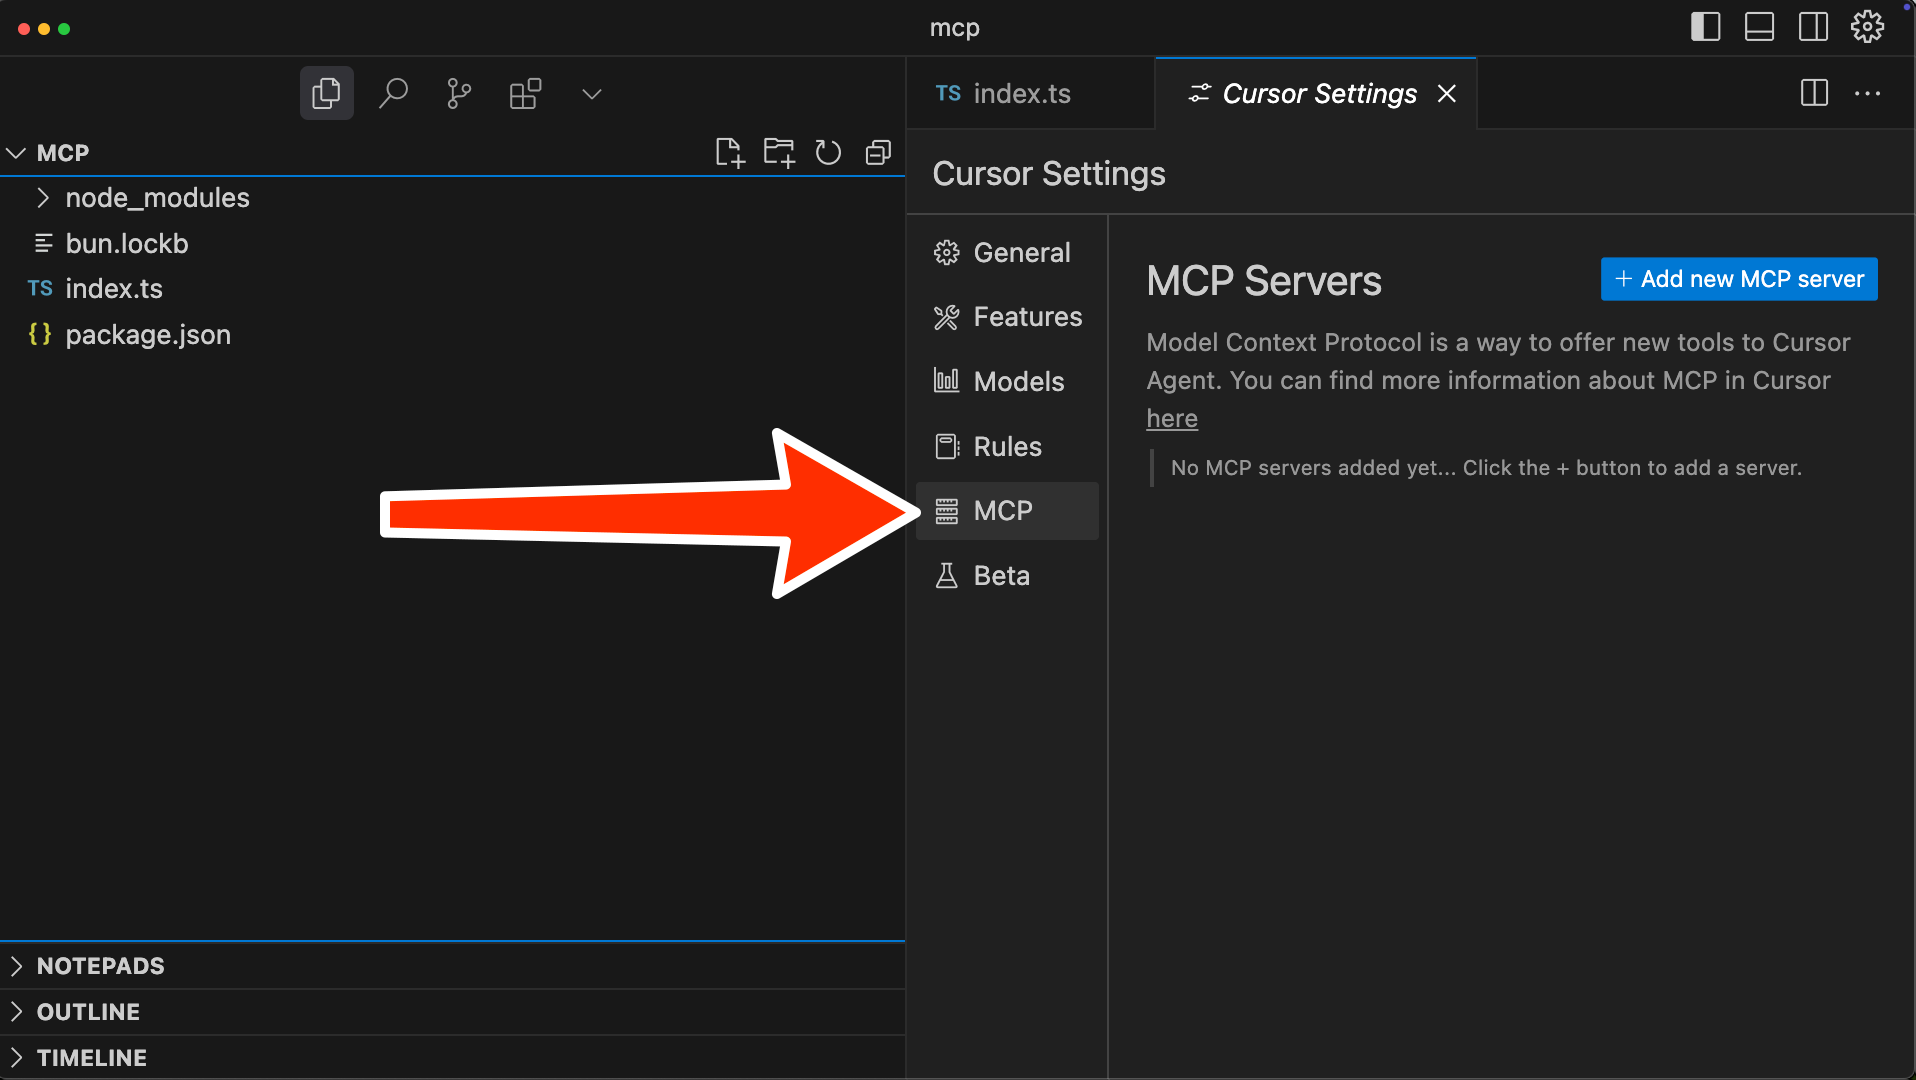
- Leave
typeascommand. - Give the server a name, for example
Translation. - Enter the command to run our translation tool:
npx tsx <path-to-file>.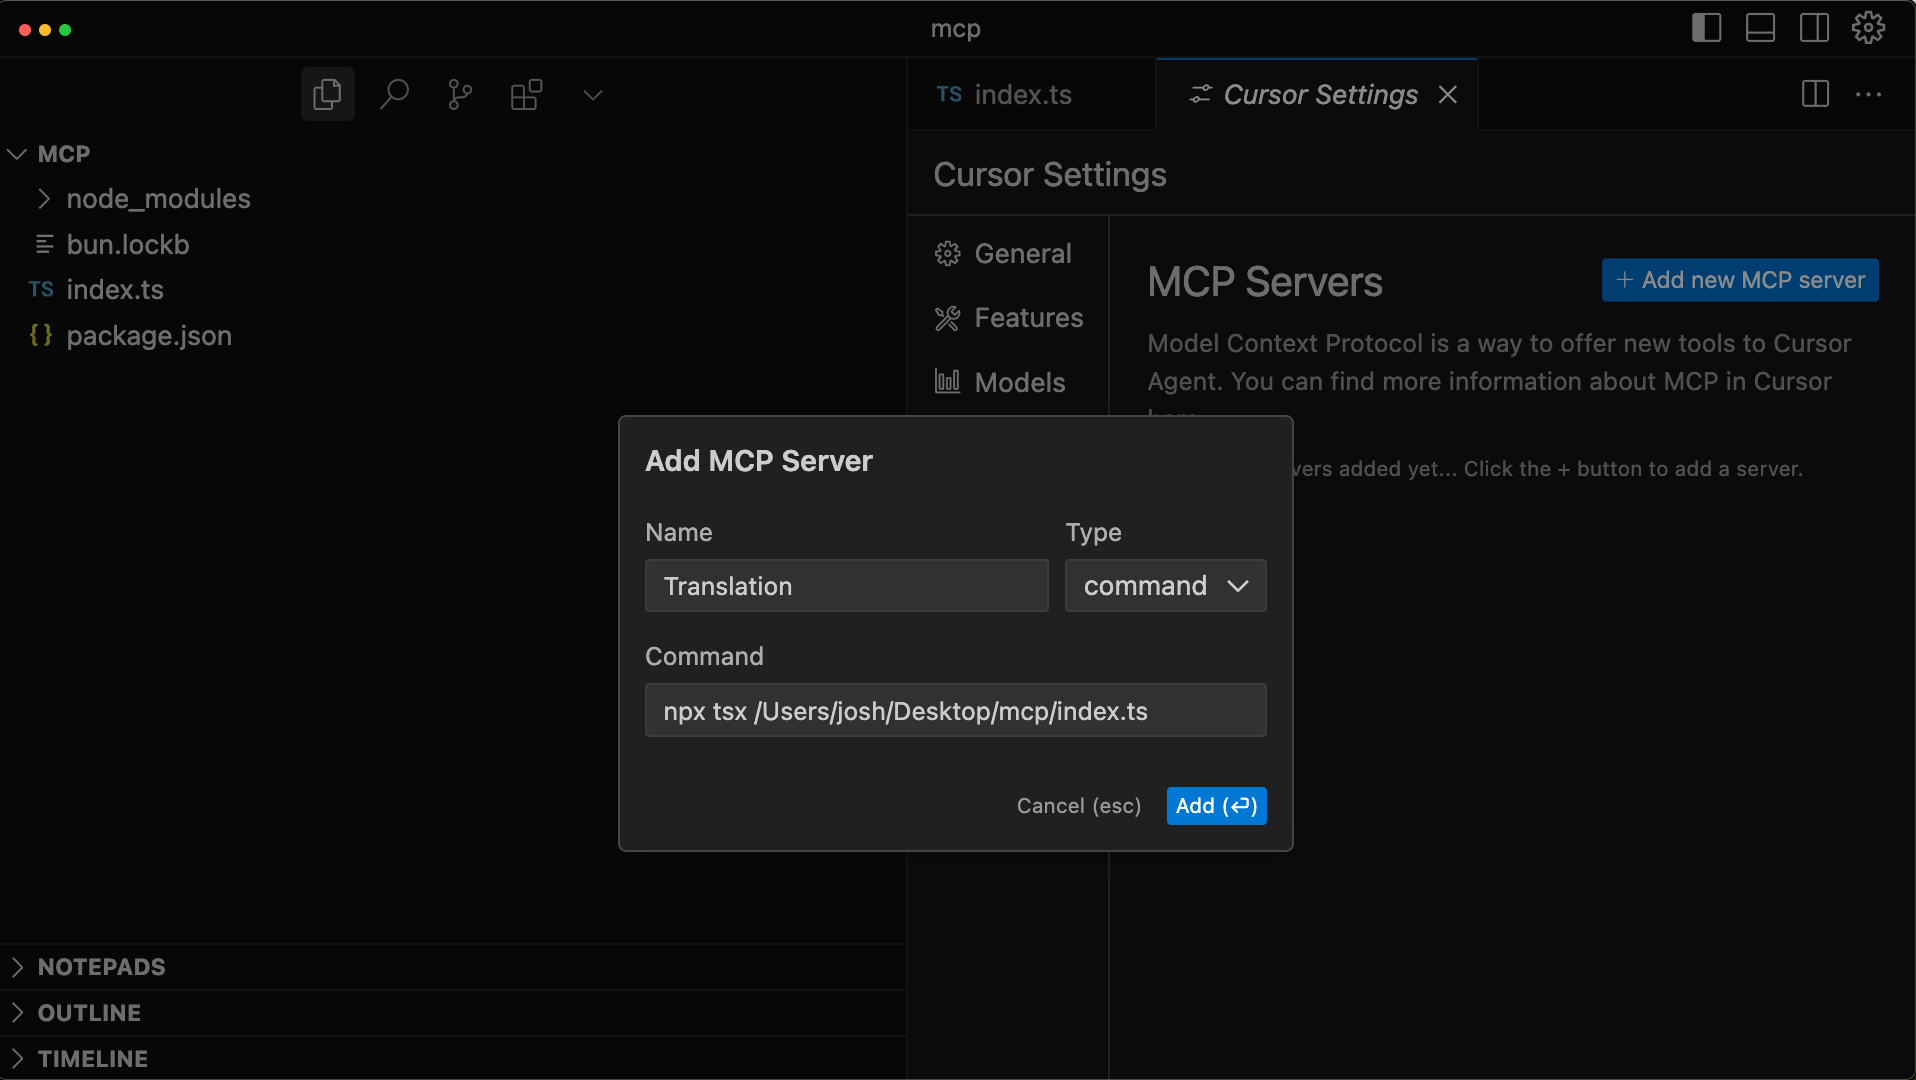
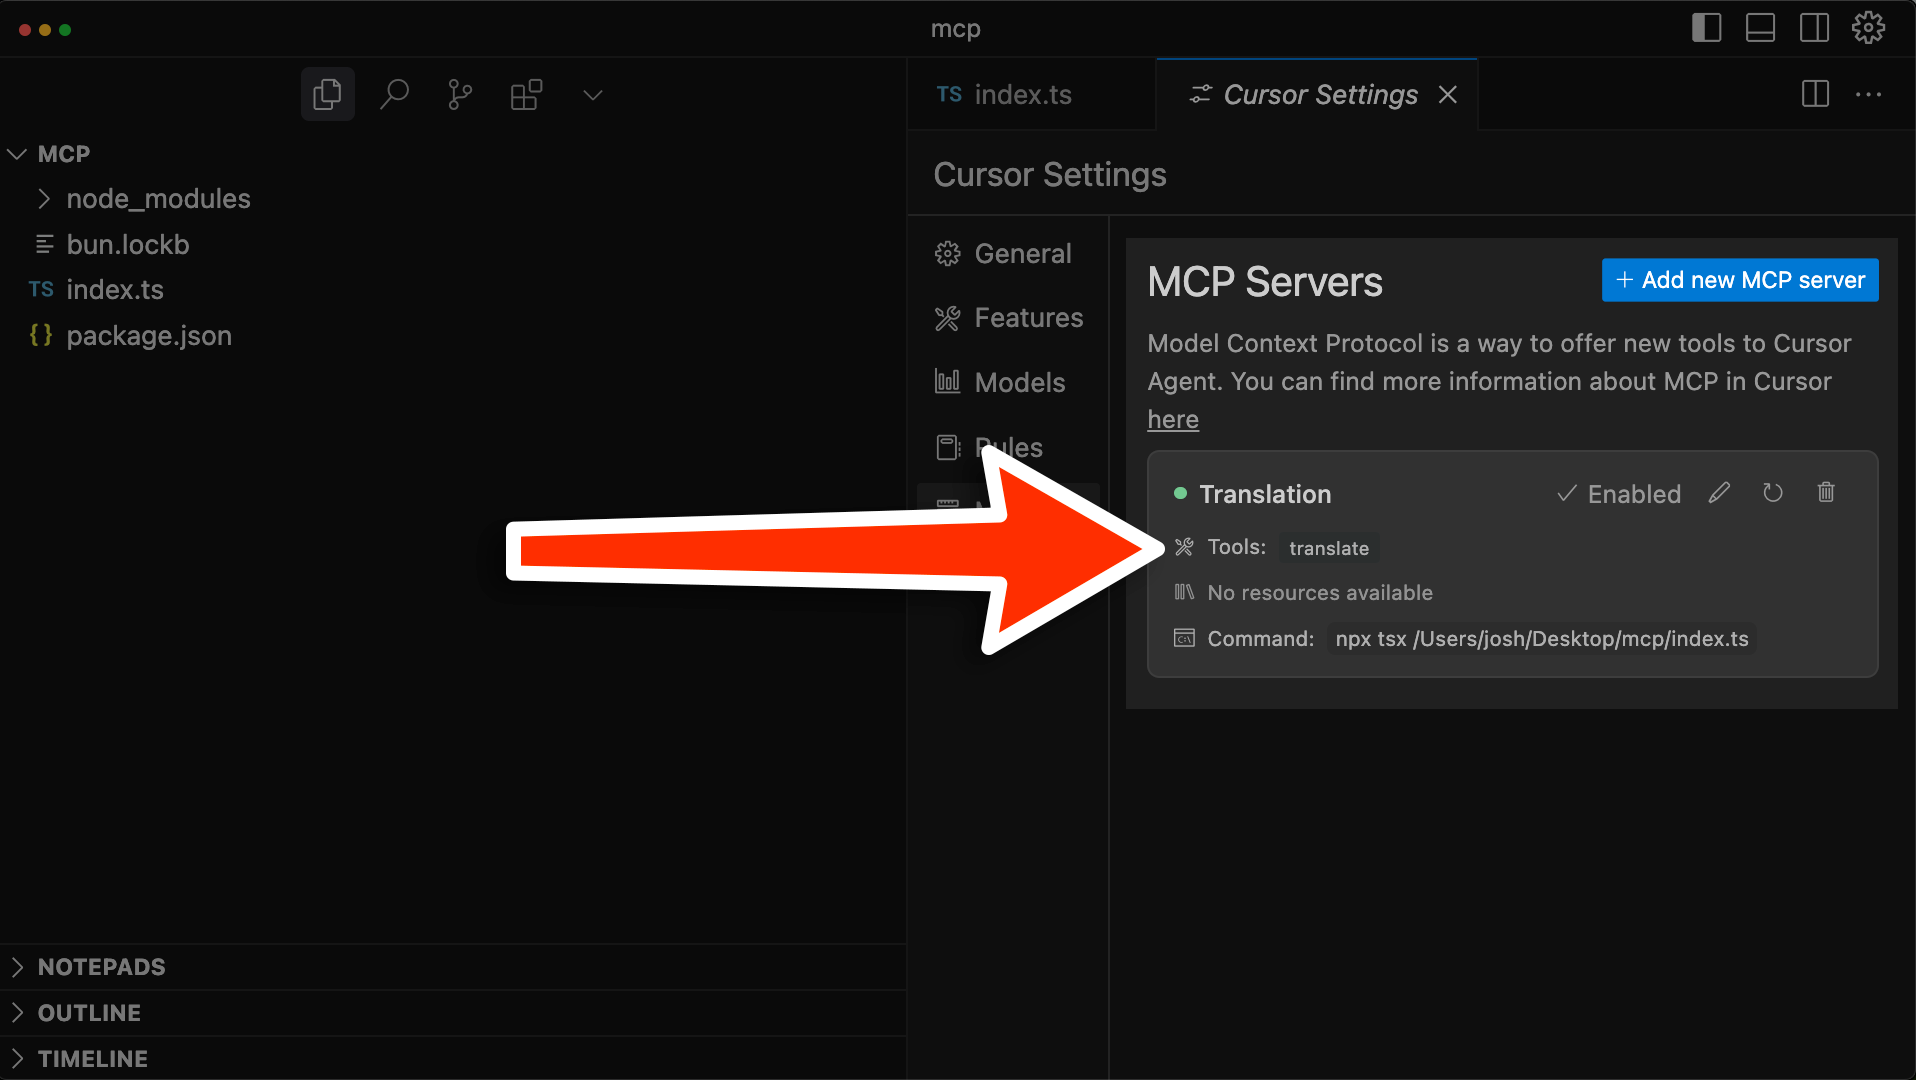
Cursor now recognizes our MCP server and all available tools. For us, this is the translate tool we created.
To try it out, open the Agentic Chat. Cursor now knows about our tool and will automatically use it for translation tasks.
Note: In this example, our tool is not actually translating, but mocking a translation. Claude responds with the actual translation.
Other MCP Use Cases
While writing this article, I came up with a few ideas to build MCP servers around. Some of these might even make sense to monetize as standalone services:
- An MCP code screenshot tool
- An MCP tool to check generations for best practices, vulnerabilities and bugs
- An MCP test generator
You can probably come up with your own ideas, too. After all, MCP just feels like building APIs for LLMs.
The Upstash MCP
We provide our own open source Upstash MCP to use natural language to interact with your Upstash account, e.g:
- "Create a new Redis database in us-east-1"
- "List my databases"
- "Show all keys starting with "user:" in my users-db"
- "Create a backup"
- "Show me the throughput spikes for the last 7 days"
Simply paste the following command into the Cursor's Add MCP Server:
npx -y @upstash/mcp-server run <UPSTASH_EMAIL> <UPSTASH_API_KEY>Setup takes 60 seconds or less, read more here: https://github.com/upstash/mcp-server
Cheers for reading! If you have any feedback or would like to be a guest author on Upstash, drop me a line at josh@upstash.com 🙌