Introduction
In this guide, we'll explore how to implement caching in your Strapi application using Upstash Redis. This will significantly improve your app's performance by reducing response times for frequently accessed data.
Getting Started
Creating the Strapi Application
First, we need to initialize a new Strapi application. Run the following command:
npx create-strapi-app@latest school --quickstart --typescriptThis command will prompt you to authenticate yourself. After authentication, the dependencies will automatically be installed, and the project will run on your local machine. You'll then be prompted to create an admin account for your app.

Great! The basic application is ready! Let's move on to creating content types and adding data to our database.
Creating a Content Type
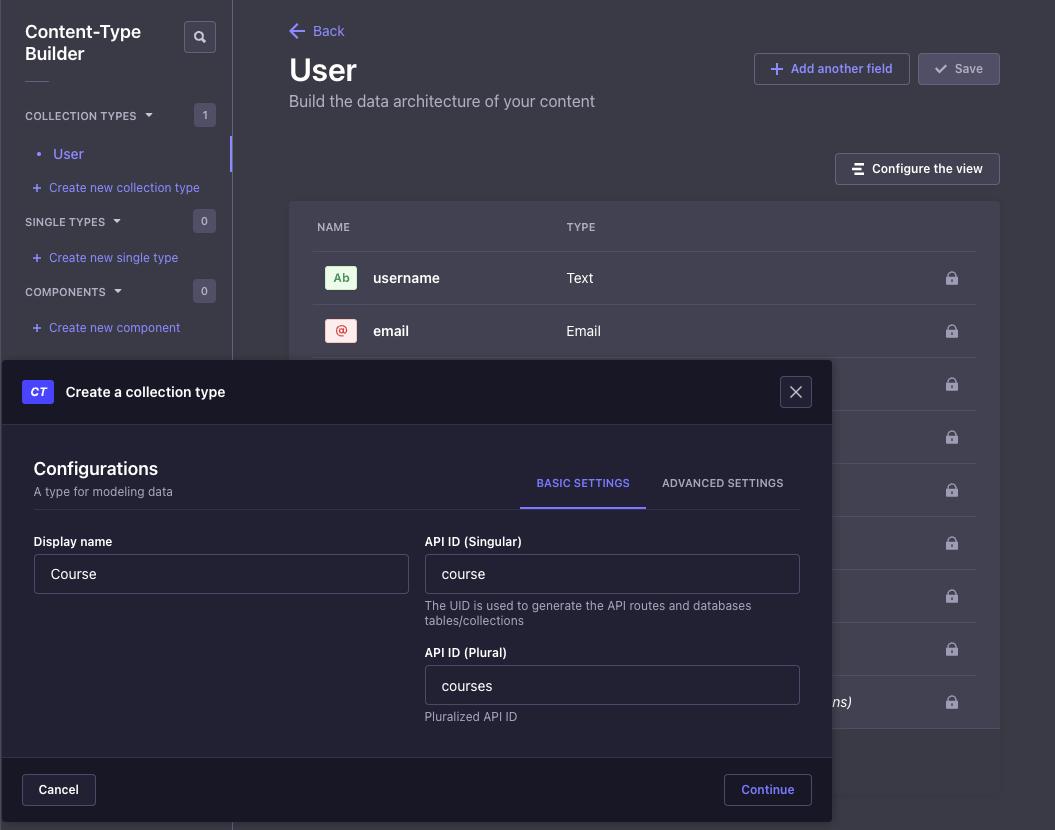
On the dashboard, navigate to the Content-Type Builder section on the sidebar. You'll see a default content type called User with pre-added fields.

Click on Create new collection type to create a new content type. For this example, we'll create a content type called Course with the following fields:
- Title: A text field to store the title of the course.
- Description: A text field to store the description of the course.
After clicking the Save button, you'll see the new content type on the sidebar.
Now, lets add some data. Go to Content Manager -> Course section on the sidebar and click on Create new entry, fill in the fields and click the Save and then Publish.

To make our application publicly accessible, go to Settings -> Users & Permissions Plugin > Roles. Edit the Public role and enable the find and findone permissions for the Course content type.
Let's test our Strapi application. Open a new terminal window and run:
curl http://localhost:1337/api/coursesYou should see output similar to this:
{
  "data": [
    {
      "id": 1,
      "attributes": {
        "title": "Data Structures and Algorithms",
        "description": "In this lecture, we'll dive into the world of data structures - the organizational powerhouses behind efficient algorithms. We'll explore how choosing the right data structure can make or break your program's performance. From the humble array to the mighty balanced tree, get ready to master the tools that will elevate your coding prowess and impress your future employers.",
        "createdAt": "2024-08-26T08:31:55.184Z",
        "updatedAt": "2024-08-26T08:32:11.941Z",
        "publishedAt": "2024-08-26T08:32:11.940Z"
      }
    }
  ],
  "meta": {
    "pagination": {
      "page": 1,
      "pageSize": 25,
      "pageCount": 1,
      "total": 1
    }
  }
}
Adding Caching to Strapi
To implement caching, we'll use the strapi-plugin-rest-cache package, which is already available on Strapi marketplace.
Install it along with its dependencies:
npm install strapi-plugin-rest-cache strapi-plugin-redis strapi-provider-rest-cache-redisNext, add this configuration to the ./config/plugins.ts file in the Strapi project:
export default () => ({
  redis: {
    enabled: true,
    config: {
      connections: {
        default: {
          connection: {
            host: "YOUR_REDIS_ENDPOINT",
            port: 6379,
            username: "default",
            password: "YOUR_REDIS_PASSWORD"
            tls: true,
          },
          settings: {
            debug: true,
          },
        },
      },
    },
  },

  "rest-cache": {
    config: {
      enabled: true,
      provider: {
        name: "redis",
        options: {
          max: 32767,
          connection: "default",
        },
      },
      strategy: {
        contentTypes: [
          {
            contentType: "api::course.course",
            routes: [
              {
                path: "/api/courses",
                method: "GET",
              },
            ],
          },
        ],
      },
    },
  },
});
Create a Redis Database on Upstash
The final step is to create a new database on Upstash Redis.
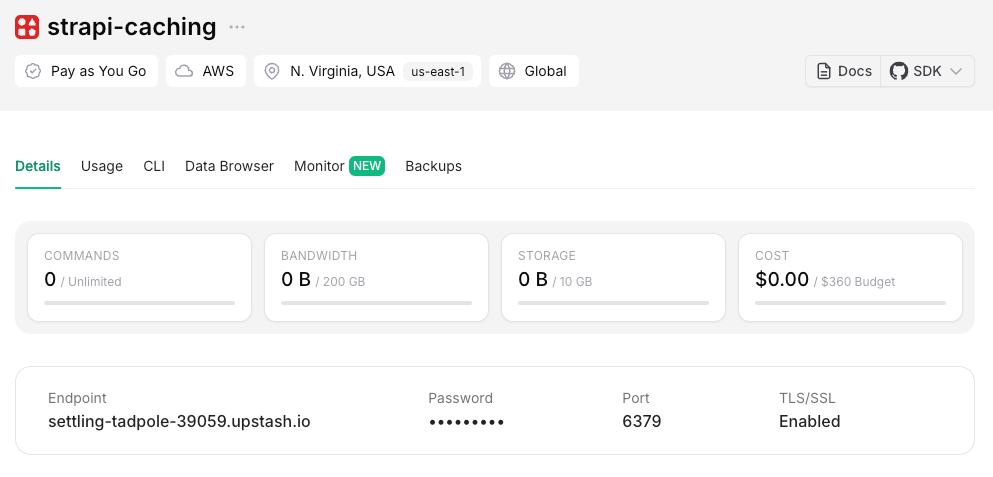
- Head over to the Upstash Console and create a new database.
- Once created, you'll see the connection details on the dashboard.

Replace YOUR_REDIS_ENDPOINT and YOUR_REDIS_PASSWORD in the ./config/plugins.ts file with your actual connection details.
Now, restart the Strapi server:
npm run developWe are all set to test the caching configuration:
curl http://localhost:1337/api/coursesThe first request will return data as usual. Subsequent requests should be noticeably faster due to caching. This is because the response is now being cached in the Redis database and access to Redis database is usually faster, compared to SQL databases.
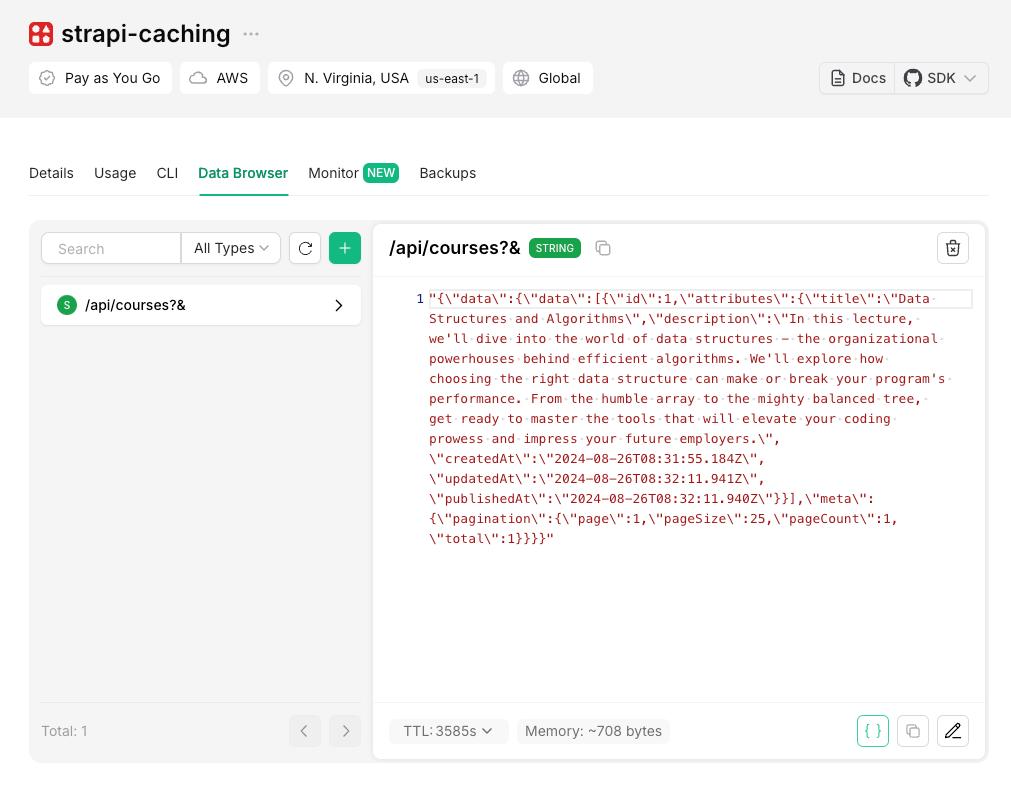
To verify caching, check the Data Browser section of your Upstash Redis database, and you'll see the /api/courses?& entry, which belongs to the request we made.

That's it! You've successfully added caching to your Strapi application using Upstash Redis. You can now scale your application without worrying about performance bottlenecks.
Conclusion
And there we are! We've just charged our Strapi application with Upstash Redis. Let's take a moment to appreciate what we've accomplished here:
- We've set up a Strapi project from scratch.
- We've created custom content type and populated it with data.
- Most importantly, we've took a significant step in optimization by caching. It will help us to reduce the response time and improve the performance of our application.
Note on Cache Management
Before you go off to enjoy your newly optimized Strapi app, remember that the strapi-plugin-rest-cache is pretty smart about managing itself:
- It automatically updates the cache when you make changes to your content using POST or DELETE methods. No manual intervention required!
- If you ever need to clear the cache manually (hey, it happens), just head over to the Strapi admin panel and hit that Content Manager > Purge REST Cache button. It's like a reset button for your cache.
So what's next? We'll, that's up to you! Maybe you'll add more complex content types or strategies. Whatever you do, you'll now be faster.
Happy coding!
