Asynchronous serverless processing with in-app notifications using QStash and novu
Today we are looking at a common problem for many developers: A user has kicked of a task, which you want to process in a serverless function. If that task may fail, you might want to retry it automatically and also let the user know about the outcome.
To solve this, we will use QStash together with novu:
- QStash is an HTTP based messaging and scheduling solution for serverless and edge runtimes.
- Novu offers simple APIs for managing all communication channels in one place: Email, SMS, Direct, and Push.
Prerequisites
To follow this tutorial, you need accounts for 3 services:
What will we build?
To demonstrate this usecase, we will build a very simple app. The app allows a user to add two numbers together while randomly throwing an error to simulate a more complex scenario. All of the "business" logic is running inside a serverless function. After the calculations are done (or have failed) the user will be notified in your app using novu.
Obviously this setup is overkill for just adding two numbers, but the same setup can be applied to much more complex workflows.
Setup
- Go to console.upstash.com/qstash and
make a note of
QSTASH_TOKEN,QSTASH_CURRENT_SIGNING_KEYandQSTASH_NEXT_SIGNING_KEYvariables. You'll need these later. - Create a new notification template in novu
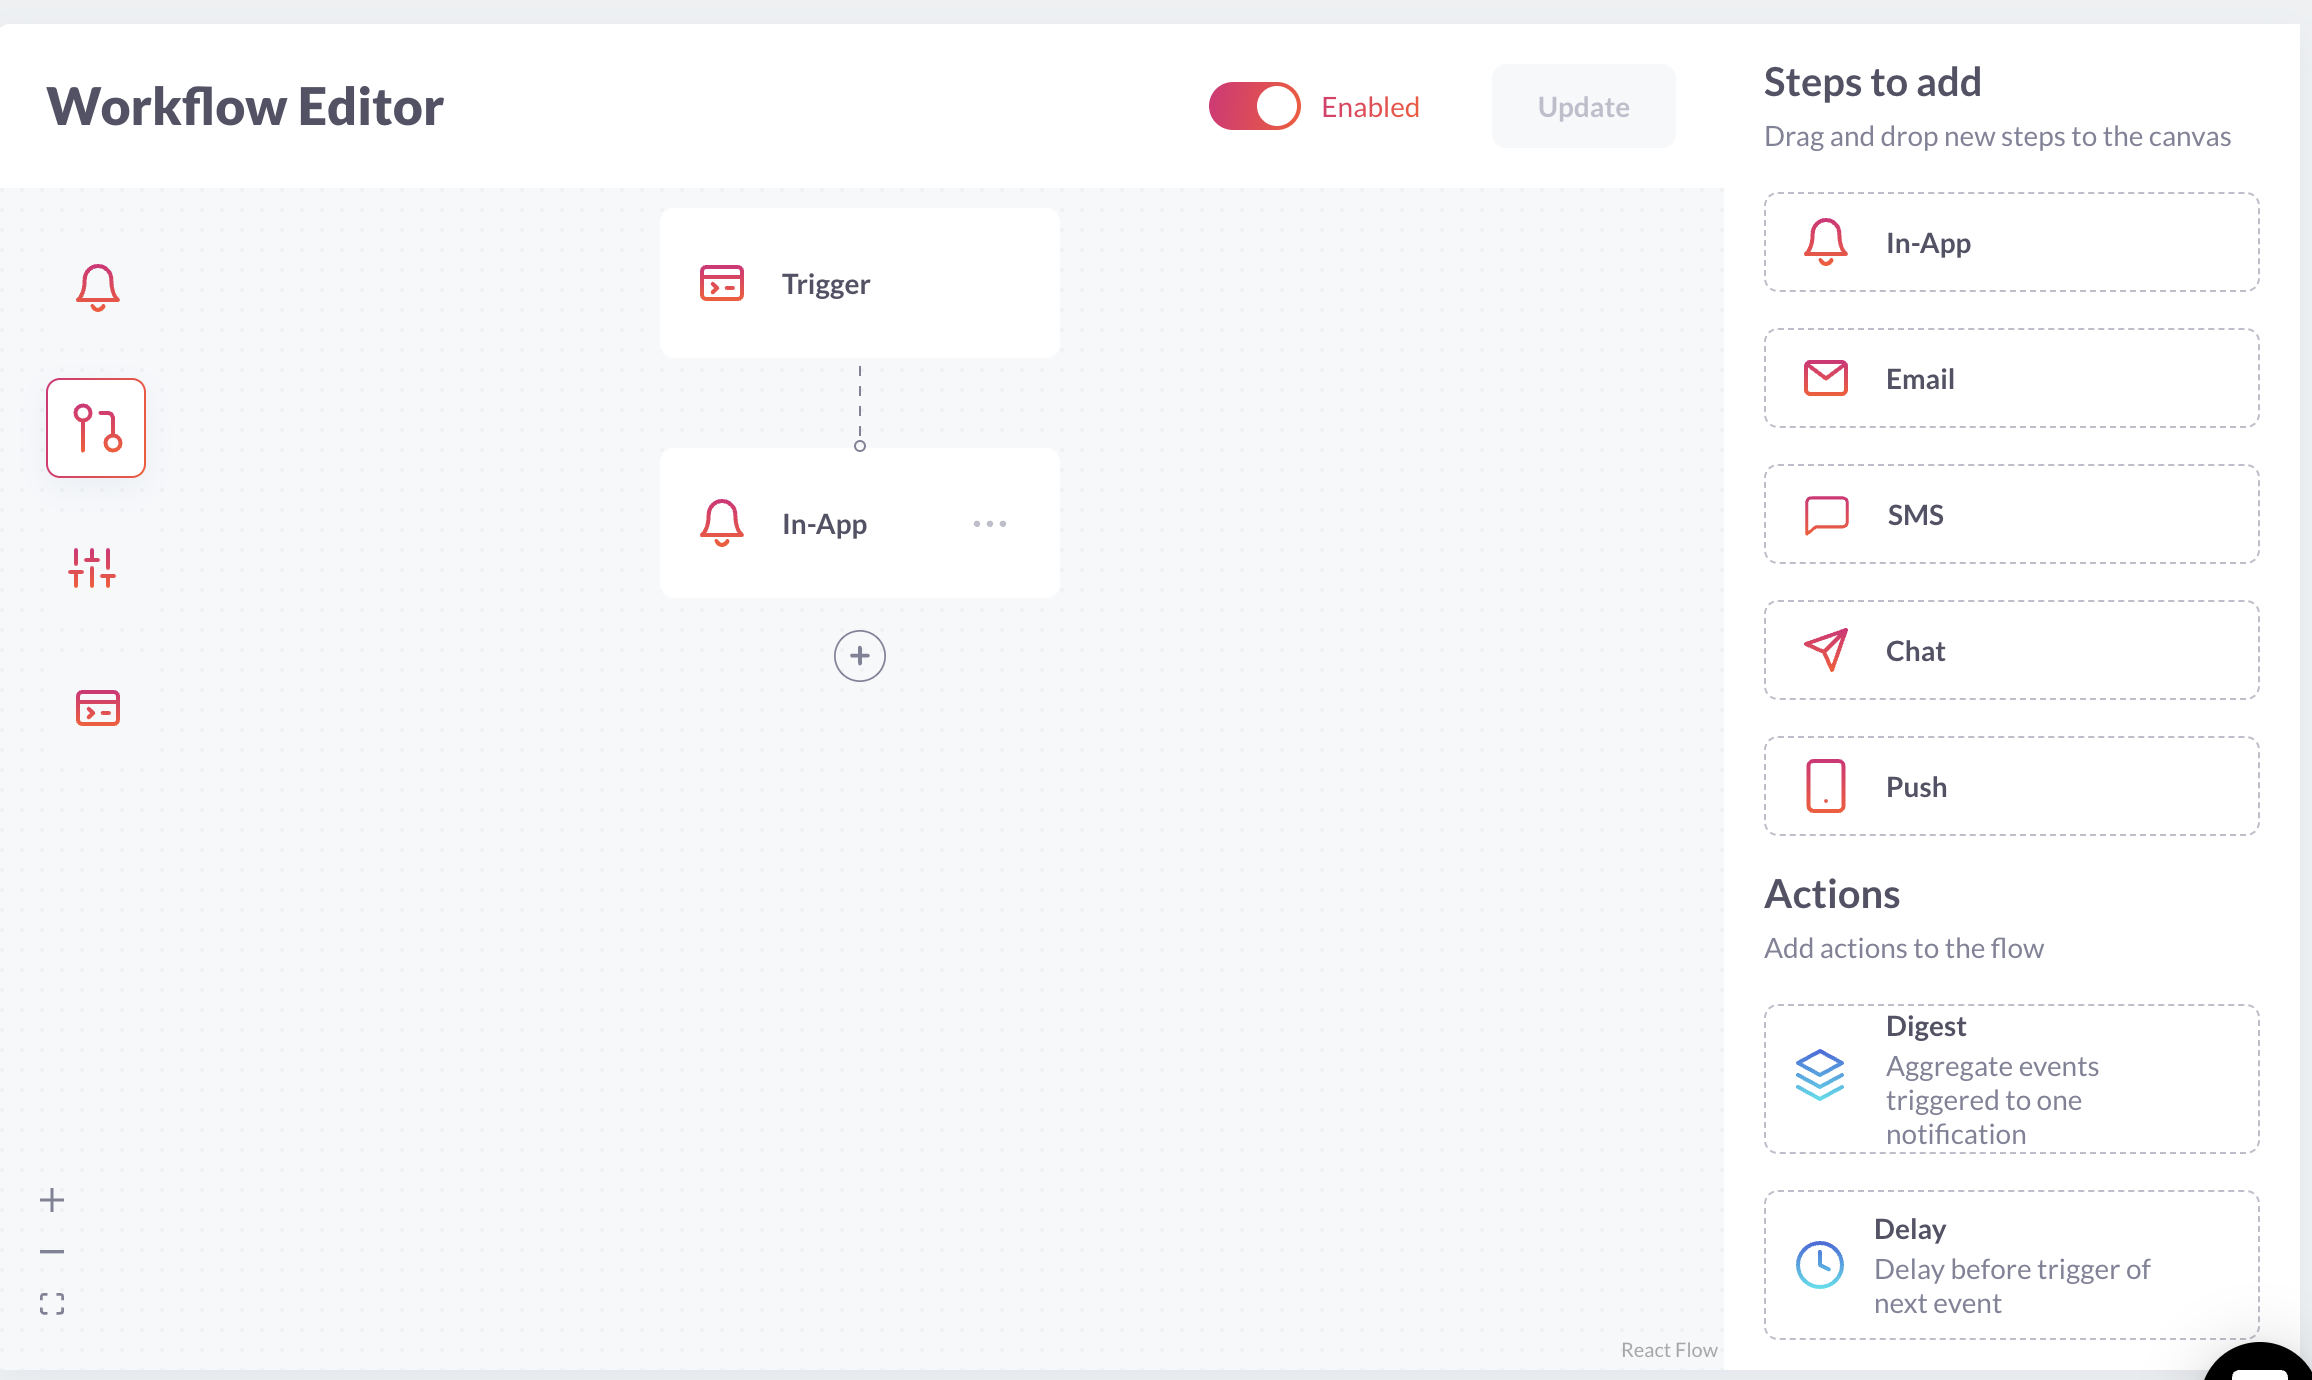
- Enter a notification name like
add.success - And then add the
In-Appstep to your trigger
- Create another notification template for
add.failureand also add theIn-Appstep. - Go to web.novu.co/settings and copy your api key and application identifier, you'll need those later.
Create the app
Let's create a new Next.js app: npx create-next-app@latest --ts and then open
your favourite code editor in the new directory.
Installing Dependencies
Both QStash and novu expose an HTTP API but to make it easier to work with them, we will install the official javascript sdks:
npm install @upstash/qstash @novu/node @novu/notification-center
Creating the api routes
/api/add
This route will be called by the frontend and receives two numbers to be added together. We will publish a message to QStash and delegate the actual execution to another serverless function. The only real purpose of this function is to use secrets to authenticate with other services, instead of exposing them in the frontend.
import assert from "assert";
import { NextApiRequest, NextApiResponse } from "next";

import { Client } from "@upstash/qstash";

export default async function (
  req: NextApiRequest,
  res: NextApiResponse,
): Promise<void> {
  try {
    const qstashToken = process.env.QSTASH_TOKEN;
    assert(qstashToken, "QSTASH_TOKEN is not defined");

    const qstash = new Client({
      token: qstashToken,
    });

    const { userId, x, y } = req.body as {
      userId: string;
      x: number;
      y: number;
    };

    await qstash.publishJSON({
      url: `https://${process.env.VERCEL_URL}/api/task/process`,
      retries: 3,
      body: {
        userId,
        x,
        y,
      },
    });

    res.status(201);
    res.send("OK");
    return;
  } catch (error) {
    console.error((error as Error).message);
    res.status(500).json({ error: (error as Error).message });
  } finally {
    res.end();
  }
}
/api/process
Here we receive the message from QStash and do the calculation. We also introduce a random error component just to highlight the retry capabilities of QStash.
import assert from "assert";
import { NextApiRequest, NextApiResponse } from "next";

import { Novu } from "@novu/node";
import { verifySignature } from "@upstash/qstash/nextjs";

async function handler(req: NextApiRequest, res: NextApiResponse) {
  try {
    const { userId, x, y } = req.body as {
      userId: string;
      x: number;
      y: number;
    };

    const novuApiKey = process.env.NOVU_API_KEY;
    assert(novuApiKey, "NOVU_API_KEY is not defined");
    const novu = new Novu(novuApiKey);

    const rng = Math.random();
    const success = rng > 0.5;

    if (success) {
      await novu.trigger("add.success", {
        to: {
          subscriberId: userId,
        },
        payload: {
          x,
          y,
          result: x + y,
        },
      });
      return res.send("ok");
    }

    if (!success) {
      const error = "simulated error";
      await novu.trigger("add.failure", {
        to: {
          subscriberId: userId,
        },
        payload: {
          x,
          y,
          error,
        },
      });
      return res.status(500).send(error);
    }
  } catch (error) {
    console.error((error as Error).message);
    res.status(500).json({ error: (error as Error).message });
  } finally {
    res.end();
  }
}

export default verifySignature(handler);

export const config = {
  api: {
    bodyParser: false,
  },
};
Frontend
To display the notifications in your UI, we added a very simple UI, you can simply use novu's react components or create a custom UI like we did here.
Run it on Vercel
The simplest way to run your Next.js app is to use Vercel's CLI:
$ npx vercel
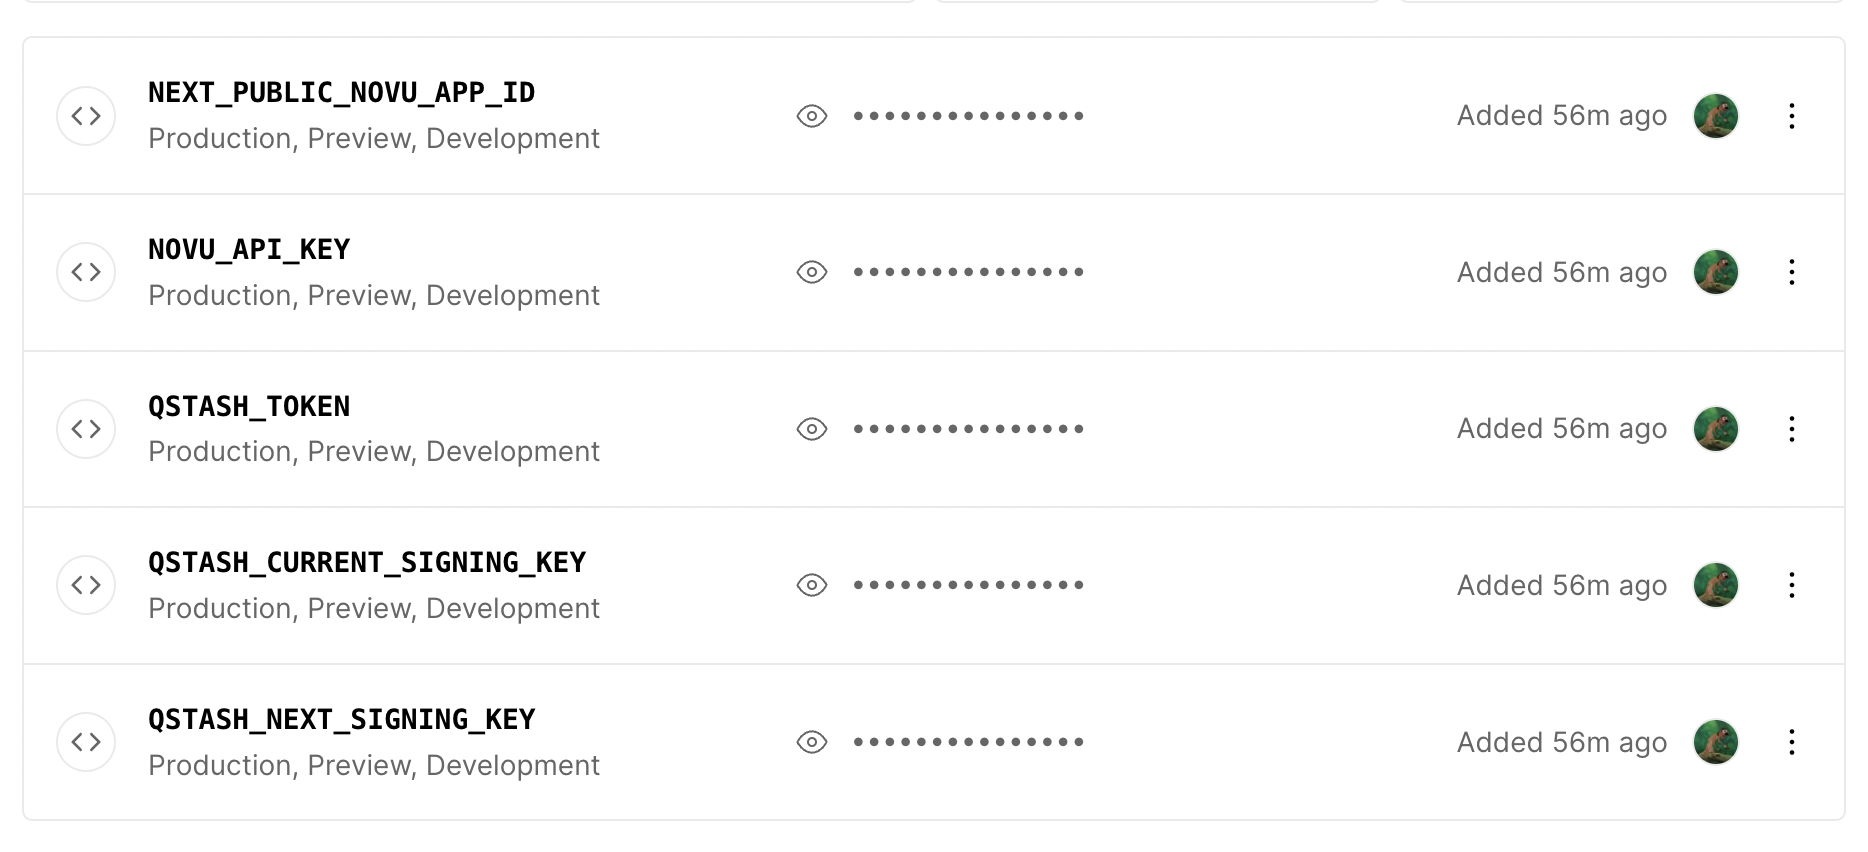
After it is deployed, you need to add all the environment variables. Head over
to vercel.com and go to your project's settings.

After you have updated the environment variables, run npx vercel --prod to
make them take effect.
Try it out
If you have added your UI, you can check out your app by going to the link
provided by Vercel, otherwise check out the hosted app of this blog post:
qstash-with-novu.vercel.app. Enter two
numbers and click the Add button. After a short time, you will see a
notification in the top right. Either it has successfully added the two numbers,
or it will let you know it encountered an error. In case of an error, it will be
retried automatically and a new notification will show up shortly.
Summary
While this usecase was very basic, think about all of the asynchronous tasks your users could kick off and if they would be a good fit to run in serverless functions.
Together with QStash and novu, you have a perfect stack to make your app failure resistant and provide feedback to the user without managing more infrastructure.
