> ## Documentation Index
> Fetch the complete documentation index at: https://upstash.com/docs/llms.txt
> Use this file to discover all available pages before exploring further.
# TanStack Start
You can find the project source code on GitHub.
This guide provides detailed, step-by-step instructions on how to use Upstash Workflow with TanStack Start. You can also explore [the source code](https://github.com/upstash/workflow-js/tree/main/examples/tanstack-start) for a detailed, end-to-end example and best practices.
## Prerequisites
* Node.js and pnpm installed.
You can integrate Upstash Workflow into an existing TanStack Start app, or create a new TanStack Start project from scratch.
## Step 1: Create a new TanStack Start project
Run the following command to create a new TanStack Start project:
```bash theme={"system"}
pnpm create @tanstack/start@latest
```
Navigate to the project directory:
```bash theme={"system"}
cd your-project-name
```
## Step 2: Installation
Run the following command to install the Upstash Workflow SDK in your TanStack Start app.
```bash theme={"system"}
pnpm install @upstash/workflow
```
```bash theme={"system"}
npm install @upstash/workflow
```
```bash theme={"system"}
bun add @upstash/workflow
```
## Step 3: Set up the development server
Upstash Workflow is built on top of Upstash QStash.
In a production environment, your application connects to the managed QStash servers hosted by Upstash.
This ensures that requests are delivered reliably, securely, and at scale without requiring you to run and maintain your own infrastructure.
For local development, you don't need to depend on the managed QStash servers. Since you are using `@upstash/workflow`, you can just set `QSTASH_DEV=true`, and the SDK will download, start, and connect to a local QStash development server automatically — no tokens or signing keys to copy over.
In the root of your project, create a `.env` file (or update your existing one):
```txt .env theme={"system"}
QSTASH_DEV=true
```
Both the workflow client and the `serve()` endpoint pick up the dev server automatically, including signature verification, so there's nothing else to configure. The local server behaves just like the production version but does not require external network calls.
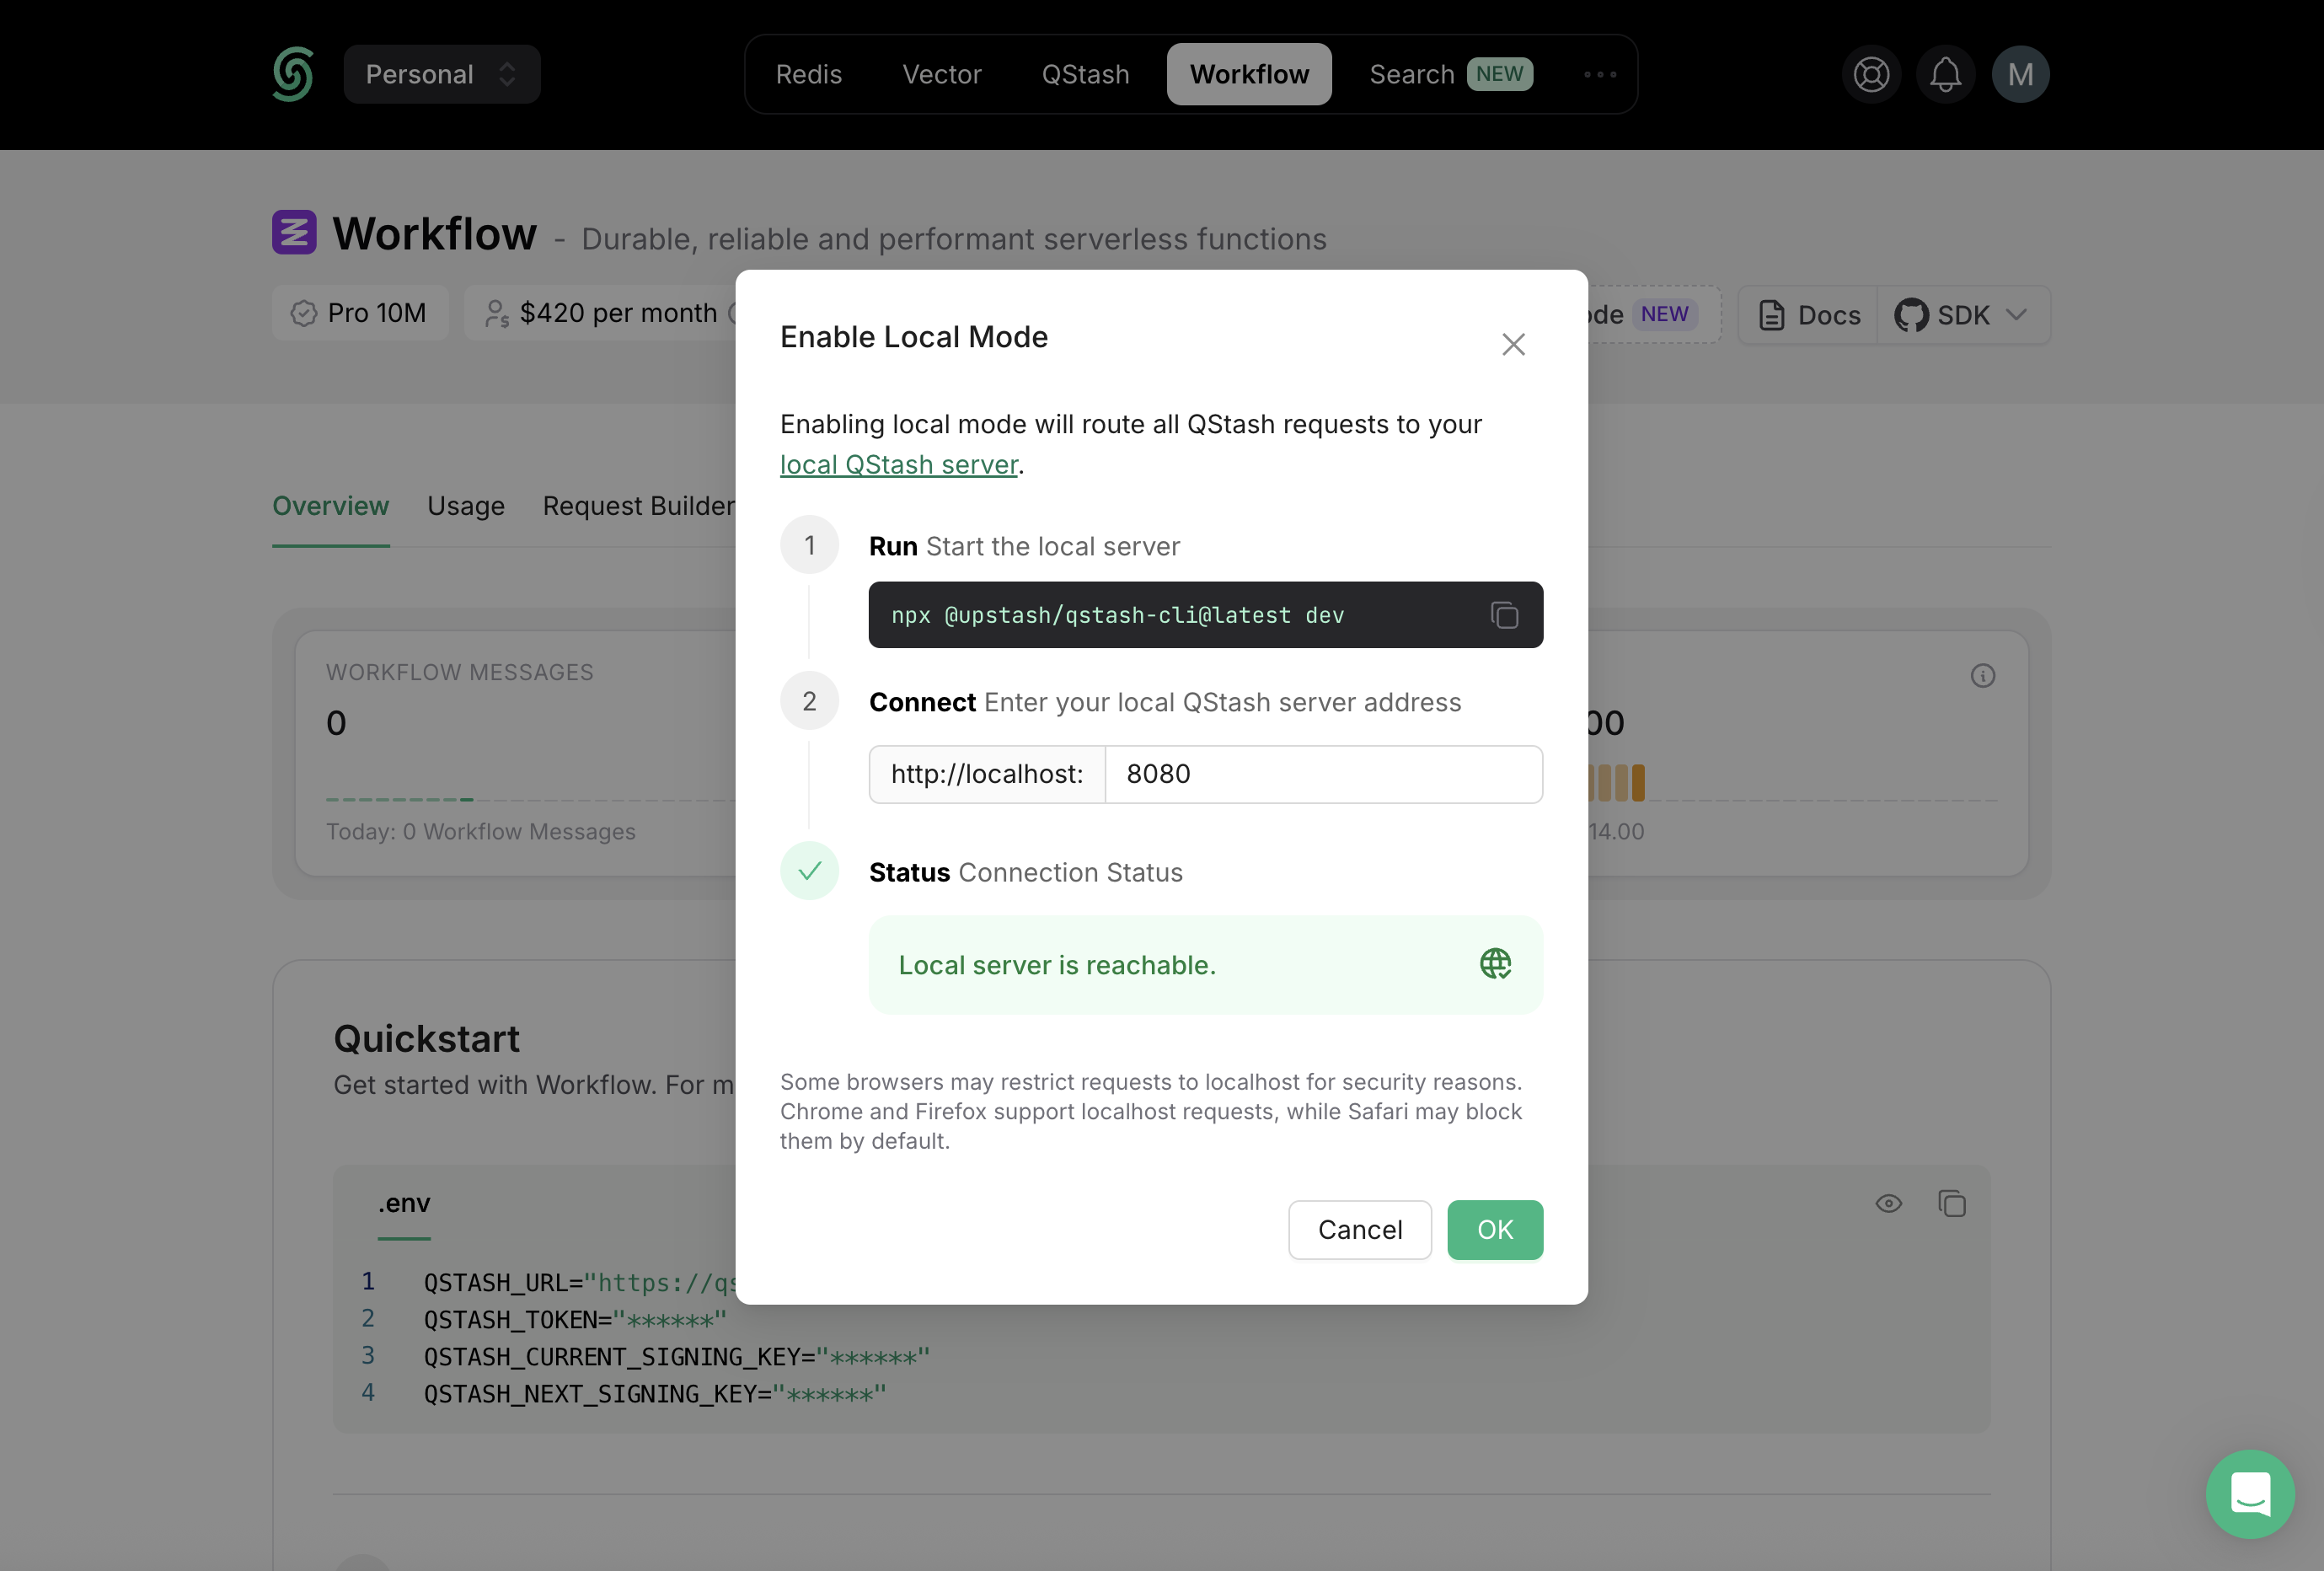
You can enable local mode in the Upstash Workflow dashboard to use the UI while developing locally.
 Prefer to start the server yourself, or using a runtime other than Node.js? See the [Development Server guide](/workflow/howto/local-development/development-server) for the manual QStash CLI setup, custom ports, and the `registerQStashDev()` helper for edge routes.
For production, set your actual credentials from the Upstash Workflow dashboard instead of `QSTASH_DEV`.
## Step 4: Create a Workflow Endpoint
With your environment ready, the next step is to define your first workflow endpoint.
In Upstash Workflow, every workflow is exposed as an endpoint.
Every endpoint you expose using the SDK's `serve()` function acts as a workflow that can be triggered independently.
In TanStack Start, these endpoints are implemented as **API routes** using the file-based routing system.
Create a new file `src/routes/api/workflow.ts`:
```typescript src/routes/api/workflow.ts theme={"system"}
import { createFileRoute } from '@tanstack/react-router'
import { serve } from '@upstash/workflow/tanstack'
const someWork = (input: string) => {
return `processed '${JSON.stringify(input)}'`
}
export const Route = createFileRoute('/api/workflow')({
server: {
handlers: serve(async (context) => {
const input = context.requestPayload
const result1 = await context.run('step1', () => {
const output = someWork(input)
console.log('step 1 input', input, 'output', output)
return output
})
await context.run('step2', () => {
const output = someWork(result1)
console.log('step 2 input', result1, 'output', output)
})
}),
},
})
```
## Step 5: Start your TanStack Start app
Start your TanStack Start development server:
```bash theme={"system"}
pnpm dev
```
```bash theme={"system"}
npm run dev
```
Your app should now be running on `http://localhost:3000`.
## Step 6: Run the Workflow Endpoint
Once your endpoint is defined, the next step is to trigger a workflow run.
You can start a new workflow run using the `trigger()` function from the Upstash Workflow SDK.
```javascript theme={"system"}
import { Client } from "@upstash/workflow";
const client = Client()
const { workflowRunId } = await client.trigger({
url: `http://localhost:3000/api/workflow`,
body: "Hello World!",
retries: 3
});
```
The `trigger()` function should typically be called from a server-side action (not directly in client-side code) to keep your credentials secure.
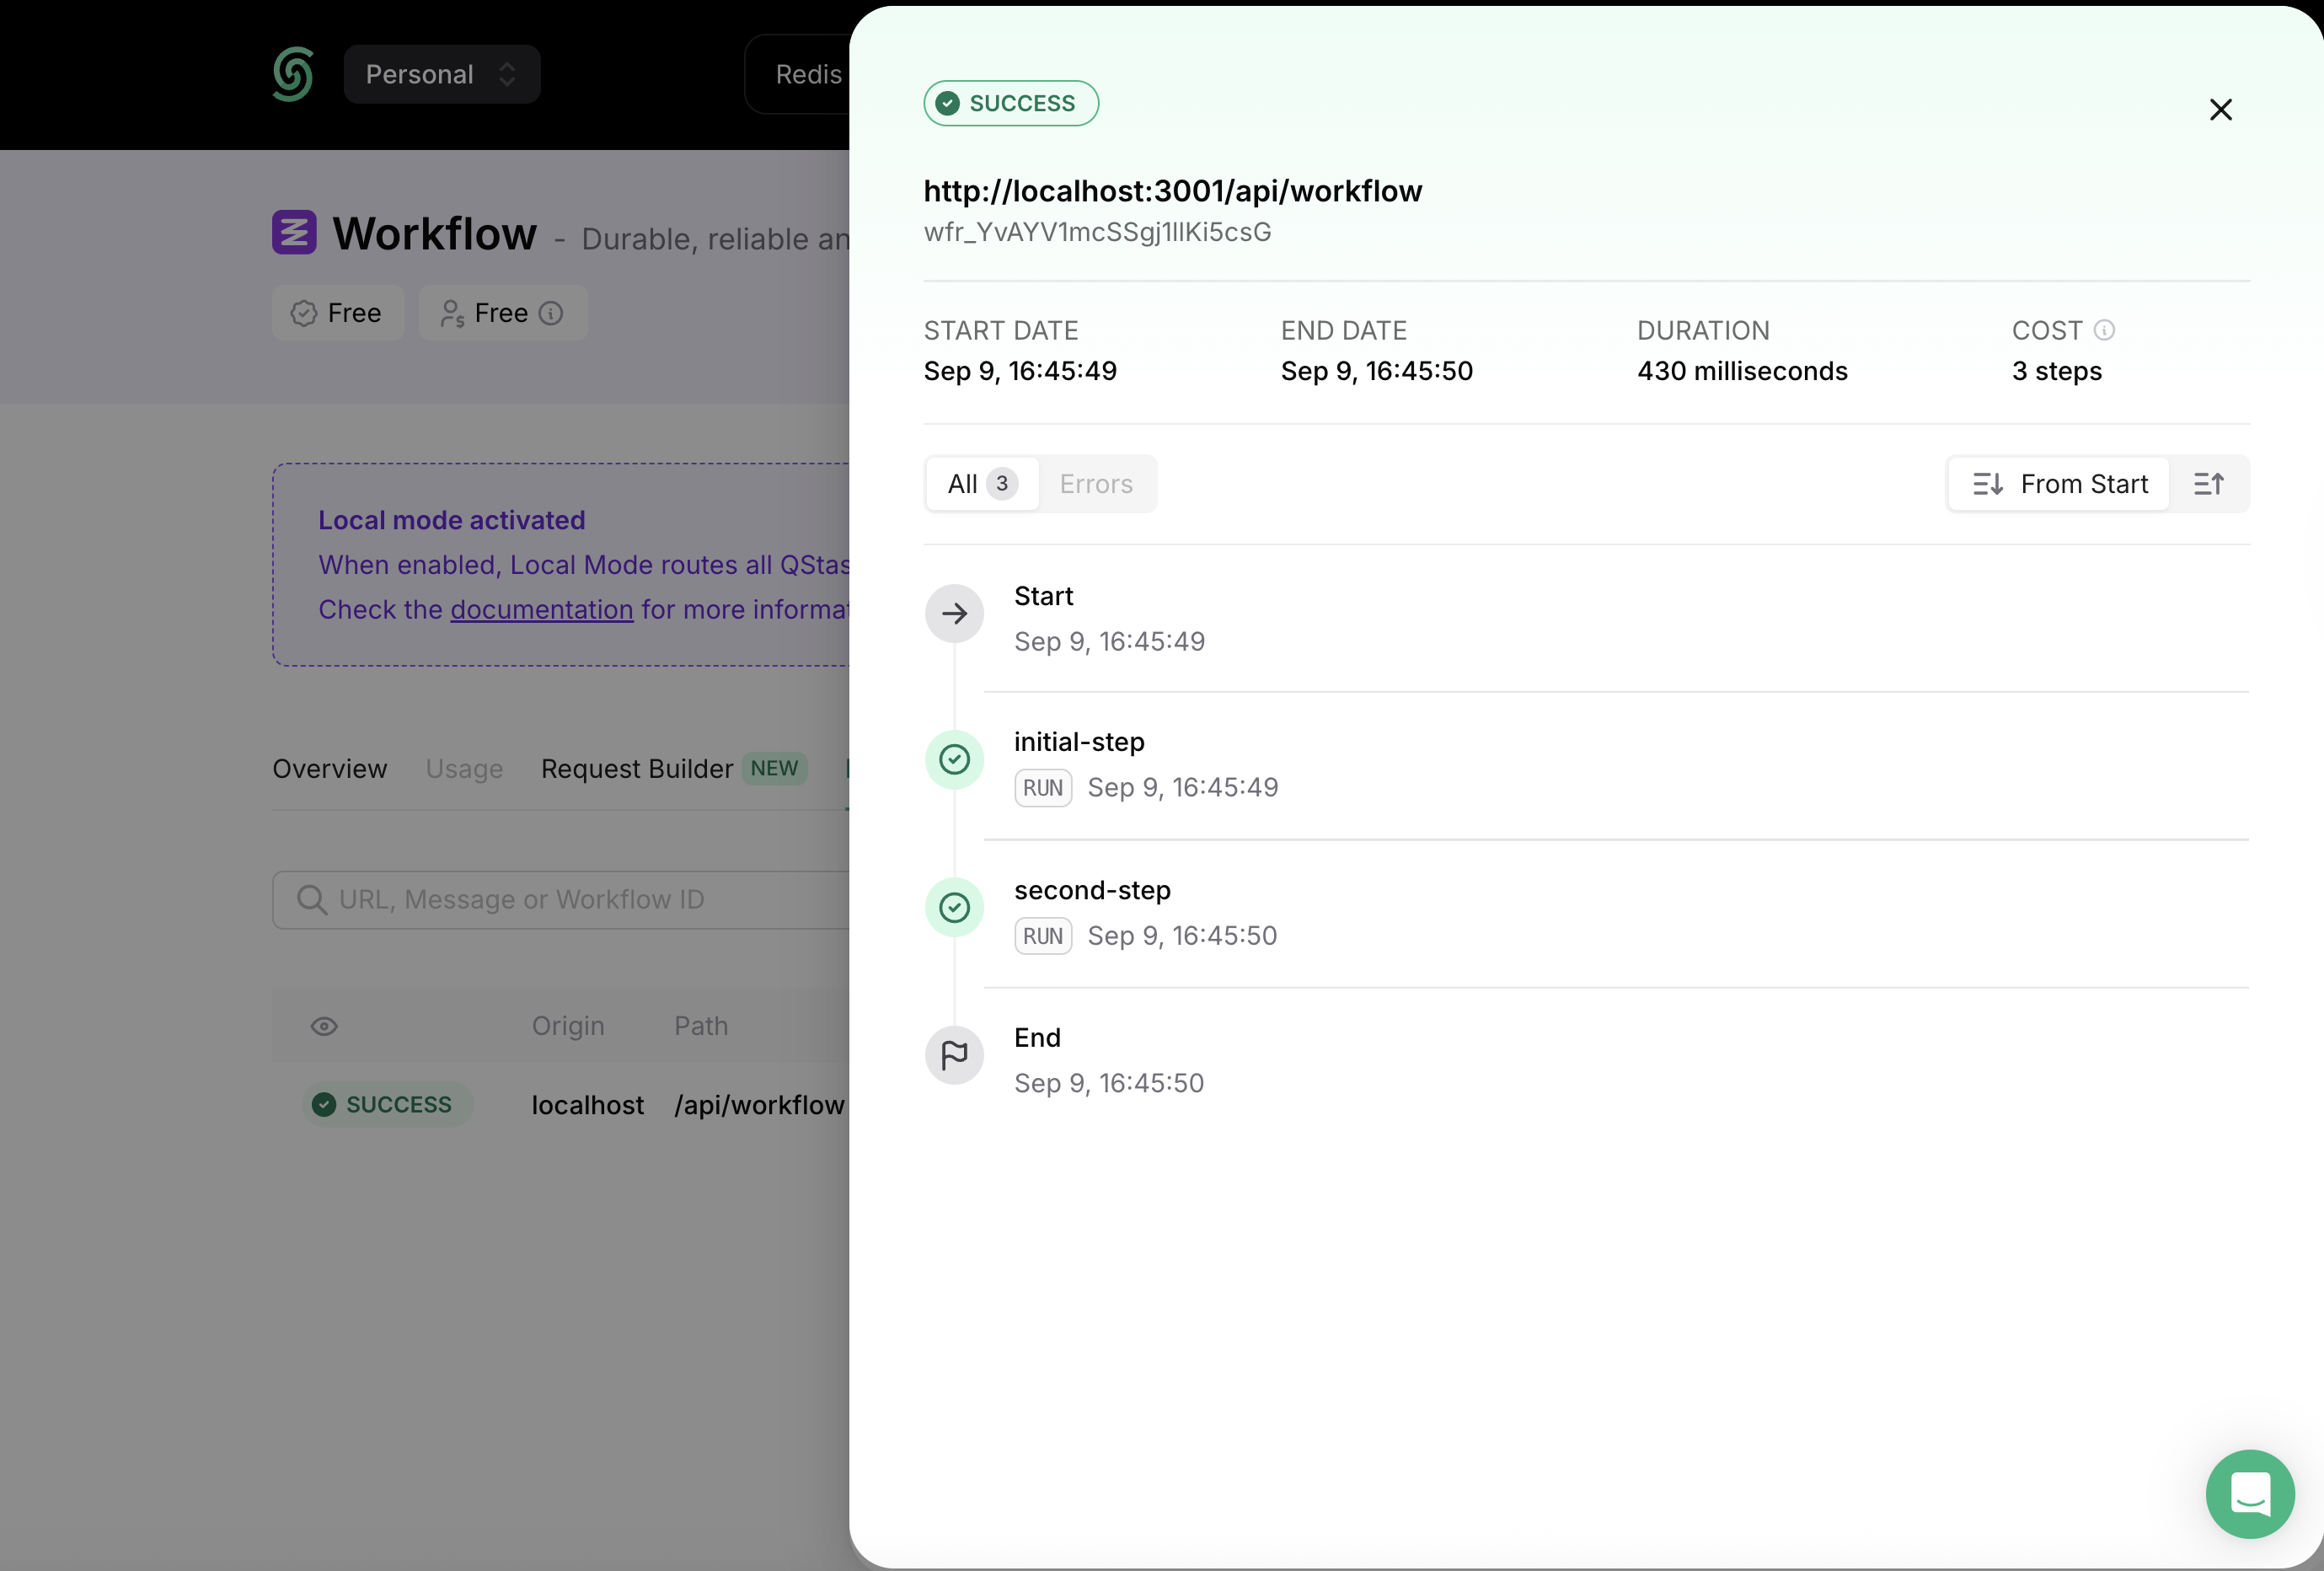
Check the Upstash Workflow dashboard to view logs of your workflow run:
Prefer to start the server yourself, or using a runtime other than Node.js? See the [Development Server guide](/workflow/howto/local-development/development-server) for the manual QStash CLI setup, custom ports, and the `registerQStashDev()` helper for edge routes.
For production, set your actual credentials from the Upstash Workflow dashboard instead of `QSTASH_DEV`.
## Step 4: Create a Workflow Endpoint
With your environment ready, the next step is to define your first workflow endpoint.
In Upstash Workflow, every workflow is exposed as an endpoint.
Every endpoint you expose using the SDK's `serve()` function acts as a workflow that can be triggered independently.
In TanStack Start, these endpoints are implemented as **API routes** using the file-based routing system.
Create a new file `src/routes/api/workflow.ts`:
```typescript src/routes/api/workflow.ts theme={"system"}
import { createFileRoute } from '@tanstack/react-router'
import { serve } from '@upstash/workflow/tanstack'
const someWork = (input: string) => {
return `processed '${JSON.stringify(input)}'`
}
export const Route = createFileRoute('/api/workflow')({
server: {
handlers: serve(async (context) => {
const input = context.requestPayload
const result1 = await context.run('step1', () => {
const output = someWork(input)
console.log('step 1 input', input, 'output', output)
return output
})
await context.run('step2', () => {
const output = someWork(result1)
console.log('step 2 input', result1, 'output', output)
})
}),
},
})
```
## Step 5: Start your TanStack Start app
Start your TanStack Start development server:
```bash theme={"system"}
pnpm dev
```
```bash theme={"system"}
npm run dev
```
Your app should now be running on `http://localhost:3000`.
## Step 6: Run the Workflow Endpoint
Once your endpoint is defined, the next step is to trigger a workflow run.
You can start a new workflow run using the `trigger()` function from the Upstash Workflow SDK.
```javascript theme={"system"}
import { Client } from "@upstash/workflow";
const client = Client()
const { workflowRunId } = await client.trigger({
url: `http://localhost:3000/api/workflow`,
body: "Hello World!",
retries: 3
});
```
The `trigger()` function should typically be called from a server-side action (not directly in client-side code) to keep your credentials secure.
Check the Upstash Workflow dashboard to view logs of your workflow run:
 Inside the `trigger()` call, you need to provide the URL of your workflow endpoint:
* Local development → use the URL where your app is running, for example: [http://localhost:3000/api/workflow](http://localhost:3000/api/workflow)
* Production → use the URL of your deployed app, for example: [https://yourapp.com/api/workflow](https://yourapp.com/api/workflow)
To avoid hardcoding URLs, you can define a `BASE_URL` constant and set it based on the environment:
```javascript theme={"system"}
const BASE_URL = process.env.NODE_ENV === 'production'
? 'https://yourapp.com'
: 'http://localhost:3000'
const { workflowRunId } = await client.trigger({
url: `${BASE_URL}/api/workflow`,
body: "Hello World!",
retries: 3
});
```
## Next Steps
Now that you've created your first workflow, here are some recommended guides to continue learning:
1. **[Learn the Workflow API](/workflow/basics/context)**: Dive deeper into the full API surface and advanced capabilities.
2. **[Configure Workflow Runs](/workflow/basics/client)**: Learn how to configure workflow execution to fit your app's needs.
3. **[Handle Failures](/workflow/howto/failures)**: Understand how to detect and recover from failed workflow runs.
Inside the `trigger()` call, you need to provide the URL of your workflow endpoint:
* Local development → use the URL where your app is running, for example: [http://localhost:3000/api/workflow](http://localhost:3000/api/workflow)
* Production → use the URL of your deployed app, for example: [https://yourapp.com/api/workflow](https://yourapp.com/api/workflow)
To avoid hardcoding URLs, you can define a `BASE_URL` constant and set it based on the environment:
```javascript theme={"system"}
const BASE_URL = process.env.NODE_ENV === 'production'
? 'https://yourapp.com'
: 'http://localhost:3000'
const { workflowRunId } = await client.trigger({
url: `${BASE_URL}/api/workflow`,
body: "Hello World!",
retries: 3
});
```
## Next Steps
Now that you've created your first workflow, here are some recommended guides to continue learning:
1. **[Learn the Workflow API](/workflow/basics/context)**: Dive deeper into the full API surface and advanced capabilities.
2. **[Configure Workflow Runs](/workflow/basics/client)**: Learn how to configure workflow execution to fit your app's needs.
3. **[Handle Failures](/workflow/howto/failures)**: Understand how to detect and recover from failed workflow runs.