> ## Documentation Index
> Fetch the complete documentation index at: https://upstash.com/docs/llms.txt
> Use this file to discover all available pages before exploring further.
# App Router
***
## Quickstart: Upstash Redis in Next 15
***
## 1. Install package
In your Next.js app, install our `@upstash/redis` package:
```bash theme={"system"}
npm install @upstash/redis
```
***
## 2. Connect to Redis
1. Grab your Redis credentials from the Upstash dashboard
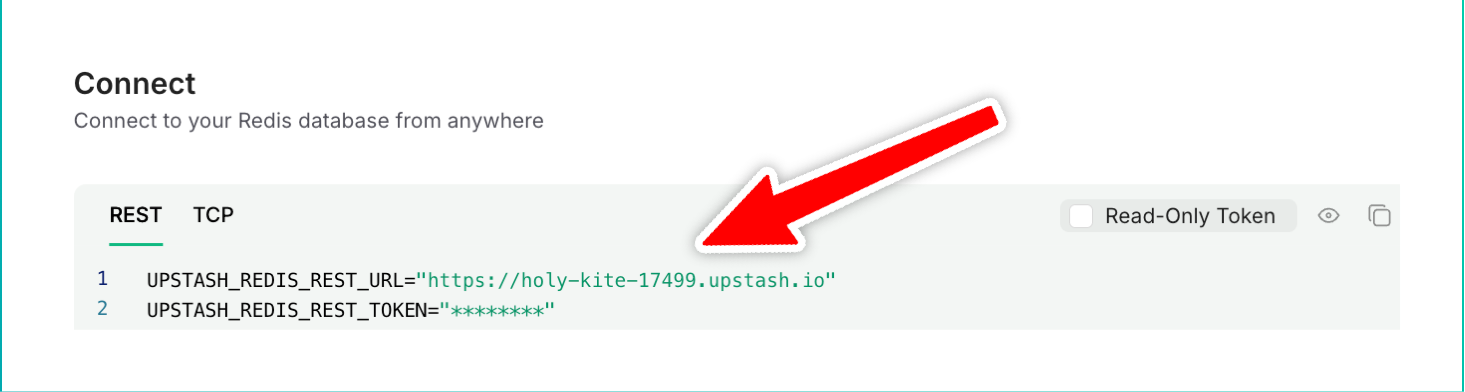 2. Paste them into your Next environment variables:
```bash title=".env" theme={"system"}
UPSTASH_REDIS_REST_URL=https://holy-kite-17499.upstash.io
UPSTASH_REDIS_REST_TOKEN=AURbAAIncDEyYjM4M...
```
3. Create a Redis instance, for example in `lib/redis.ts`
```typescript title="lib/redis.ts" theme={"system"}
import { Redis } from "@upstash/redis"
// 👇 we can now import our redis client anywhere we need it
export const redis = new Redis({
url: process.env.UPSTASH_REDIS_REST_URL,
token: process.env.UPSTASH_REDIS_REST_TOKEN,
})
```
***
## 3. Using our Redis Client
We can now connect to Upstash Redis from any server component or API route. For example:
```typescript title="app/page.tsx" theme={"system"}
import { redis } from "@/lib/redis"
// 👇 server component
const Page = async () => {
const count = await redis.get("count")
return
2. Paste them into your Next environment variables:
```bash title=".env" theme={"system"}
UPSTASH_REDIS_REST_URL=https://holy-kite-17499.upstash.io
UPSTASH_REDIS_REST_TOKEN=AURbAAIncDEyYjM4M...
```
3. Create a Redis instance, for example in `lib/redis.ts`
```typescript title="lib/redis.ts" theme={"system"}
import { Redis } from "@upstash/redis"
// 👇 we can now import our redis client anywhere we need it
export const redis = new Redis({
url: process.env.UPSTASH_REDIS_REST_URL,
token: process.env.UPSTASH_REDIS_REST_TOKEN,
})
```
***
## 3. Using our Redis Client
We can now connect to Upstash Redis from any server component or API route. For example:
```typescript title="app/page.tsx" theme={"system"}
import { redis } from "@/lib/redis"
// 👇 server component
const Page = async () => {
const count = await redis.get("count")
return count: {count}
}
export default Page
```
Because this `count` doesn't exist yet, let's create a Next API route to populate it.
***
## 4. Storing data in Redis
Let's create a super simple API that, every time when called, increments an integer value we call `count`. This is the same value we display in our page above:
```typescript title="app/api/counter/route.ts" theme={"system"}
import { redis } from "@/lib/redis"
export const POST = async () => {
await redis.incr("count")
return new Response("OK")
}
```
Perfect! Every time we now call this API, we increment the count in our Redis database:
 The server component fetches the most recent count at render-time and displays the up-to-date value automatically. For a video demo, check the video at the top of this article.
***
## Examples
You can find the project source code on GitHub.
If you're already on Vercel, you can create Upstash projects directly through Vercel: [Read more](../howto/vercelintegration).
The server component fetches the most recent count at render-time and displays the up-to-date value automatically. For a video demo, check the video at the top of this article.
***
## Examples
You can find the project source code on GitHub.
If you're already on Vercel, you can create Upstash projects directly through Vercel: [Read more](../howto/vercelintegration).