> ## Documentation Index
> Fetch the complete documentation index at: https://upstash.com/docs/llms.txt
> Use this file to discover all available pages before exploring further.
# Vercel - Upstash Redis Integration
If you are using [Vercel](https://vercel.com/) then you can integrate Upstash
Redis, Vector, Search or QStash to your project easily. Upstash is the perfect serverless
solution for your applications thanks to its:
* Low latency data
* Per request pricing
* Durable storage
* Ease of use
Below are the steps of the integration.
## Add Integration to Your Vercel Account
Visit the [Upstash Integration](https://vercel.com/integrations/upstash) on
Vercel and click the `Install` button. If you are installing an Upstash integration
for the first time, you will be prompted to choosing between connecting an existing Upstash
account or letting Vercel manage an Upstash account for you.
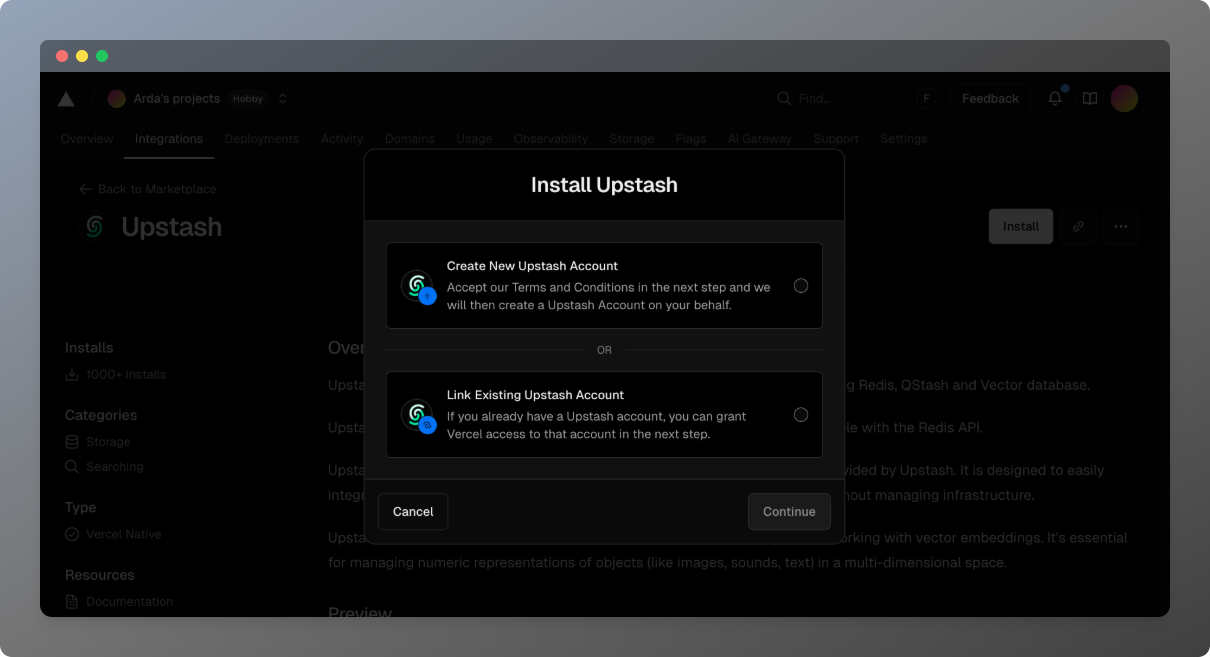 In both cases, you will be able to create and use a redis database as usual. If you let Vercel
manage your Upstash account, you can handle payments, database creation and deletion directly from the Vercel dashboard.
If you choose to connect an existing Upstash account, you will be able to utilize features on Upstash Console
such as teams and audit logs.
### Option 1: "Create New Upstash Account"
If you choose this option, Vercel will prompt you to choose one of the products available on Upstash,
configure the database (by choosing database name, regions, plan). After you finish the configuration,
Vercel will create the Upstash account and the selected resources for you and redirect you to the
page of the created resource on Vercel dashboard.
On the Vercel dashboard, you will be able to find the credentials of the database, change the database
name, update the regions or plan.
In both cases, you will be able to create and use a redis database as usual. If you let Vercel
manage your Upstash account, you can handle payments, database creation and deletion directly from the Vercel dashboard.
If you choose to connect an existing Upstash account, you will be able to utilize features on Upstash Console
such as teams and audit logs.
### Option 1: "Create New Upstash Account"
If you choose this option, Vercel will prompt you to choose one of the products available on Upstash,
configure the database (by choosing database name, regions, plan). After you finish the configuration,
Vercel will create the Upstash account and the selected resources for you and redirect you to the
page of the created resource on Vercel dashboard.
On the Vercel dashboard, you will be able to find the credentials of the database, change the database
name, update the regions or plan.
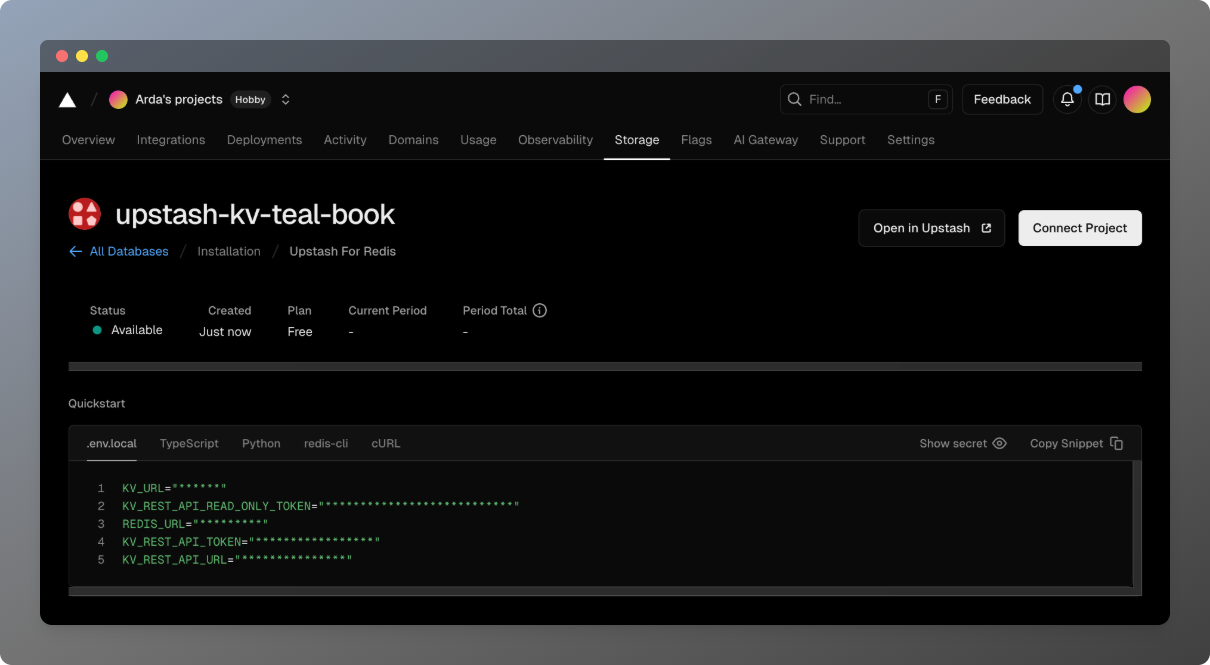 You can also go to the `Settings` tab and connect your apps on Vercel to the database, making the credentials
of the database available to the app as environment variables.
### Option 2: "Link Existing Upstash Account"
Vercel will redirect you to Upstash, where you can select your Vercel project
and Upstash resources that you want to integrate.
You should login to [the Upstash Console](https://console.upstash.com/) with your account if you
are not logged in before clicking continue.
You can also go to the `Settings` tab and connect your apps on Vercel to the database, making the credentials
of the database available to the app as environment variables.
### Option 2: "Link Existing Upstash Account"
Vercel will redirect you to Upstash, where you can select your Vercel project
and Upstash resources that you want to integrate.
You should login to [the Upstash Console](https://console.upstash.com/) with your account if you
are not logged in before clicking continue.
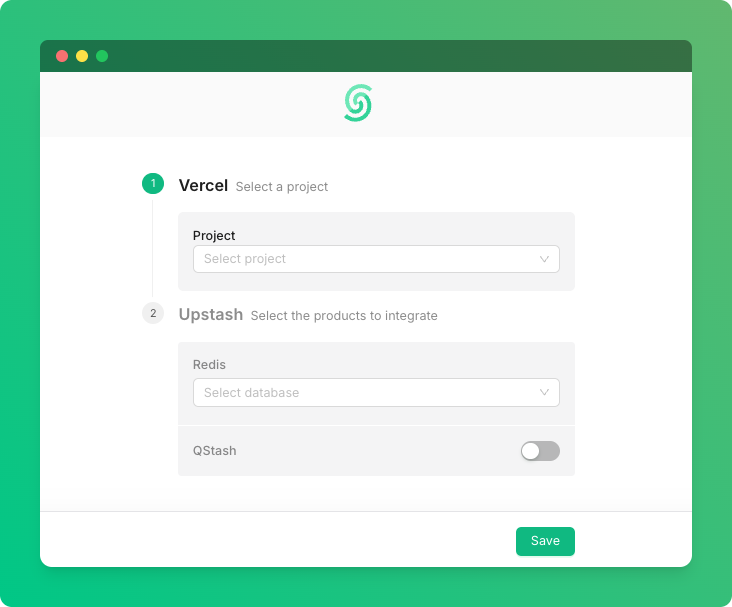 If you do not have a Redis database yet, you can create one
from the dropdown menu.
If you do not have a Redis database yet, you can create one
from the dropdown menu.
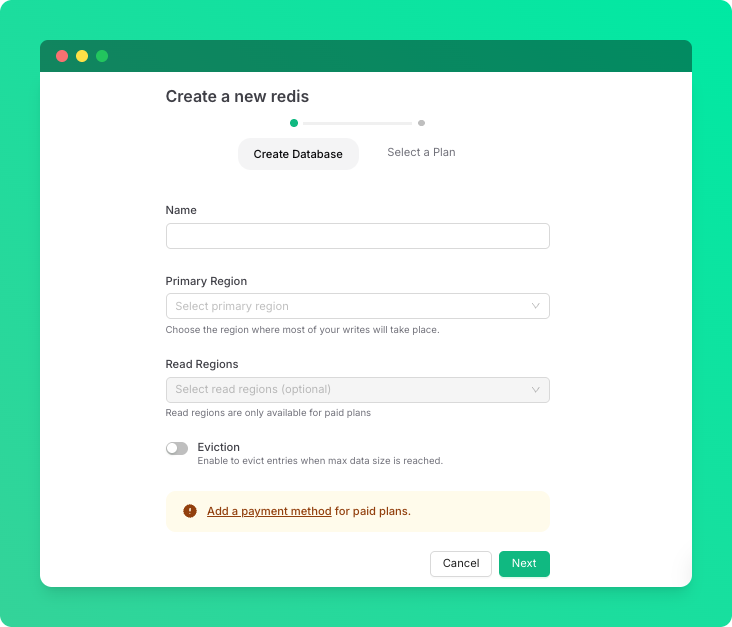 Once you have selected all resources, click the `Save` button at the bottom of
the page.
After all environment variables are created, you will be forwarded to Vercel. Go
to your project settings where you can see all added environment variables.
You need to redeploy your app for the environment variable to be used.
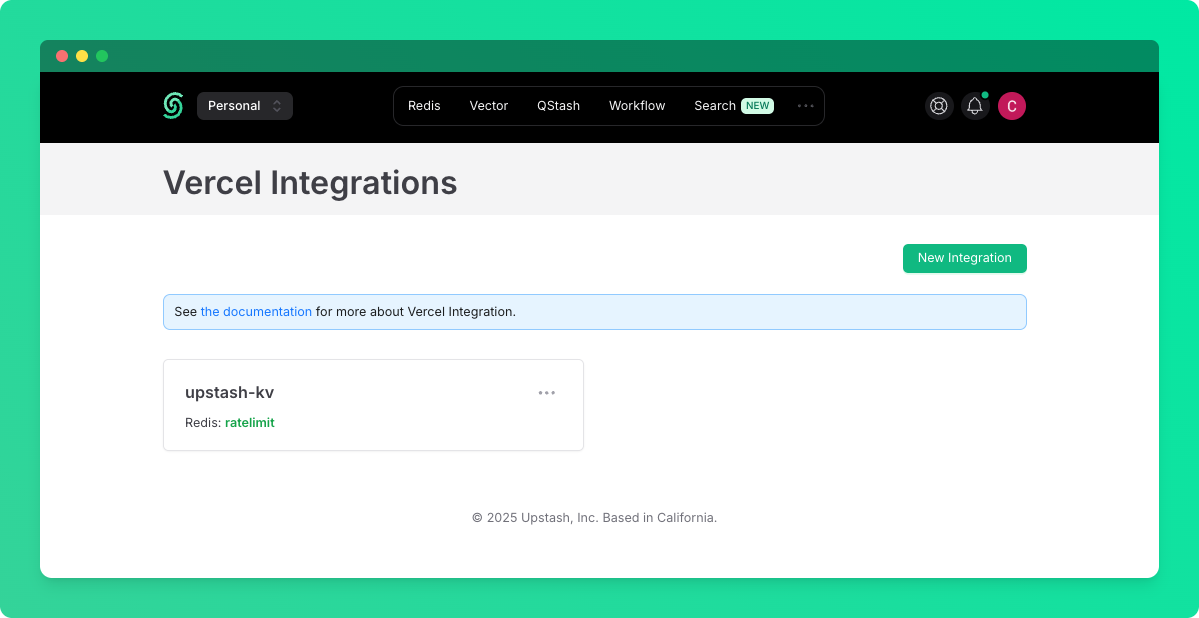
The [Integration Dashboard](https://console.upstash.com/integration/vercel)
allows you to see all your integrations, link new projects or manage existing
ones.
Once you have selected all resources, click the `Save` button at the bottom of
the page.
After all environment variables are created, you will be forwarded to Vercel. Go
to your project settings where you can see all added environment variables.
You need to redeploy your app for the environment variable to be used.
The [Integration Dashboard](https://console.upstash.com/integration/vercel)
allows you to see all your integrations, link new projects or manage existing
ones.
 ## Use Upstash in Your App
If you completed the integration steps above and redeploy your app, the added
environment variables will be accessible inside your Vercel application. You can
now use them in your clients to connect
### Redis
```ts theme={"system"}
import { Redis } from "@upstash/redis";
import { type NextRequest, NextResponse } from "next/server";
const redis = Redis.fromEnv();
export const POST = async (request: NextRequest) => {
await redis.set("foo", "bar");
const bar = await redis.get("foo");
return NextResponse.json({
body: `foo: ${bar}`,
});
}
```
### QStash
**Client**
```ts theme={"system"}
import { Client } from "@upstash/qstash";
const client = new Client({
token: process.env.QSTASH_TOKEN,
});
const res = await client.publishJSON({
url: "https://my-api...",
body: {
hello: "world",
},
});
```
**Receiver**
```ts theme={"system"}
import { Receiver } from "@upstash/qstash";
const receiver = new Receiver({
currentSigningKey: process.env.QSTASH_CURRENT_SIGNING_KEY,
nextSigningKey: process.env.QSTASH_NEXT_SIGNING_KEY,
});
const isValid = await receiver.verify({
signature: "..."
body: "..."
})
```
### Vector
```ts theme={"system"}
import { Index } from "@upstash/vector";
const index = new Index({
url: process.env.UPSTASH_VECTOR_REST_URL,
token: process.env.UPSTASH_VECTOR_REST_TOKEN,
});
await index.upsert({
id: "1",
data: "Hello world!",
metadata: { "category": "greeting" }
})
```
### Search
```ts theme={"system"}
import { Search } from "@upstash/search";
const client = new Search({
url: process.env.UPSTASH_SEARCH_REST_URL,
token: process.env.UPSTASH_SEARCH_REST_TOKEN,
});
const index = client.index("my-index");
await index.upsert({
id: "1",
content: { text: "Hello world!" },
metadata: { category: "greeting" }
});
```
## Support
If you have any issue you can ask in our
[Discord server](https://discord.gg/w9SenAtbme) or send email at
[support@upstash.com](mailto:support@upstash.com)
## Use Upstash in Your App
If you completed the integration steps above and redeploy your app, the added
environment variables will be accessible inside your Vercel application. You can
now use them in your clients to connect
### Redis
```ts theme={"system"}
import { Redis } from "@upstash/redis";
import { type NextRequest, NextResponse } from "next/server";
const redis = Redis.fromEnv();
export const POST = async (request: NextRequest) => {
await redis.set("foo", "bar");
const bar = await redis.get("foo");
return NextResponse.json({
body: `foo: ${bar}`,
});
}
```
### QStash
**Client**
```ts theme={"system"}
import { Client } from "@upstash/qstash";
const client = new Client({
token: process.env.QSTASH_TOKEN,
});
const res = await client.publishJSON({
url: "https://my-api...",
body: {
hello: "world",
},
});
```
**Receiver**
```ts theme={"system"}
import { Receiver } from "@upstash/qstash";
const receiver = new Receiver({
currentSigningKey: process.env.QSTASH_CURRENT_SIGNING_KEY,
nextSigningKey: process.env.QSTASH_NEXT_SIGNING_KEY,
});
const isValid = await receiver.verify({
signature: "..."
body: "..."
})
```
### Vector
```ts theme={"system"}
import { Index } from "@upstash/vector";
const index = new Index({
url: process.env.UPSTASH_VECTOR_REST_URL,
token: process.env.UPSTASH_VECTOR_REST_TOKEN,
});
await index.upsert({
id: "1",
data: "Hello world!",
metadata: { "category": "greeting" }
})
```
### Search
```ts theme={"system"}
import { Search } from "@upstash/search";
const client = new Search({
url: process.env.UPSTASH_SEARCH_REST_URL,
token: process.env.UPSTASH_SEARCH_REST_TOKEN,
});
const index = client.index("my-index");
await index.upsert({
id: "1",
content: { text: "Hello world!" },
metadata: { category: "greeting" }
});
```
## Support
If you have any issue you can ask in our
[Discord server](https://discord.gg/w9SenAtbme) or send email at
[support@upstash.com](mailto:support@upstash.com)