> ## Documentation Index
> Fetch the complete documentation index at: https://upstash.com/docs/llms.txt
> Use this file to discover all available pages before exploring further.
# Quickstart
Upstash Realtime is the easiest way to add realtime features to any Next.js project.
 ## Why Upstash Realtime?
* 🧨 Clean APIs & first-class TypeScript support
* ⚡ Extremely fast, zero dependencies, 2.6kB gzipped
* 💻 Deploy anywhere: Vercel, Netlify, etc.
* 💎 100% type-safe with zod 4 or zod mini
* ⏱️ Built-in message histories
* 🔌 Automatic connection management w/ delivery guarantee
* 🔋 Built-in middleware and authentication helpers
* 📶 100% HTTP-based: Redis streams & SSE
***
## Quickstart
### 1. Installation
```bash npm theme={"system"}
npm install @upstash/realtime @upstash/redis zod
```
```bash yarn theme={"system"}
yarn add @upstash/realtime @upstash/redis zod
```
```bash pnpm theme={"system"}
pnpm add @upstash/realtime @upstash/redis zod
```
```bash bun theme={"system"}
bun install @upstash/realtime @upstash/redis zod
```
### 2. Configure Upstash Redis
Upstash Realtime is powered by Redis Streams. Grab your credentials from the [Upstash Console](https://console.upstash.com).
## Why Upstash Realtime?
* 🧨 Clean APIs & first-class TypeScript support
* ⚡ Extremely fast, zero dependencies, 2.6kB gzipped
* 💻 Deploy anywhere: Vercel, Netlify, etc.
* 💎 100% type-safe with zod 4 or zod mini
* ⏱️ Built-in message histories
* 🔌 Automatic connection management w/ delivery guarantee
* 🔋 Built-in middleware and authentication helpers
* 📶 100% HTTP-based: Redis streams & SSE
***
## Quickstart
### 1. Installation
```bash npm theme={"system"}
npm install @upstash/realtime @upstash/redis zod
```
```bash yarn theme={"system"}
yarn add @upstash/realtime @upstash/redis zod
```
```bash pnpm theme={"system"}
pnpm add @upstash/realtime @upstash/redis zod
```
```bash bun theme={"system"}
bun install @upstash/realtime @upstash/redis zod
```
### 2. Configure Upstash Redis
Upstash Realtime is powered by Redis Streams. Grab your credentials from the [Upstash Console](https://console.upstash.com).
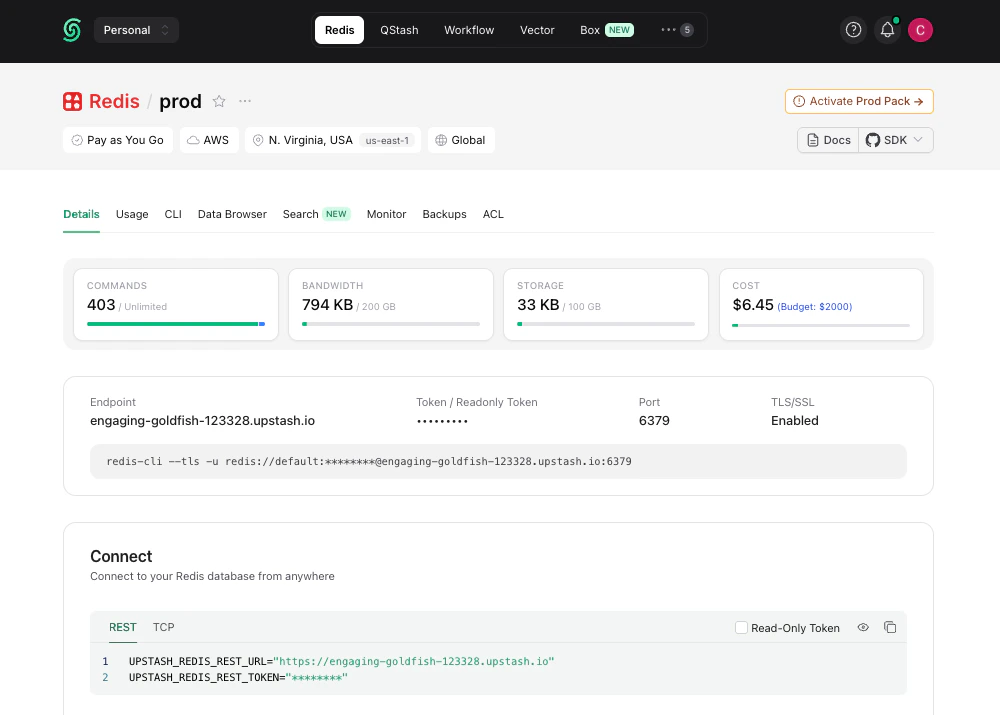 Add them to your environment variables:
```bash title=".env" theme={"system"}
UPSTASH_REDIS_REST_URL=https://striking-osprey-20681.upstash.io
UPSTASH_REDIS_REST_TOKEN=AVDJAAIjcDEyZ...
```
And lastly, create a Redis instance:
```typescript title="lib/redis.ts" theme={"system"}
import { Redis } from "@upstash/redis"
export const redis = new Redis({
url: process.env.UPSTASH_REDIS_REST_URL,
token: process.env.UPSTASH_REDIS_REST_TOKEN,
})
```
### 3. Define Event Schema
Define the structure of realtime events in your app:
```typescript title="lib/realtime.ts" theme={"system"}
import { Realtime, InferRealtimeEvents } from "@upstash/realtime"
import { redis } from "./redis"
import z from "zod/v4"
const schema = {
notification: {
alert: z.string(),
},
}
export const realtime = new Realtime({ schema, redis })
export type RealtimeEvents = InferRealtimeEvents
```
### 4. Create Realtime Route Handler
Create a route handler at `api/realtime/route.ts`:
```typescript title="app/api/realtime/route.ts" theme={"system"}
import { handle } from "@upstash/realtime"
import { realtime } from "@/lib/realtime"
export const GET = handle({ realtime })
```
### 5. Add the Provider
Wrap your application in `RealtimeProvider`:
```tsx title="app/providers.tsx" theme={"system"}
"use client"
import { RealtimeProvider } from "@upstash/realtime/client"
export function Providers({ children }: { children: React.ReactNode }) {
return {children}
}
```
```tsx title="app/layout.tsx" theme={"system"}
import { Providers } from "./providers"
export default function RootLayout({ children }: { children: React.ReactNode }) {
return (
{children}
)
}
```
### 6. Create Typed Client Hook
Create a typed `useRealtime` hook for your client components:
```typescript title="lib/realtime-client.ts" theme={"system"}
"use client"
import { createRealtime } from "@upstash/realtime/client"
import type { RealtimeEvents } from "./realtime"
export const { useRealtime } = createRealtime()
```
### 7. Emit Events
From any server component, server action, or API route:
```typescript title="app/api/notify/route.ts" theme={"system"}
import { realtime } from "@/lib/realtime"
export const POST = async () => {
await realtime.emit("notification.alert", "hello world!")
return new Response("OK")
}
```
### 8. Subscribe to Events
In any client component:
```tsx title="app/components/notifications.tsx" theme={"system"}
"use client"
import { useRealtime } from "@/lib/realtime-client"
export default function Notifications() {
useRealtime({
events: ["notification.alert"],
onData({ event, data, channel }) {
console.log(`Received ${event}:`, data)
},
})
return
Add them to your environment variables:
```bash title=".env" theme={"system"}
UPSTASH_REDIS_REST_URL=https://striking-osprey-20681.upstash.io
UPSTASH_REDIS_REST_TOKEN=AVDJAAIjcDEyZ...
```
And lastly, create a Redis instance:
```typescript title="lib/redis.ts" theme={"system"}
import { Redis } from "@upstash/redis"
export const redis = new Redis({
url: process.env.UPSTASH_REDIS_REST_URL,
token: process.env.UPSTASH_REDIS_REST_TOKEN,
})
```
### 3. Define Event Schema
Define the structure of realtime events in your app:
```typescript title="lib/realtime.ts" theme={"system"}
import { Realtime, InferRealtimeEvents } from "@upstash/realtime"
import { redis } from "./redis"
import z from "zod/v4"
const schema = {
notification: {
alert: z.string(),
},
}
export const realtime = new Realtime({ schema, redis })
export type RealtimeEvents = InferRealtimeEvents
```
### 4. Create Realtime Route Handler
Create a route handler at `api/realtime/route.ts`:
```typescript title="app/api/realtime/route.ts" theme={"system"}
import { handle } from "@upstash/realtime"
import { realtime } from "@/lib/realtime"
export const GET = handle({ realtime })
```
### 5. Add the Provider
Wrap your application in `RealtimeProvider`:
```tsx title="app/providers.tsx" theme={"system"}
"use client"
import { RealtimeProvider } from "@upstash/realtime/client"
export function Providers({ children }: { children: React.ReactNode }) {
return {children}
}
```
```tsx title="app/layout.tsx" theme={"system"}
import { Providers } from "./providers"
export default function RootLayout({ children }: { children: React.ReactNode }) {
return (
{children}
)
}
```
### 6. Create Typed Client Hook
Create a typed `useRealtime` hook for your client components:
```typescript title="lib/realtime-client.ts" theme={"system"}
"use client"
import { createRealtime } from "@upstash/realtime/client"
import type { RealtimeEvents } from "./realtime"
export const { useRealtime } = createRealtime()
```
### 7. Emit Events
From any server component, server action, or API route:
```typescript title="app/api/notify/route.ts" theme={"system"}
import { realtime } from "@/lib/realtime"
export const POST = async () => {
await realtime.emit("notification.alert", "hello world!")
return new Response("OK")
}
```
### 8. Subscribe to Events
In any client component:
```tsx title="app/components/notifications.tsx" theme={"system"}
"use client"
import { useRealtime } from "@/lib/realtime-client"
export default function Notifications() {
useRealtime({
events: ["notification.alert"],
onData({ event, data, channel }) {
console.log(`Received ${event}:`, data)
},
})
return Listening for events...
}
```
That's it! Your app is now listening for realtime events with full type safety. 🎉
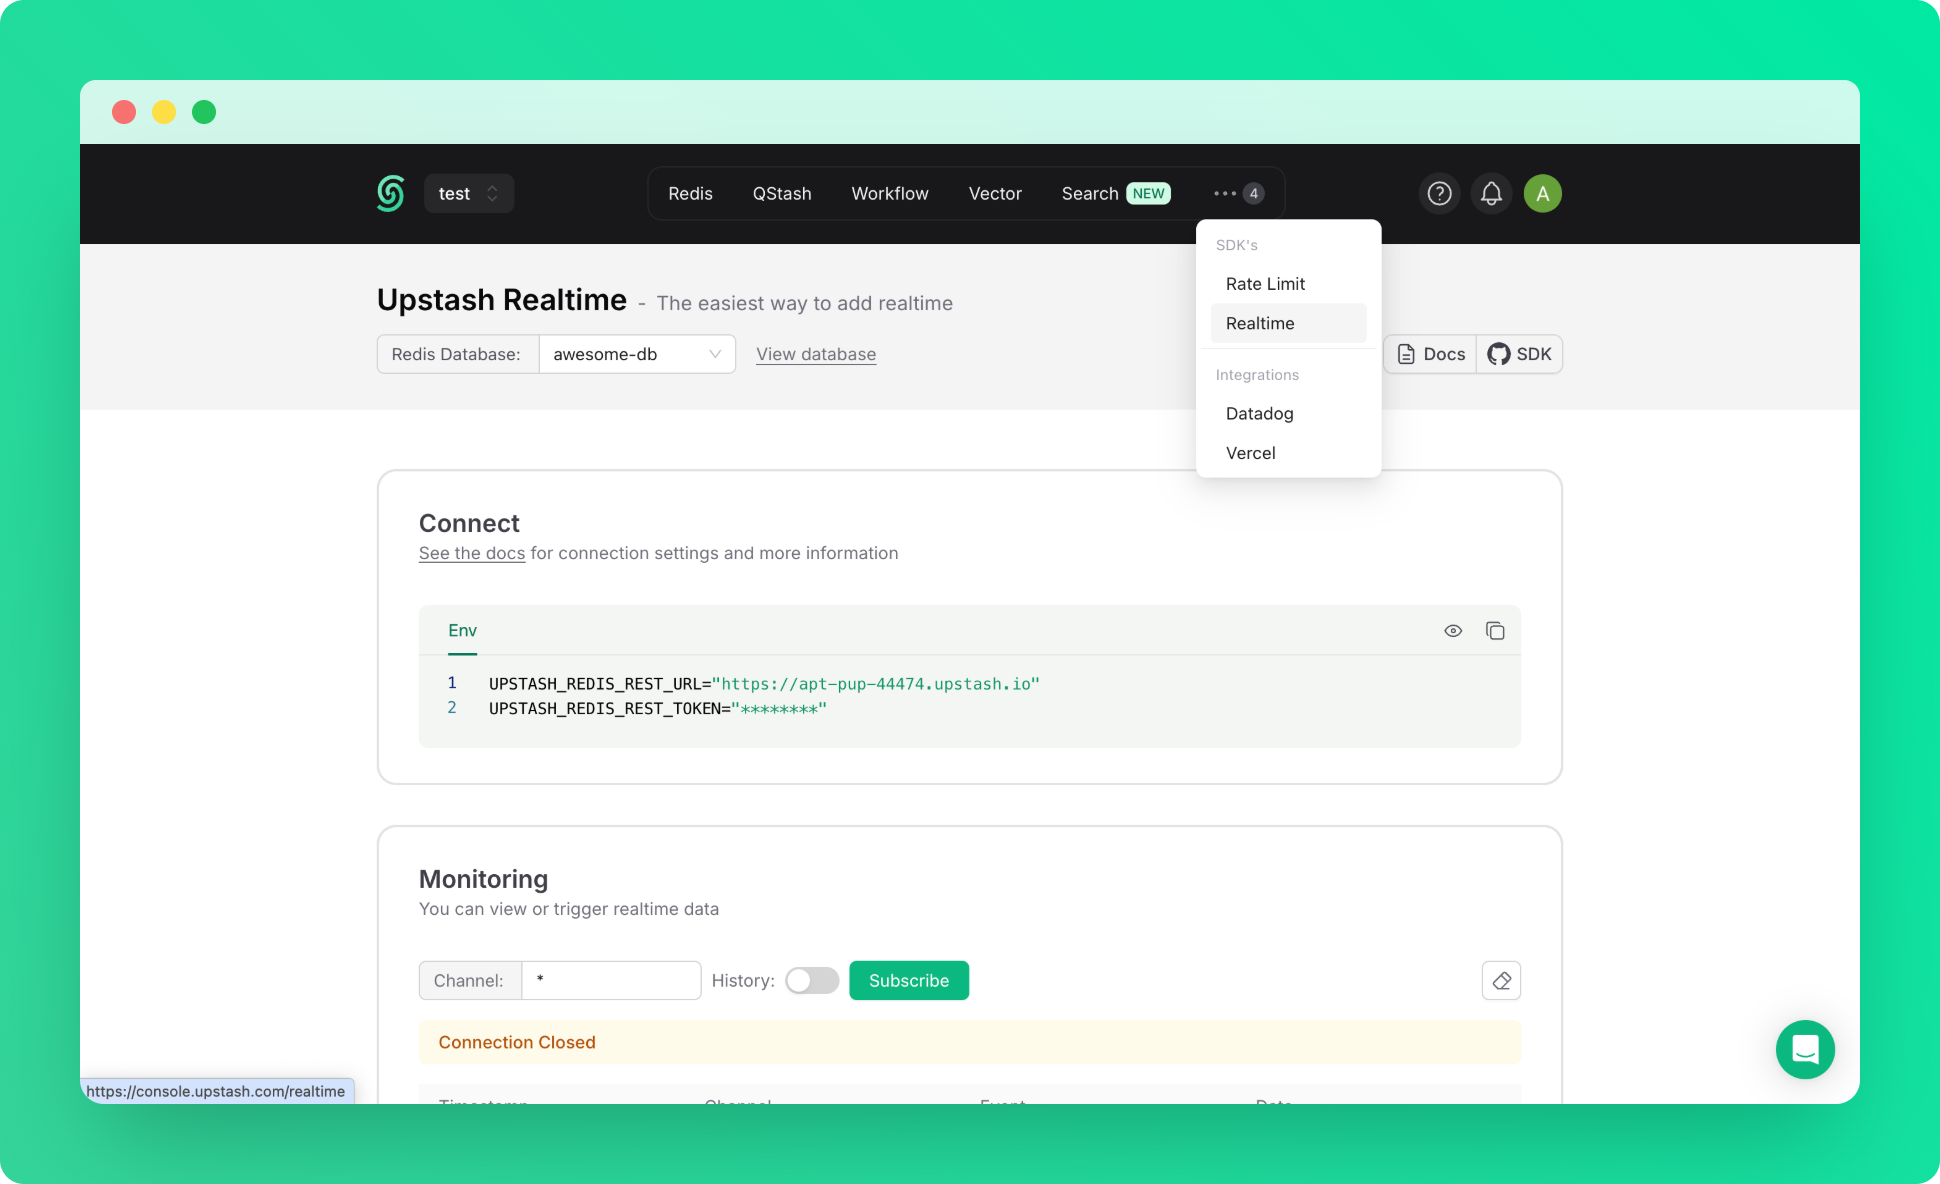
### 9. Realtime Dashboard
For debugging or monitoring purposes, you can use Realtime Dashboard in console.
 ## Next Steps
Complete guide to the useRealtime hook
Subscribe to events and stream updates on the server
Scope events to specific rooms or channels
Fetch and replay past messages
## Next Steps
Complete guide to the useRealtime hook
Subscribe to events and stream updates on the server
Scope events to specific rooms or channels
Fetch and replay past messages