> ## Documentation Index
> Fetch the complete documentation index at: https://upstash.com/docs/llms.txt
> Use this file to discover all available pages before exploring further.
# Periodic Data Updates
* Code:
[Repository](https://github.com/upstash/qstash-examples/tree/main/periodic-data-updates)
* App:
[qstash-examples-periodic-data-updates.vercel.app](https://qstash-examples-periodic-data-updates.vercel.app)
This recipe shows how to use QStash as a trigger for a Next.js api route, that
fetches data from somewhere and stores it in your database.
For the database we will use Redis because it's very simple to setup and is not
really the main focus of this recipe.
## What will be build?
Let's assume there is a 3rd party API that provides some data. One approach
would be to just query the API whenever you or your users need it, however that
might not work well if the API is slow, unavailable or rate limited.
A better approach would be to continuously fetch fresh data from the API and
store it in your database.
Traditionally this would require a long running process, that would continuously
call the API. With QStash you can do this inside your Next.js app and you don't
need to worry about maintaining anything.
For the purpose of this recipe we will build a simple app, that scrapes the
current Bitcoin price from a public API, stores it in redis and then displays a
chart in the browser.
## Setup
If you don't have one already, create a new Next.js project with
`npx create-next-app@latest --ts`.
Then install the required packages
```bash theme={"system"}
npm install @upstash/qstash @upstash/redis
```
You can replace `@upstash/redis` with any kind of database client you want.
## Scraping the API
Create a new serverless function in `/pages/api/cron.ts`
````ts theme={"system"}
import { NextApiRequest, NextApiResponse } from "next";
import { Redis } from "@upstash/redis";
import { verifySignature } from "@upstash/qstash/nextjs";
/**
* You can use any database you want, in this case we use Redis
*/
const redis = Redis.fromEnv();
/**
* Load the current bitcoin price in USD and store it in our database at the
* current timestamp
*/
async function handler(_req: NextApiRequest, res: NextApiResponse) {
try {
/**
* The API returns something like this:
* ```json
* {
* "USD": {
* "last": 123
* },
* ...
* }
* ```
*/
const raw = await fetch("https://blockchain.info/ticker");
const prices = await raw.json();
const bitcoinPrice = prices["USD"]["last"] as number;
/**
* After we have loaded the current bitcoin price, we can store it in the
* database together with the current time
*/
await redis.zadd("bitcoin-prices", {
score: Date.now(),
member: bitcoinPrice,
});
res.send("OK");
} catch (err) {
res.status(500).send(err);
} finally {
res.end();
}
}
/**
* Wrap your handler with `verifySignature` to automatically reject all
* requests that are not coming from Upstash.
*/
export default verifySignature(handler);
/**
* To verify the authenticity of the incoming request in the `verifySignature`
* function, we need access to the raw request body.
*/
export const config = {
api: {
bodyParser: false,
},
};
````
## Deploy to Vercel
That's all we need to fetch fresh data. Let's deploy our app to Vercel.
You can either push your code to a git repository and deploy it to Vercel, or
you can deploy it directly from your local machine using the
[vercel cli](https://vercel.com/docs/cli).
For a more indepth tutorial on how to deploy to Vercel, check out this
[quickstart](/qstash/quickstarts/vercel-nextjs#4-deploy-to-vercel).
After you have deployed your app, it is time to add your secrets to your
environment variables.
## Secrets
Head over to [QStash](https://console.upstash.com/qstash) and copy the
`QSTASH_CURRENT_SIGNING_KEY` and `QSTASH_NEXT_SIGNING_KEY` to vercel's
environment variables. 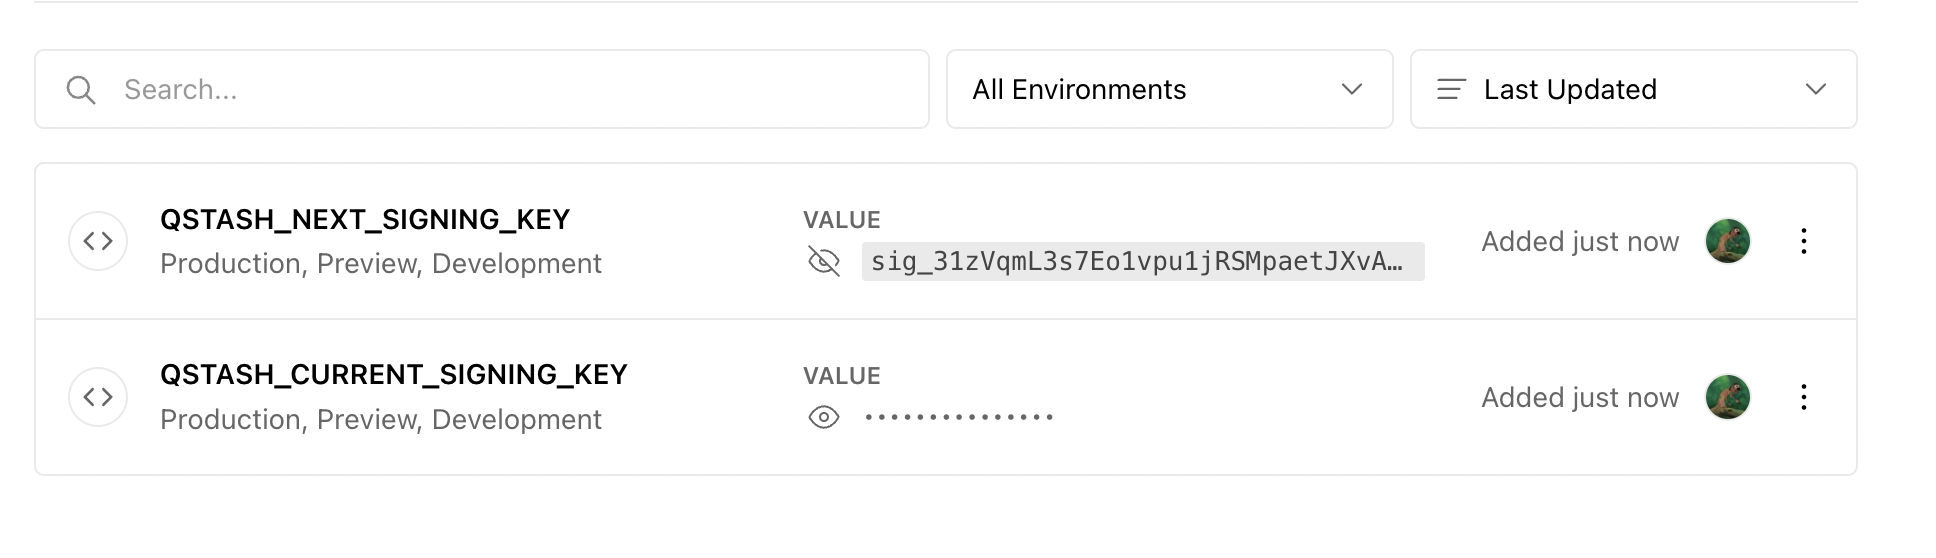 If you are not using a custom database, you can quickly create a new
[Redis database](https://console.upstash.com/redis). Afterwards copy the
`UPSTASH_REDIS_REST_URL` and `UPSTASH_REDIS_REST_TOKEN` to vercel.
In the near future we will update our
[Vercel integration](https://vercel.com/integrations/upstash) to do this for
you.
## Redeploy
To use the environment variables, you need to redeploy your app. Either with
`npx vercel --prod` or in the UI.
## Create cron trigger in QStash
The last part is to add the trigger in QStash. Go to
[QStash](https://console.upstash.com/qstash) and create a new schedule.
If you are not using a custom database, you can quickly create a new
[Redis database](https://console.upstash.com/redis). Afterwards copy the
`UPSTASH_REDIS_REST_URL` and `UPSTASH_REDIS_REST_TOKEN` to vercel.
In the near future we will update our
[Vercel integration](https://vercel.com/integrations/upstash) to do this for
you.
## Redeploy
To use the environment variables, you need to redeploy your app. Either with
`npx vercel --prod` or in the UI.
## Create cron trigger in QStash
The last part is to add the trigger in QStash. Go to
[QStash](https://console.upstash.com/qstash) and create a new schedule.
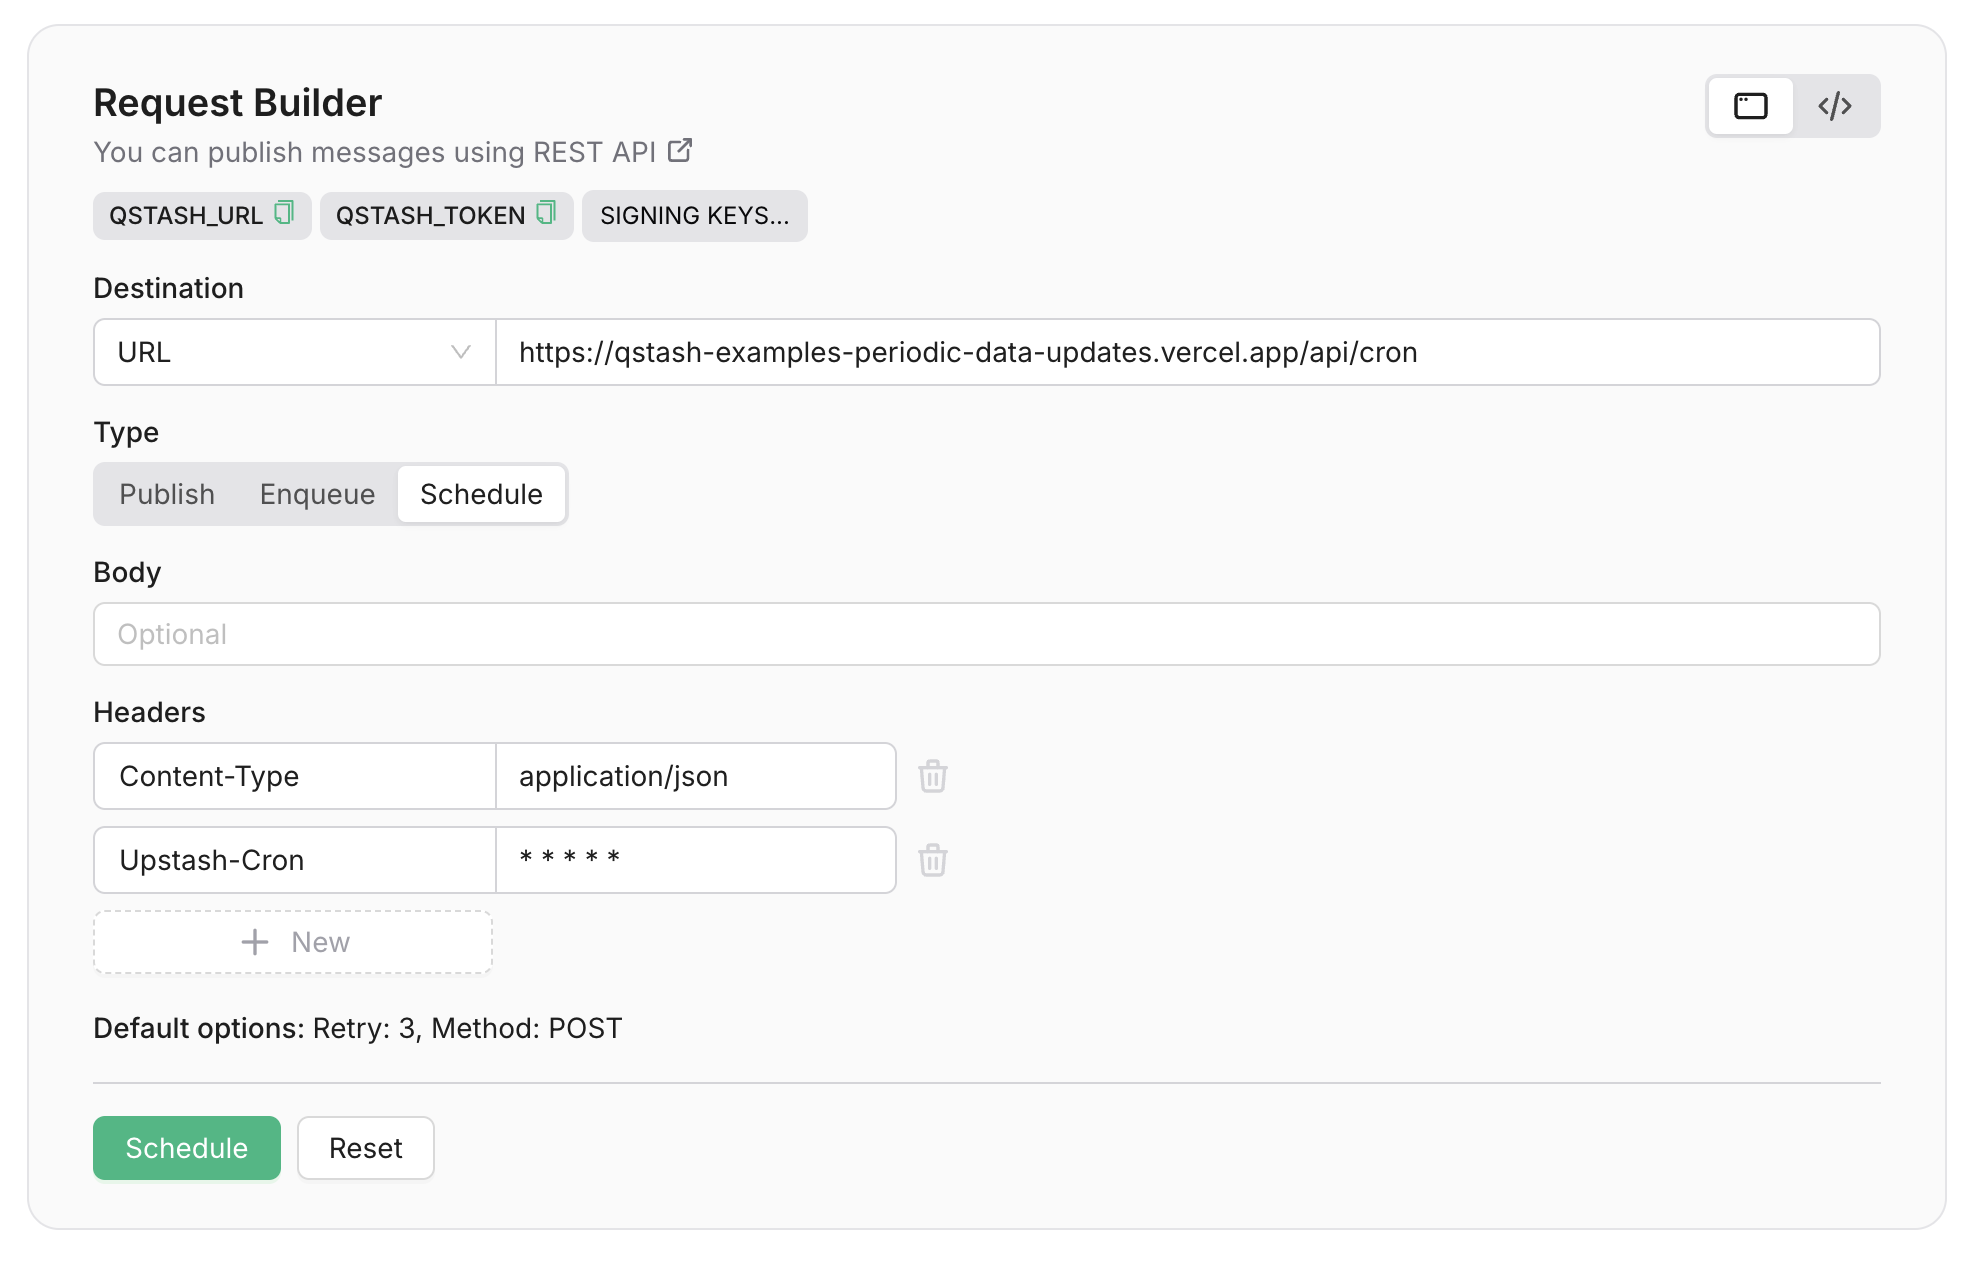 Now we will call your api function whenever you schedule is triggered.
## Adding frontend UI
This part is probably the least interesting and would require more dependencies
for styling etc. Check out the
[index.tsx](https://github.com/upstash/qstash-examples/blob/main/periodic-data-updates/pages/index.tsx)
file, where we load the data from the database and display it in a chart.
## Hosted example
You can find a running example of this recipe
[here](https://qstash-examples-periodic-data-updates.vercel.app/).
Now we will call your api function whenever you schedule is triggered.
## Adding frontend UI
This part is probably the least interesting and would require more dependencies
for styling etc. Check out the
[index.tsx](https://github.com/upstash/qstash-examples/blob/main/periodic-data-updates/pages/index.tsx)
file, where we load the data from the database and display it in a chart.
## Hosted example
You can find a running example of this recipe
[here](https://qstash-examples-periodic-data-updates.vercel.app/).