> ## Documentation Index
> Fetch the complete documentation index at: https://upstash.com/docs/llms.txt
> Use this file to discover all available pages before exploring further.
# Cloudflare Workers
This is a step by step guide on how to receive webhooks from QStash in your
Cloudflare Worker.
### Project Setup
We will use **C3 (create-cloudflare-cli)** command-line tool to create our functions. You can open a new terminal window and run C3 using the prompt below.
```shell npm theme={"system"}
npm create cloudflare@latest
```
```shell yarn theme={"system"}
yarn create cloudflare@latest
```
This will install the `create-cloudflare` package, and lead you through setup. C3 will also install Wrangler in projects by default, which helps us testing and deploying the projects.
```text theme={"system"}
➜ npm create cloudflare@latest
Need to install the following packages:
create-cloudflare@2.52.3
Ok to proceed? (y) y
using create-cloudflare version 2.52.3
╭ Create an application with Cloudflare Step 1 of 3
│
├ In which directory do you want to create your application?
│ dir ./cloudflare_starter
│
├ What would you like to start with?
│ category Hello World example
│
├ Which template would you like to use?
│ type Worker only
│
├ Which language do you want to use?
│ lang TypeScript
│
├ Do you want to use git for version control?
│ yes git
│
╰ Application created
```
We will also install the **Upstash QStash library**.
```bash theme={"system"}
npm install @upstash/qstash
```
### 3. Use QStash in your handler
First we import the library:
```ts src/index.ts theme={"system"}
import { Receiver } from "@upstash/qstash";
```
Then we adjust the `Env` interface to include the `QSTASH_CURRENT_SIGNING_KEY`
and `QSTASH_NEXT_SIGNING_KEY` environment variables.
```ts src/index.ts theme={"system"}
export interface Env {
QSTASH_CURRENT_SIGNING_KEY: string;
QSTASH_NEXT_SIGNING_KEY: string;
}
```
And then we validate the signature in the `handler` function.
First we create a new receiver and provide it with the signing keys.
```ts src/index.ts theme={"system"}
const receiver = new Receiver({
currentSigningKey: env.QSTASH_CURRENT_SIGNING_KEY,
nextSigningKey: env.QSTASH_NEXT_SIGNING_KEY,
});
```
Then we verify the signature.
```ts src/index.ts theme={"system"}
const body = await request.text();
const isValid = await receiver.verify({
signature: request.headers.get("Upstash-Signature")!,
body,
});
```
The entire file looks like this now:
```ts src/index.ts theme={"system"}
import { Receiver } from "@upstash/qstash";
export interface Env {
QSTASH_CURRENT_SIGNING_KEY: string;
QSTASH_NEXT_SIGNING_KEY: string;
}
export default {
async fetch(request, env, ctx): Promise {
const receiver = new Receiver({
currentSigningKey: env.QSTASH_CURRENT_SIGNING_KEY,
nextSigningKey: env.QSTASH_NEXT_SIGNING_KEY,
});
const body = await request.text();
const isValid = await receiver.verify({
signature: request.headers.get("Upstash-Signature")!,
body,
});
if (!isValid) {
return new Response("Invalid signature", { status: 401 });
}
// signature is valid
return new Response("Hello World!");
},
} satisfies ExportedHandler;
```
### Configure Credentials
There are two methods for setting up the credentials for QStash. One for worker level, the other for account level.
#### Using Cloudflare Secrets (Worker Level Secrets)
This is the common way of creating secrets for your worker, see [Workflow Secrets](https://developers.cloudflare.com/workers/configuration/secrets/)
* Navigate to [Upstash Console](https://console.upstash.com) and get your QStash credentials.
* In [Cloudflare Dashboard](https://dash.cloudflare.com/), Go to **Compute (Workers)** > **Workers & Pages**.
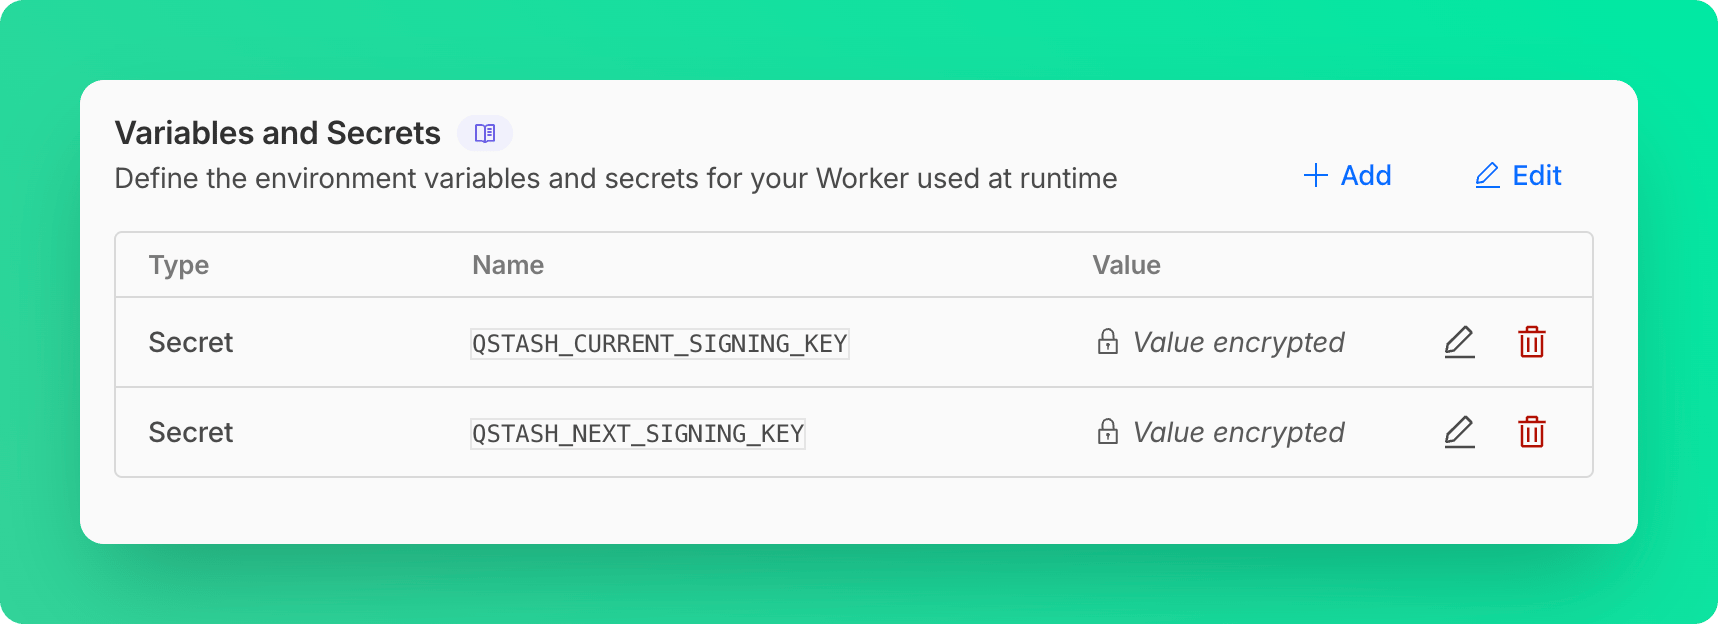
* Select your worker and go to **Settings** > **Variables and Secrets**.
* Add your QStash credentials as secrets here:
 #### Using Cloudflare Secrets Store (Account Level Secrets)
This method requires a few modifications in the worker code, see [Access to Secret on Env Object](https://developers.cloudflare.com/secrets-store/integrations/workers/#3-access-the-secret-on-the-env-object)
```ts src/index.ts theme={"system"}
import { Receiver } from "@upstash/qstash";
export interface Env {
QSTASH_CURRENT_SIGNING_KEY: SecretsStoreSecret;
QSTASH_NEXT_SIGNING_KEY: SecretsStoreSecret;
}
export default {
async fetch(request, env, ctx): Promise {
const c = new Receiver({
currentSigningKey: await env.QSTASH_CURRENT_SIGNING_KEY.get(),
nextSigningKey: await env.QSTASH_NEXT_SIGNING_KEY.get(),
});
// Rest of the code
},
};
```
After doing these modifications, you can deploy the worker to Cloudflare with `npx wrangler deploy`, and
follow the steps below to define the secrets:
* Navigate to [Upstash Console](https://console.upstash.com) and get your QStash credentials.
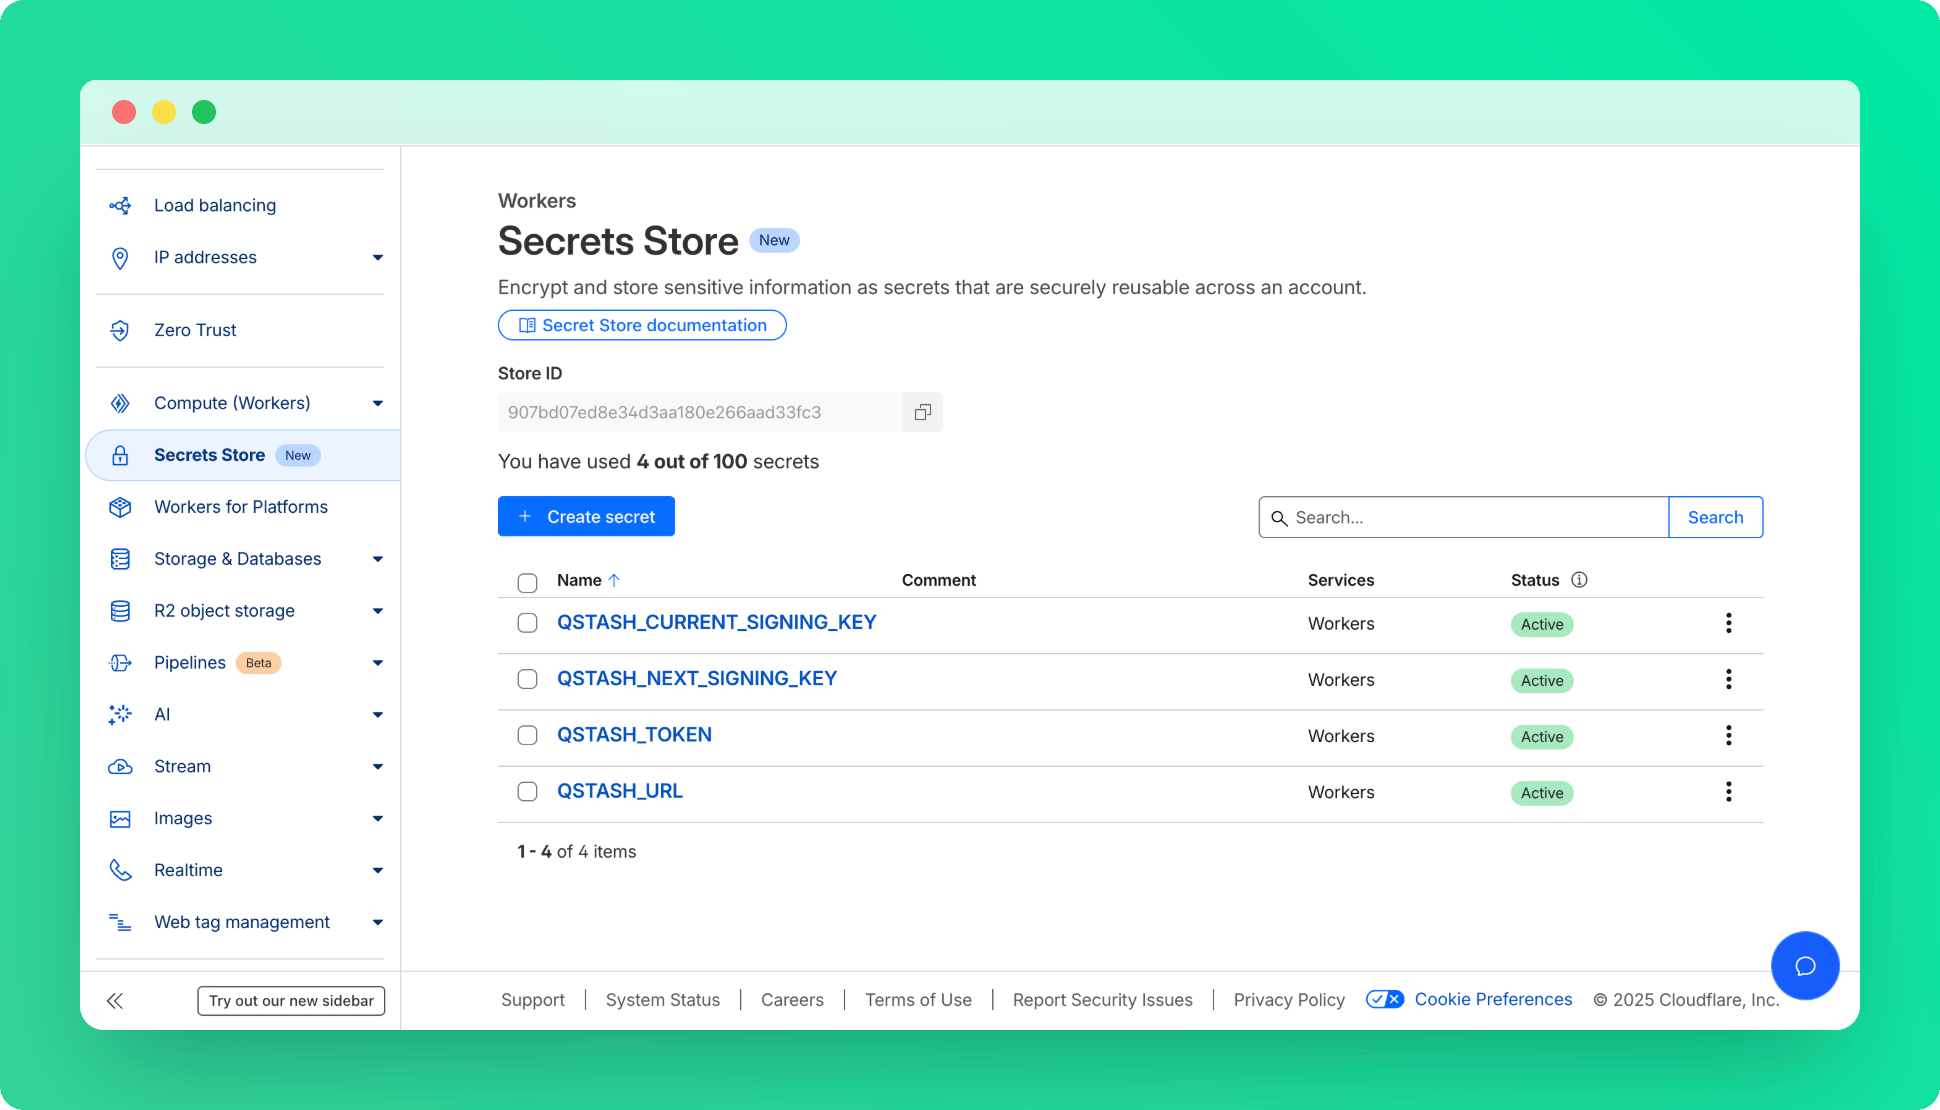
* In [Cloudflare Dashboard](https://dash.cloudflare.com/), Go to **Secrets Store** and add QStash credentials as secrets.
#### Using Cloudflare Secrets Store (Account Level Secrets)
This method requires a few modifications in the worker code, see [Access to Secret on Env Object](https://developers.cloudflare.com/secrets-store/integrations/workers/#3-access-the-secret-on-the-env-object)
```ts src/index.ts theme={"system"}
import { Receiver } from "@upstash/qstash";
export interface Env {
QSTASH_CURRENT_SIGNING_KEY: SecretsStoreSecret;
QSTASH_NEXT_SIGNING_KEY: SecretsStoreSecret;
}
export default {
async fetch(request, env, ctx): Promise {
const c = new Receiver({
currentSigningKey: await env.QSTASH_CURRENT_SIGNING_KEY.get(),
nextSigningKey: await env.QSTASH_NEXT_SIGNING_KEY.get(),
});
// Rest of the code
},
};
```
After doing these modifications, you can deploy the worker to Cloudflare with `npx wrangler deploy`, and
follow the steps below to define the secrets:
* Navigate to [Upstash Console](https://console.upstash.com) and get your QStash credentials.
* In [Cloudflare Dashboard](https://dash.cloudflare.com/), Go to **Secrets Store** and add QStash credentials as secrets.
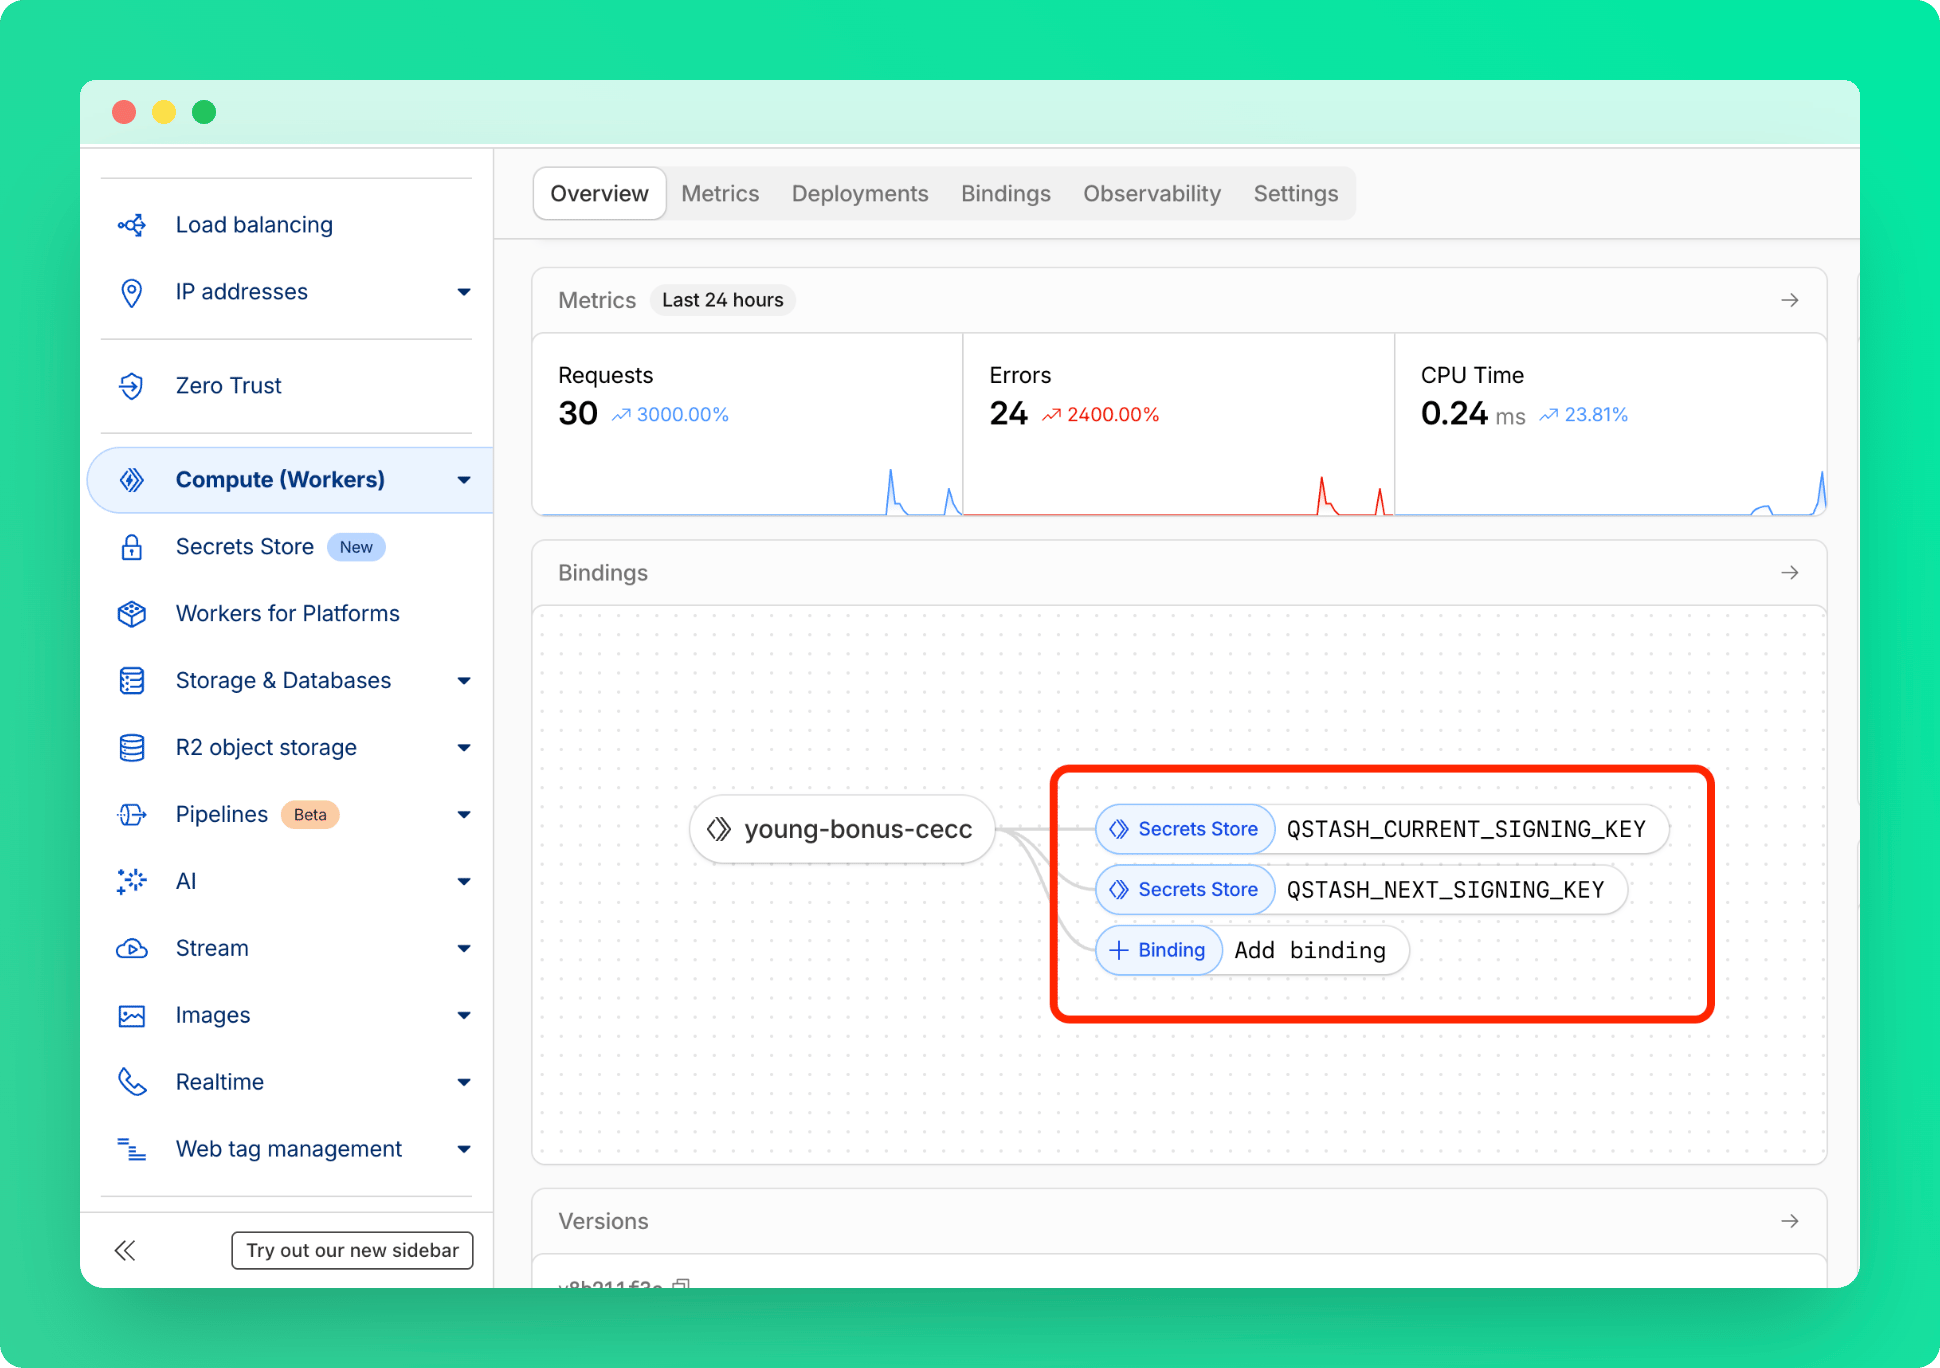
 * Under **Compute (Workers)** > **Workers & Pages**, find your worker and add these secrets as bindings.
 ### Deployment
Newer deployments may revert the configurations you did in the dashboard.
While worker level secrets persist, the bindings will be gone!
Deploy your function to Cloudflare with `npx wrangler deploy`
The endpoint of the function will be provided to you, once the deployment is done.
### Publish a message
Open a different terminal and publish a message to QStash. Note the destination
url is the same that was printed in the previous deploy step.
```bash theme={"system"}
curl --request POST "https://qstash.upstash.io/v2/publish/https://..workers.dev" \
-H "Authorization: Bearer " \
-H "Content-Type: application/json" \
-d "{ \"hello\": \"world\"}"
```
In the logs you should see something like this:
```bash theme={"system"}
$ npx wrangler tail
⛅️ wrangler 4.43.0
--------------------
Successfully created tail, expires at 2025-10-16T00:25:17Z
Connected to , waiting for logs...
POST https://..workers.dev/ - Ok @ 10/15/2025, 10:34:55 PM
```
## Next Steps
That's it, you have successfully created a secure Cloudflare Worker, that
receives and verifies incoming webhooks from qstash.
Learn more about publishing a message to qstash [here](/qstash/howto/publishing).
You can find the source code [here](https://github.com/upstash/qstash-examples/tree/main/cloudflare-workers).
### Deployment
Newer deployments may revert the configurations you did in the dashboard.
While worker level secrets persist, the bindings will be gone!
Deploy your function to Cloudflare with `npx wrangler deploy`
The endpoint of the function will be provided to you, once the deployment is done.
### Publish a message
Open a different terminal and publish a message to QStash. Note the destination
url is the same that was printed in the previous deploy step.
```bash theme={"system"}
curl --request POST "https://qstash.upstash.io/v2/publish/https://..workers.dev" \
-H "Authorization: Bearer " \
-H "Content-Type: application/json" \
-d "{ \"hello\": \"world\"}"
```
In the logs you should see something like this:
```bash theme={"system"}
$ npx wrangler tail
⛅️ wrangler 4.43.0
--------------------
Successfully created tail, expires at 2025-10-16T00:25:17Z
Connected to , waiting for logs...
POST https://..workers.dev/ - Ok @ 10/15/2025, 10:34:55 PM
```
## Next Steps
That's it, you have successfully created a secure Cloudflare Worker, that
receives and verifies incoming webhooks from qstash.
Learn more about publishing a message to qstash [here](/qstash/howto/publishing).
You can find the source code [here](https://github.com/upstash/qstash-examples/tree/main/cloudflare-workers).